How To Make a Slip Knot For Crochet – Learn 2 Ways In 1 Minute
You cannot securely start many crochet projects without a slip knot, but luckily, it’s much easier. If you want to learn how to make a slip knot crochet, this detailed tutorial will help you. By the end, you can join the crochet hook with yarn in two ways/methods. I shall provide step-by-step pictures, answer common queries about slip knots, and provide written instructions for each step.
What Is Slip Knot?
Simply, it is a knot that connects the yarn with the hook, leaving a yarn tail and a working yarn connected to the ball. Making a slip knot is tying the yarn with the hook shaft, creating a knot or loop on the hook. It can be used in almost all crochet tasks. It can be tied or loose, pulling on the loop and ends.
While there are knotless ways to start crocheting, slip knot is more secure and safer.
Materials Used:
- Yarn – Ball end and tail End Portions used
- Crochet Hook
How To Make A Slip Knot?
Below are the detailed instructions on how to tie the slip knot:
Step 1: Grab The Rolled Yarn With Finger Tips
You will need to pull a little length of yarn from the ball and grab the tail end with the fingertips of the right hand and one that extends to the ball with the left one. Ensure the yarn tail is not small enough to cause difficulty in weaving when finishing the task.
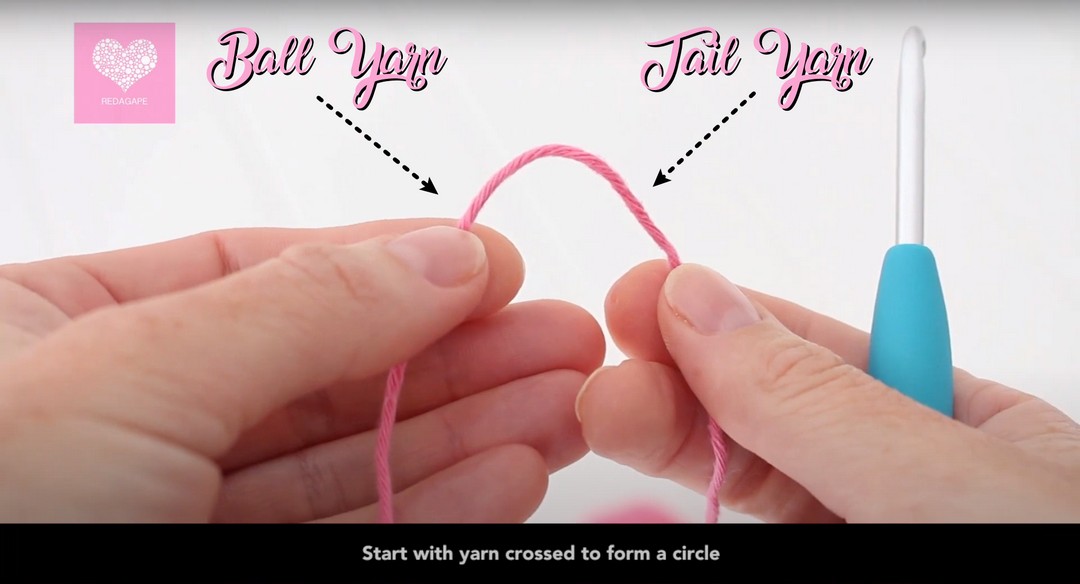
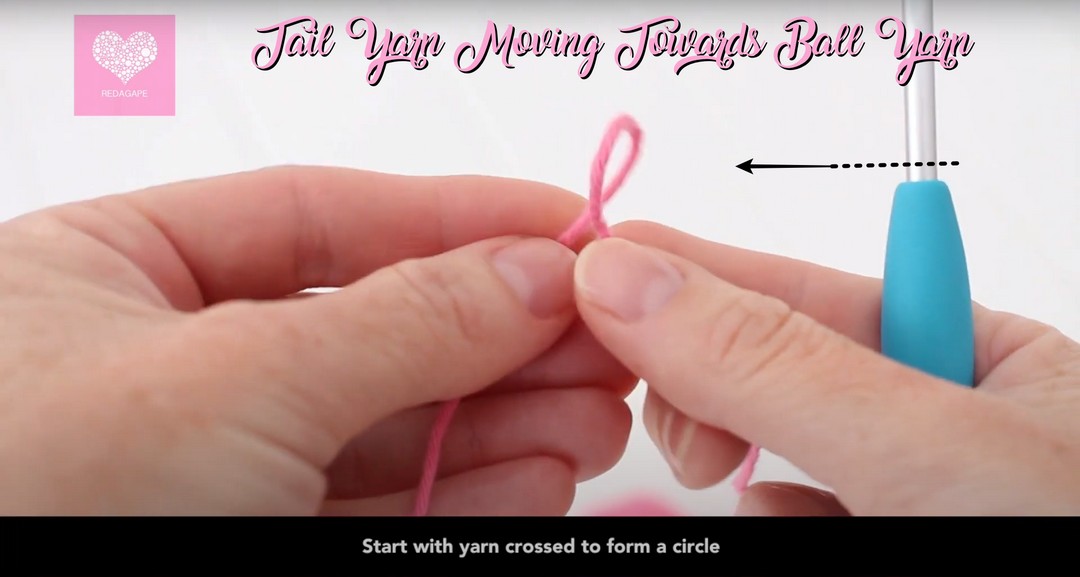
Step 2: Make A Yarn Loop
You can make a loop by crossing the tail yarn of the yarn or both hands clockwise and putting the tail yarn on the ball yarn length at the point you hold with the fingertips of your right hand. In this way, a loop can be seen due to yarn overlapping.
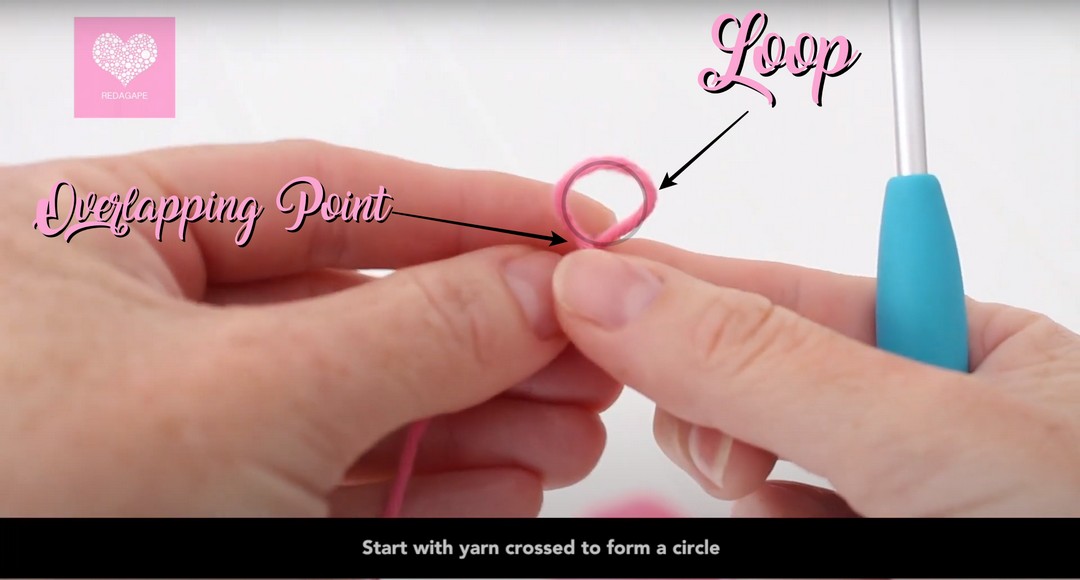
Step 3: Grab the overlapping point
Squeeze the region where both lengths are meeting and pick the tail end with the fingertip of the right hand.
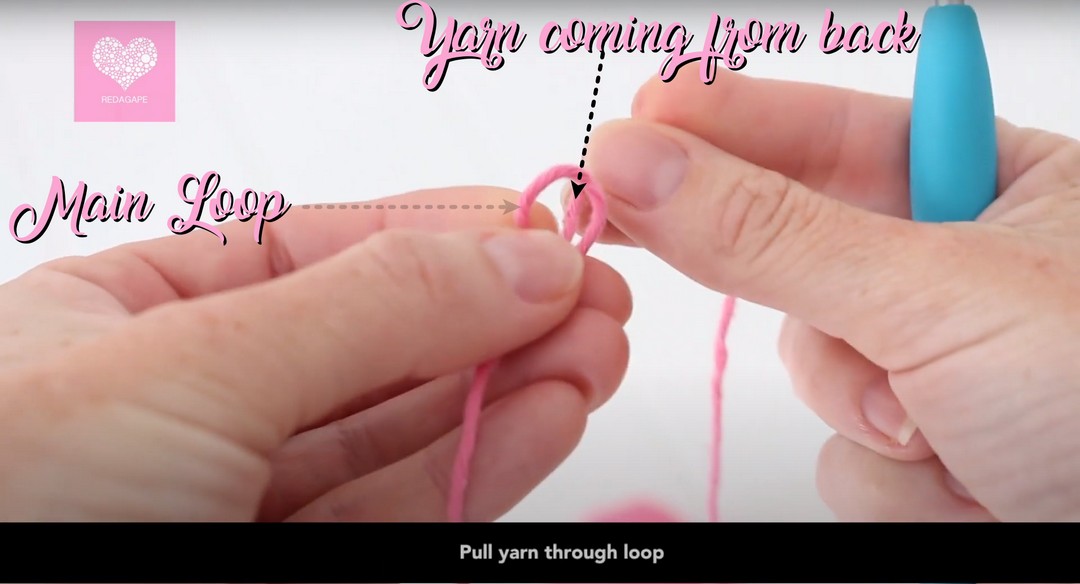
Step 4: Pass the yarn through the loop
Bring the tail yarn to the back of the loop and semi-pull through to the front. It will make another small loop coming out of the first loop.
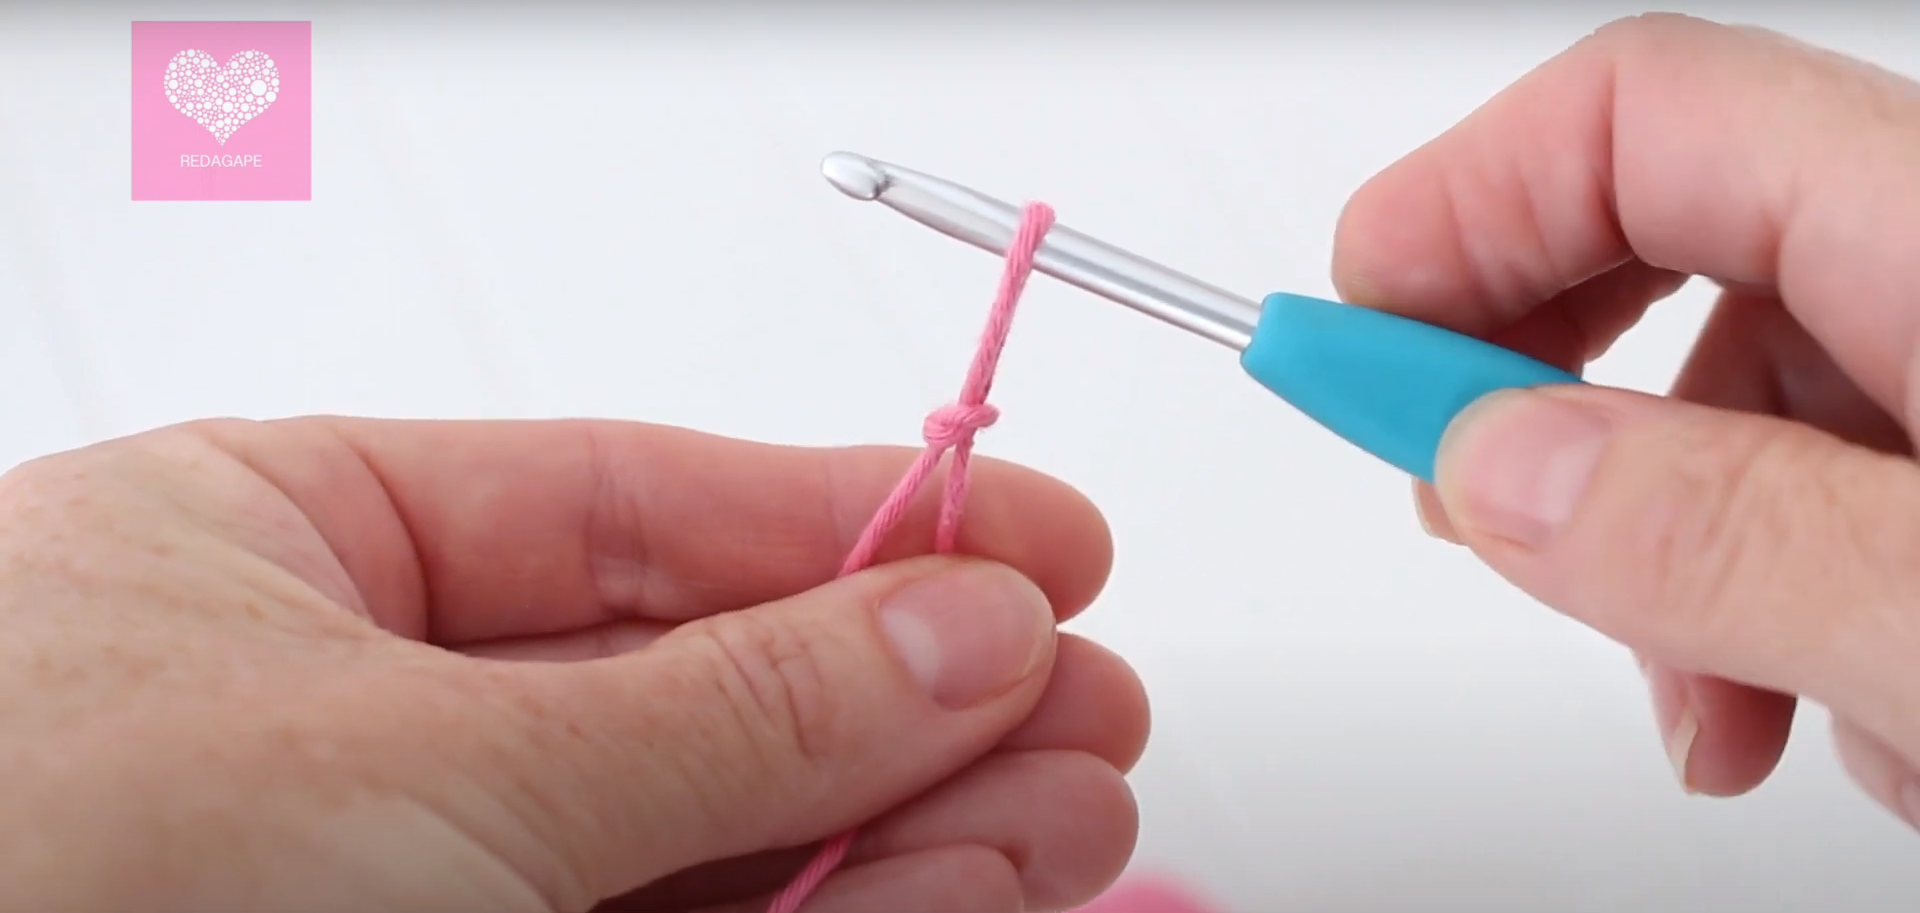
Step 5: Insert Your Hook or Finger
Now, to fasten off the loop to the hook, insert a crochet hook into the loop coming out towards you.
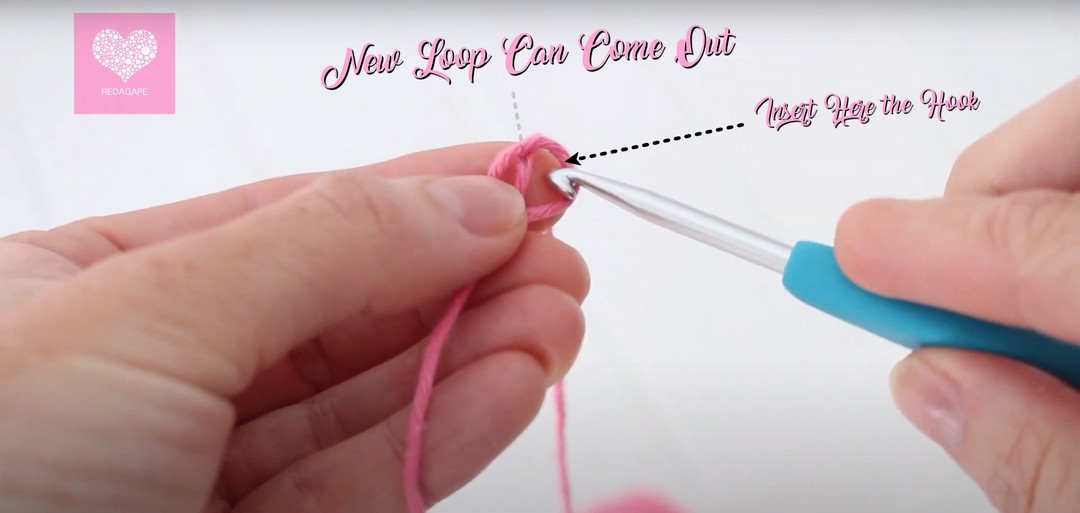
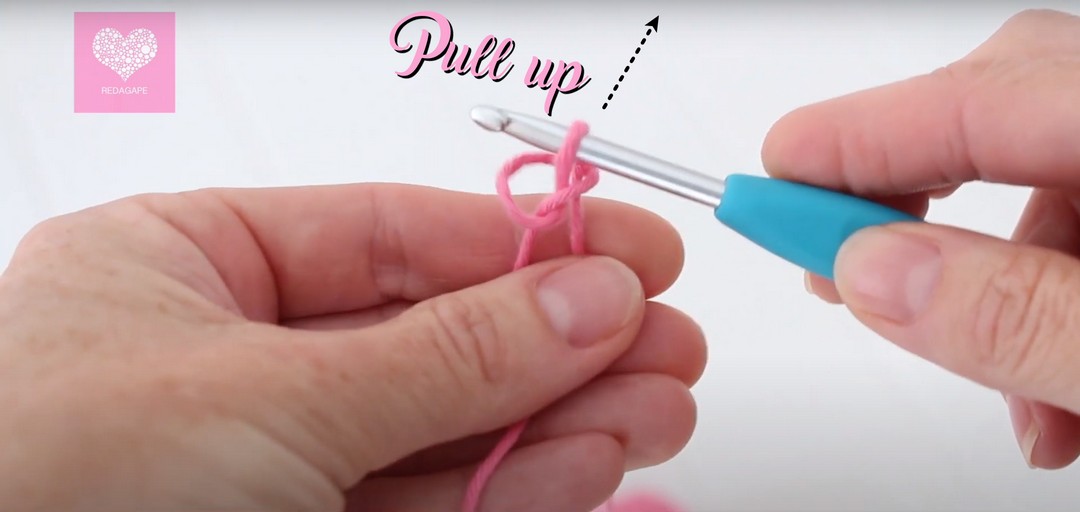
Step 6: Pull Loop Up By hook or Finger
When the loop is on the hook shaft, Pull that loop until the yarn gets completely tied.
You can make the first loop smaller if you want to get the loop with exactly the size of shaft.

What Is Another Method For Tieing A Slip Knot?
One other method to make a slip knot is as follows:
- Pull the length of the yarn, create a loop as mentioned earlier, and lay flat on the table.
- Now, pass the crochet hook through the loop and grab the ball end yarn by the groove of the hook.
- Then, pull the crochet hook through the loop. Then, pull both ends of the yarn to tighten the loop.
FAQs
How To Open or Remove The Slip Knot?
To remove the slip knot, you only need to pull the hook out of the loop and pull both ends of the yarn.
What should be the length of the tail end of the yarn?
Usually, 6 inches of the tail end is recommended to easily weave in the ends. However, smaller than this will cause difficulty in the procedure.
Does Slip Knot Count As A Stitch?
No, because it is merely a knot weaved at the project’s end. When you count the chain in a row, don’t count the slip knot as a stitch.
Final Thoughts
Crocheting is about learning and implementing. So, keep practicing what you have learned. If you enjoyed this crochet slip knot tutorial, leave a comment below.