How to Block Yarn For Crochet Items: (3) Three Beginner Ways

How Blocking is done for crocheting?
All types of blocking are done by wetting the finished crochet work and drying it so the yarn fibers resettle uniformly, so the whole item comes in an even shape.
Every kind of blocking has its way of wetting and drying the item. So, you can select what you like the most.
Tip: Always check the yarn label for guidelines on care about the washing or heating.

Which crochet items need to get blocked?
One rule of thumb says any crochet item that is flat, lacy, or intricately shaped needs to get blocked if you can (sometimes it is painful to do for large projects, though you should).
Stuffed items, round baskets, etc, on the other hand, would not get the benefit from blocking.
So, granny squares, doilies, scarves, motifs for crochet blankets, snowflakes, fillet crochet, and mesh can all be blocked.
In this tutorial, I shall use my squares as an example.
Should I Block yarn before or after Weaving in the ends?
We have to ensure that blocking the crochet item gives us a finalized straight look. So, it is better to weave in the ends first (though it may resist the settling of yarn).
If you leave the ends as they are for later weaving, the item may curl up quickly again after weaving.
It has happened to me, So I have shown the granny squares with already sewed ends.
What are the Types of Blocking?
Usually, there are three famous ways of blocking crochet, and I detail you in detail:
- Wet or Immersion Blocking
- Spray Blocking
- Steam Blocking (a little expensive, though)
3 Ways to Block Yarn For Crochet Items: Step-by-Step Instructions
-
Spray blocking
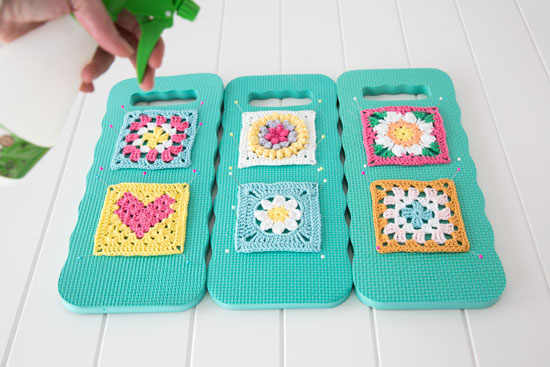
This method basically involves pinning the project (granny square in my case) in a flat place, spraying it with water, and leaving it to dry.
You don’t need a fancy blocking board to block your projects. All you need is a soft, straight surface large enough to block your items and where you can enter the pin.
I’ve used some foam knee protectors for gardening as my blocking boards, as I’m only blocking small squares. An ironing board is a great alternative, too, but if you need a larger space, a bed will work well.
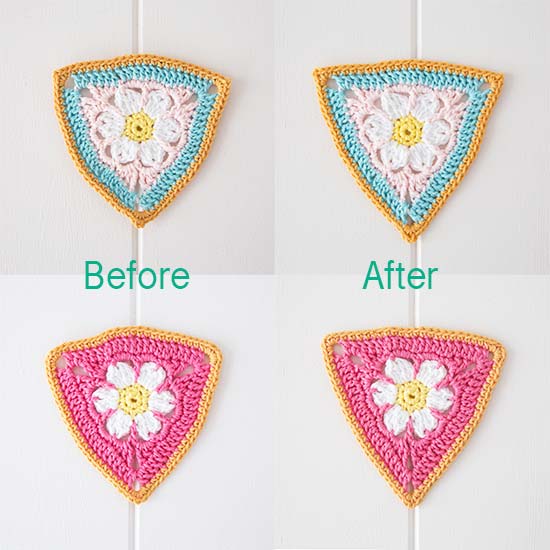
If you’re using a bed, remember that your project might take a while to dry, so you must delay taking a nap. It’s also a good idea to place a waterproof cover between your bed and the project. Before we get to the tutorial, check out these sweet before and afters.
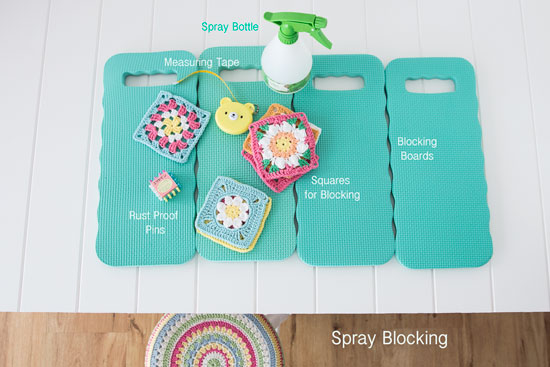
Spray Blocking: Step-by-step
1 – Pin your motif into place using rust-proof pins. If you are aiming to make your squares the same size, then grab your tape measure and make sure each side is the same length.
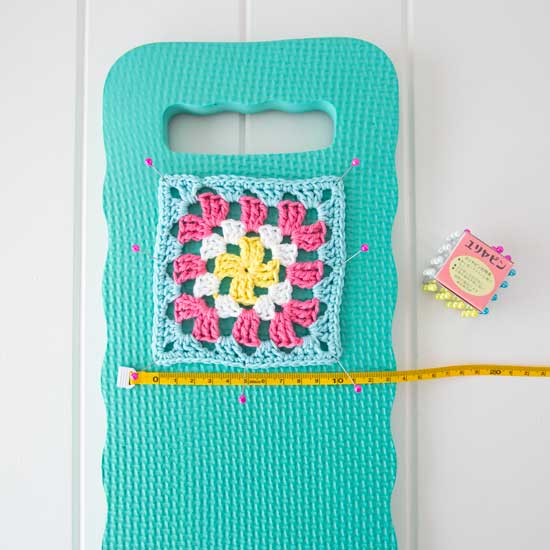
2 – Lightly spray a mist of water over your squares. 3 or 4 squirts should be enough.
3 – After spraying, leave to dry. Make sure your blocks are 100% dry before removing the pins.

2 – Wet Blocking
It involves submerging the entire project, removing as much water as possible (without wringing), and laying flat to dry. The project can be pinned into place if desired. See the video below for the best details:
3 – Steam Blocking
Pin your project onto a cushioned ironing board or other soft surface. Heat up your iron and gently steam a few centimeters from the surface. You might like to place a clean cloth between your project and the iron to help protect your precious yarn. Watch the video tutorial below on how to steam block:
Some sweet Before and Afters Of Crochet Blocking
FAQs
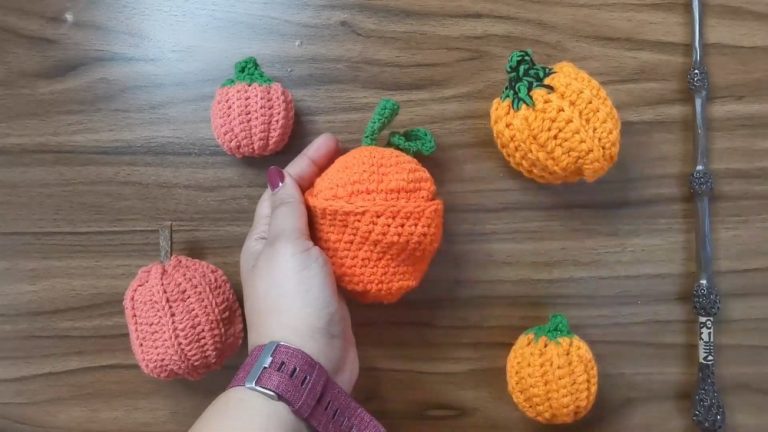
Can I block my amigurumi?
No, amigurumi never need to get blocked because they are already tightened using smaller hook sizes, stitches, and stuffing in proper shape. Blocking is mainly a requirement of flat, unstuffed items (even clothing too).
Should I Block the Motifs Before the Assembling?
Motifs should be separately blocked before assembling as a blanket. It will help you join them easily.
Which Yarn Blocks Best?
Acrylic is a synthetic fiber, so it holds its shape well after blocking than any other yarn. So, it is best for blocking.