
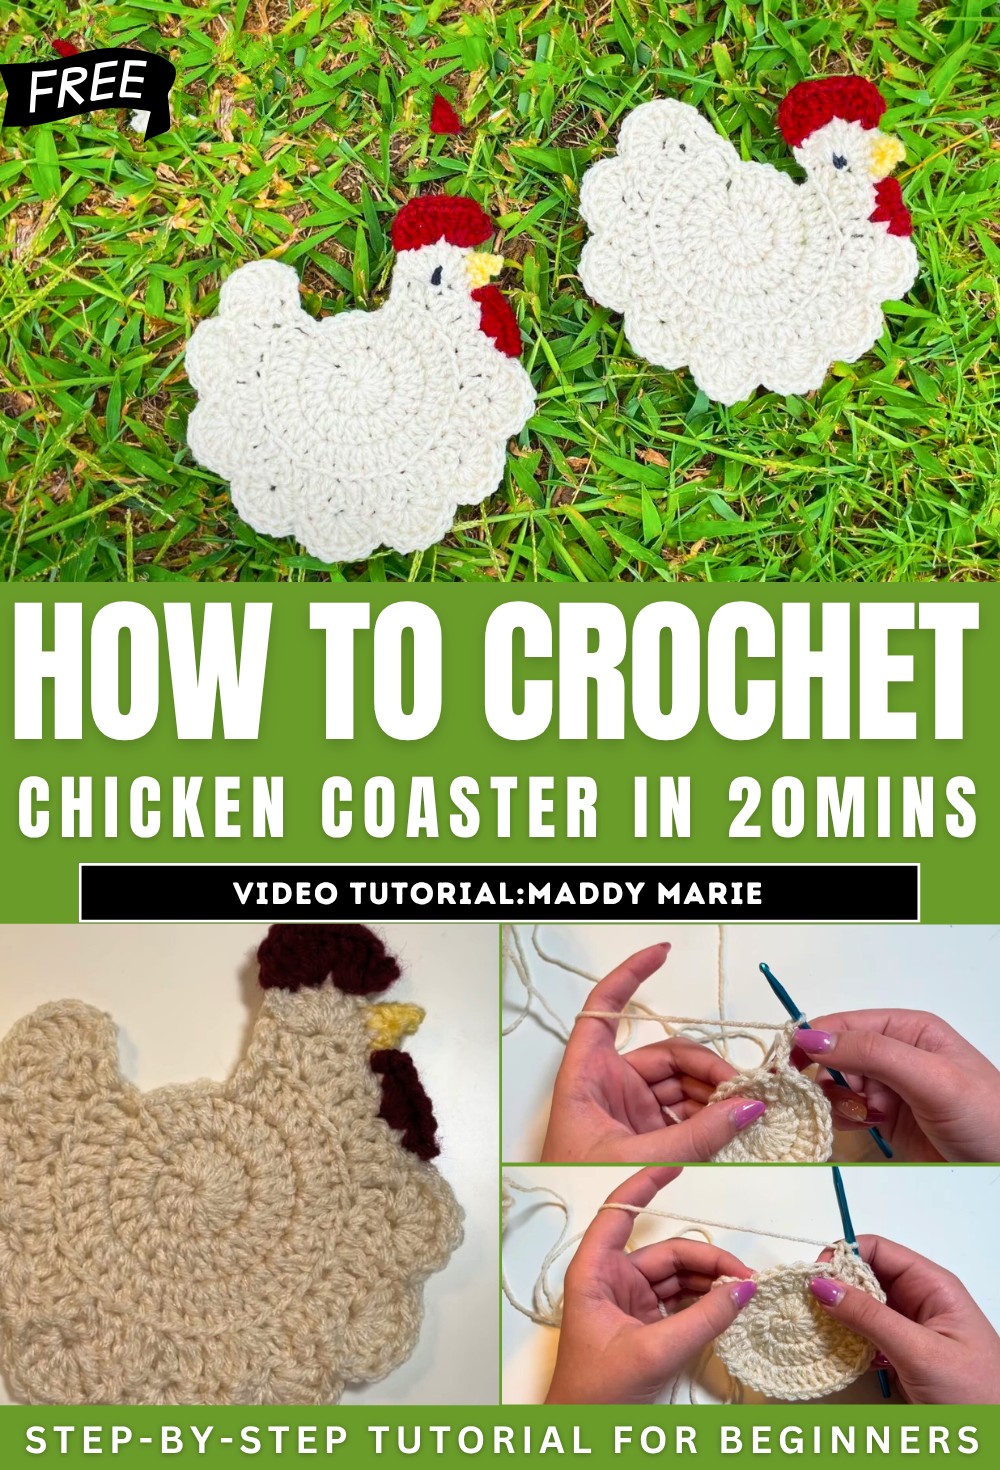
How to Crochet a Chicken Coaster in 20mins

With a beginner-friendly tutorial, learn how to crochet adorable chicken coasters, perfect for quick and easy projects. In just 20-30 minutes, you can create these versatile designs, which can be used as coasters or decorative items. The tutorial covers techniques like making a magic ring, double crochets, and pattern repetition while also explaining how to add features like the comb, beak, and eye.
It’s a fun and creative project for crochet enthusiasts of all levels. So, follow through with us for the complete tutorial.
Crochet Chicken Coaster Tutorial Summary
This tutorial by MADD demonstrates how to crochet an adorable chicken coaster. The project is ideal for beginners and perfect for quick and fun creations. The coaster takes only 20–30 minutes to complete and can be used for home decor, wall art, or as coasters.
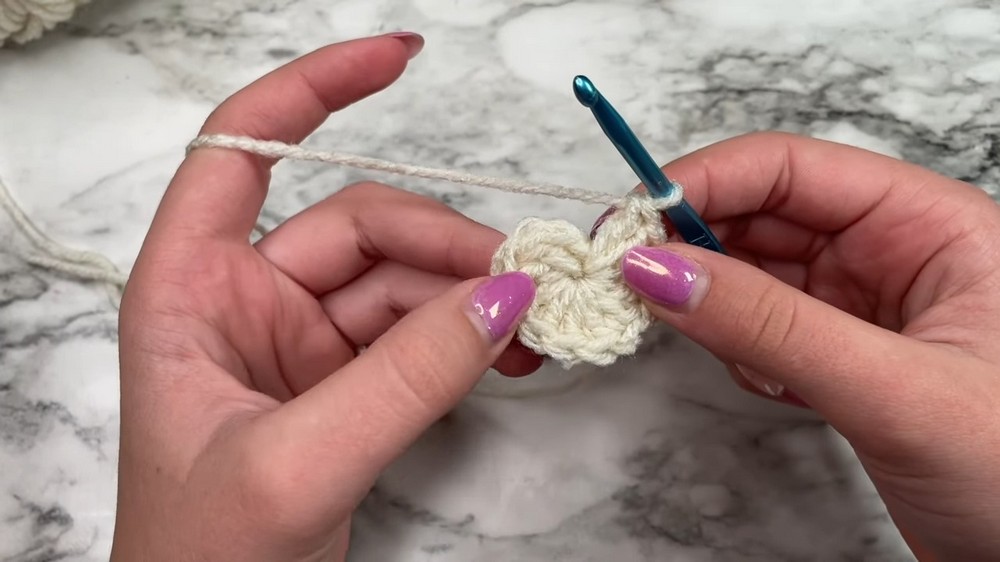
1. Creating the Magic Ring and Base
- Begin by making a magic ring. Wrap the yarn around your fingers to create the foundation and pinch it to hold the shape.
- Secure the magic ring with chains and begin working on the first round.
- Work double crochet stitches into the magic ring.
- Tighten the ring by pulling the tail, ensuring the base is snug.
- Complete the round by slip stitching to the first chain.
2. Building the Circular Body
-
Round 2:
- Chain and create double crochets in each stitch around the base.
- Continue adding double crochets to increase the size of the circle.
-
Round 3:
- Alternate between one double crochet and two double crochets in the following stitches, forming a pattern to expand the coaster.
- Finish the round, leaving unworked spaces where the chicken’s head will be added later.
-
Round 4:
- Work in the front loops only to create a decorative ridge.
- Alternate between one and two double crochets across the round.
3. Adding the Ruffled Shells for the Body
- Chain one and skip the first stitch before creating shells (decorative ruffled edges).
- For each shell, crochet six double crochets into one stitch and skip the next stitch.
- Repeat this process to add eight shells for the chicken’s body.
- After completing the shells, work single crochets leading to the area reserved for the head.
4. Creating the Head
- Crochet a small shell for the chicken’s head by adding six double crochets into a stitch.
- Work around the remaining stitches and finish off the head by securing it with a slip stitch.
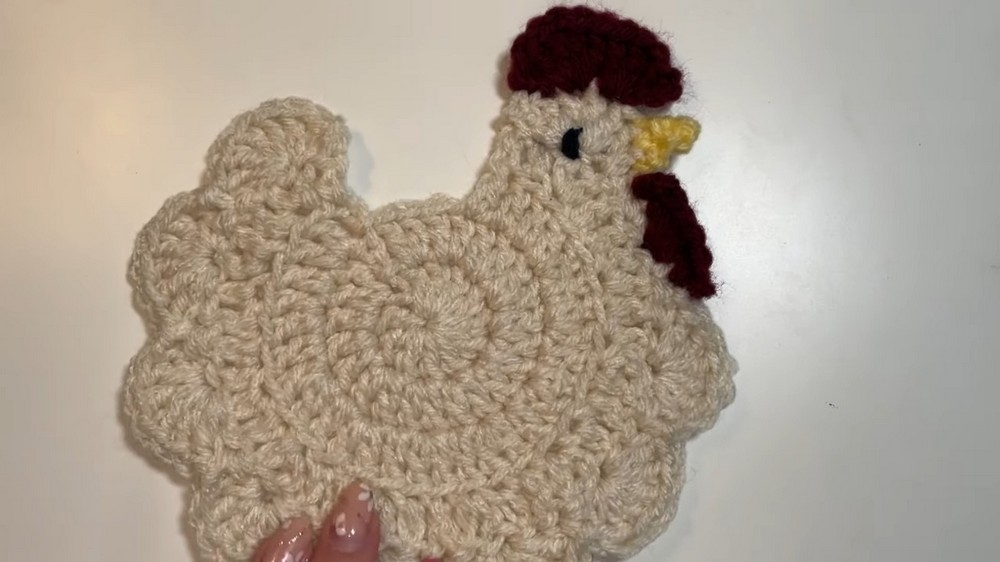
5. Adding Details (Comb, Wattle, Beak, and Eye)
Comb:
- Join red yarn at the top of the head.
- Use chains and double crochets to create the distinctive scalloped comb of the chicken.

Wattle:
- Attach red yarn at the base of the chicken’s head.
- Add small single crochet clusters to form the wattle below the beak.
Beak:
- Attach yellow yarn near the head and create a small triangular beak by reducing single crochets.

Eye:
- Use black yarn to sew a small eye onto the side of the chicken.
- Optionally, you can use plastic eyes as an alternative.
6. Finishing Touches
- Weave in all loose ends securely.
- Inspect the coaster for neatness, ensuring both sides look clean and polished.

Conclusion
This quick and beginner-friendly crochet project results in a charming chicken coaster, great for home use or gifting. The tutorial emphasizes creativity, allowing some flexibility with colors and features. The final product is adorable, versatile, and a fantastic addition to any crochet collection.


