How to Crochet A Flower Dishcloth for Spring
Learn how to crochet a charming flower dishcloth, which can serve as a potholder, dish towel, or decorative kitchen accessory. The tutorial guides you step-by-step through seven rounds, finishing with an optional loop for hanging. Perfect for beginners, this project blends functionality and flair in an easy-to-follow process.
Free Crochet A Flower Dishcloth Tutorial

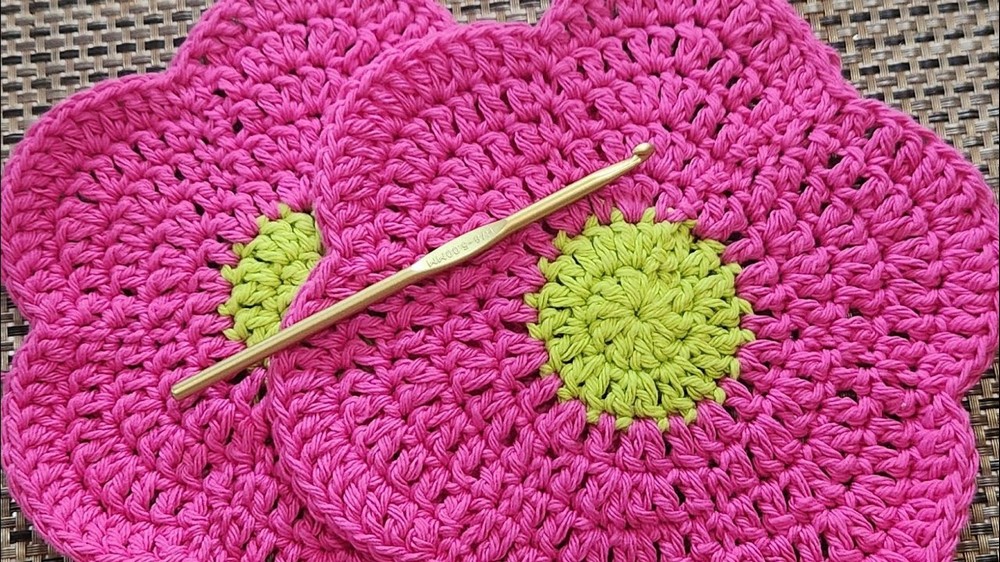
Mrs. Stewart’s crochet tutorial demonstrates how to create a beautiful, chic flower motif pot holder that can also be used as a dish towel or kitchen decoration. The step-by-step video covers techniques including color changes, increasing rows for petal formation, and adding an optional hanging loop.

Chic Flower Motif Pot Holder / Dishcloth
Materials Needed
- Yarn: 100% cotton yarn (Worsted weight / Category 4—e.g., Bernat Handicrafter or similar)
- Two colors: center and petal (scraps suitable)
- Hook: 5 mm (H/8) crochet hook (adjust if needed)
- Scissors
- Tapestry needle (for weaving in ends)
Key Abbreviations (US Terms)
| Abbreviation | Meaning |
|---|---|
| ch | Chain |
| sl st | Slip Stitch |
| sc | Single Crochet |
| dc | Double Crochet |
| st(s) | Stitch(es) |
| inc | Increase (2 dc in same st) |
Special Notes
- Ch 2 at the start of rounds does NOT count as a stitch.
- Join each round with a sl st to the first actual stitch, NOT the ch-2 turning chain.
- Change colors as indicated (or use one solid color).
- For a thicker pot holder, make two and sc them together, wrong sides facing.
Pattern
Center (Color A, e.g. Green)
Rnd 1:
- Make a slip knot.
- Ch 2.
- Work 10 dc in first chain.
- Join with a sl st to the first dc.
(10 sts)

Round 2
- Ch 2 (does not count as a dc throughout).
- Work 2 dc in each stitch around.
- Join with a sl st to the first dc.
(20 sts)
On the last dc, begin color change: pull through first 2 loops as normal, then finish the stitch with Color B (e.g., pink). Drop Color A.
Round 3 (Begin Petal Color)
- Ch 2.
- (1 dc in first st, 2 dc in next st); repeat from * to end.
- Join with a sl st to first dc (do not join into ch-2).
(30 sts)
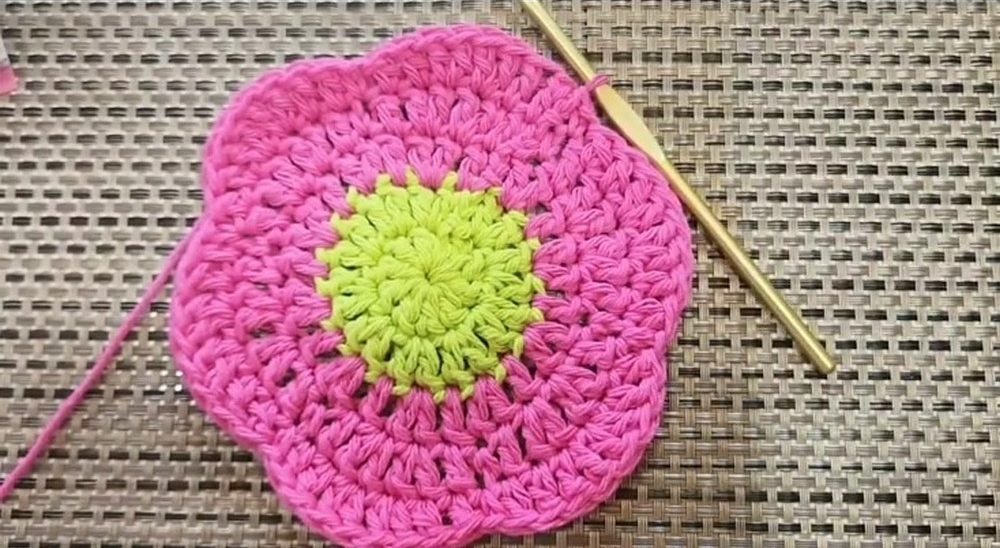
Round 4 (Start Petals)
- Ch 2.
- 1 dc in next st, 2 dc in next st, 2 dc in next st, 1 dc in next st, 1 sc in next st; repeat around.
(This is: dc, 2dc, 2dc, dc, sc) - Join with sl st to first dc.

Round 5
- Ch 2.
- 1 dc in each of next 2 sts, 2 dc in each of next 2 sts, 1 dc in each of next 2 sts, 1 sc in next st; repeat around.
(This is: dc, dc, 2dc, 2dc, dc, dc, sc) - Join with sl st to first dc.
Round 6
- Ch 2.
- 1 dc in each of next 3 sts, 2 dc in next st, 2 dc in next st, 1 dc in each of next 3 sts, 1 sc in next st; repeat around.
(This is: dc, dc, dc, 2dc, 2dc, dc, dc, dc, sc) - Join with sl st to first dc.
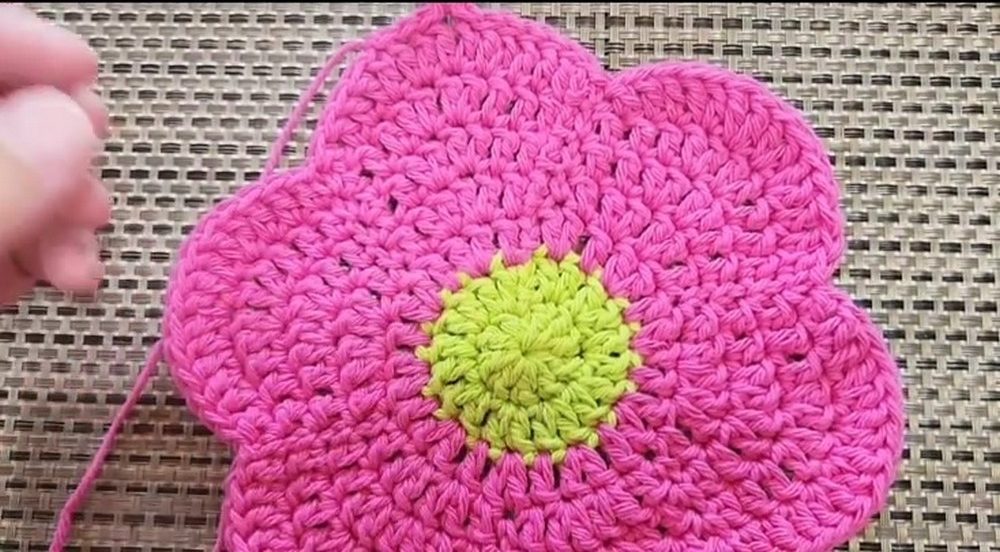
Round 7
- Ch 2.
- 1 dc in each of next 3 sts, 2 dc in each of next 4 sts, 1 dc in each of next 3 sts, 1 sc in next st; repeat around.
(This is: dc, dc, dc, 2dc, 2dc, 2dc, 2dc, dc, dc, dc, sc) - Join with sl st to first dc.
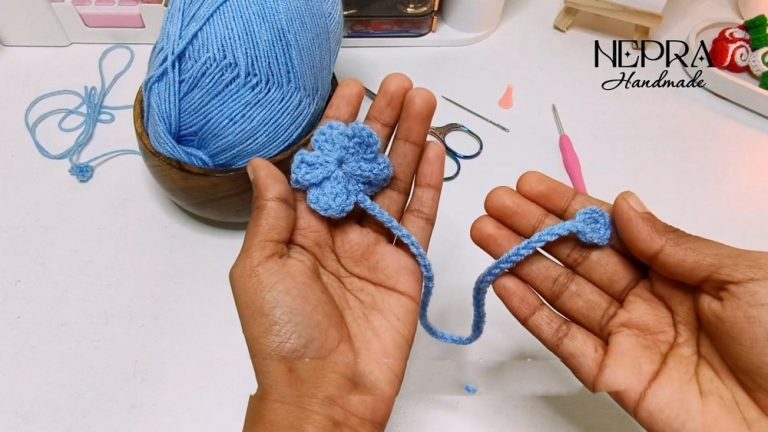
(Optional) Hanging Loop
- Sl st into the next 6 sts to center the loop at the petal’s tip.
- Ch 8.
- Sl st in same st.
- Sl st a few more sts to secure if desired.
- Fasten off and weave in ends.
Finishing
- Weave in all ends neatly on the back.
- (Optional) For double thickness, make two, place wrong sides together, and sc around for a robust pot holder.
Conclusion
You’ve created a classic, absorbent, and decorative flower motif that’s perfect for use or gifting. Seven straightforward rounds make for a quick, satisfying project, and the color and yarn choice is highly adaptable.
Pattern Correction & Tips
Corrections
- If you do not end a round with the correct stitch (e.g., finish a petal with a sc), check your counts before proceeding.
- Always join to the first dc, not the ch-2.
Tips
- For best result, use tightly spun cotton to maximize absorbency and heat protection.
- Hide color change tails by crocheting over them.
- Adjust the petal color each round for a stripy or ombré effect!