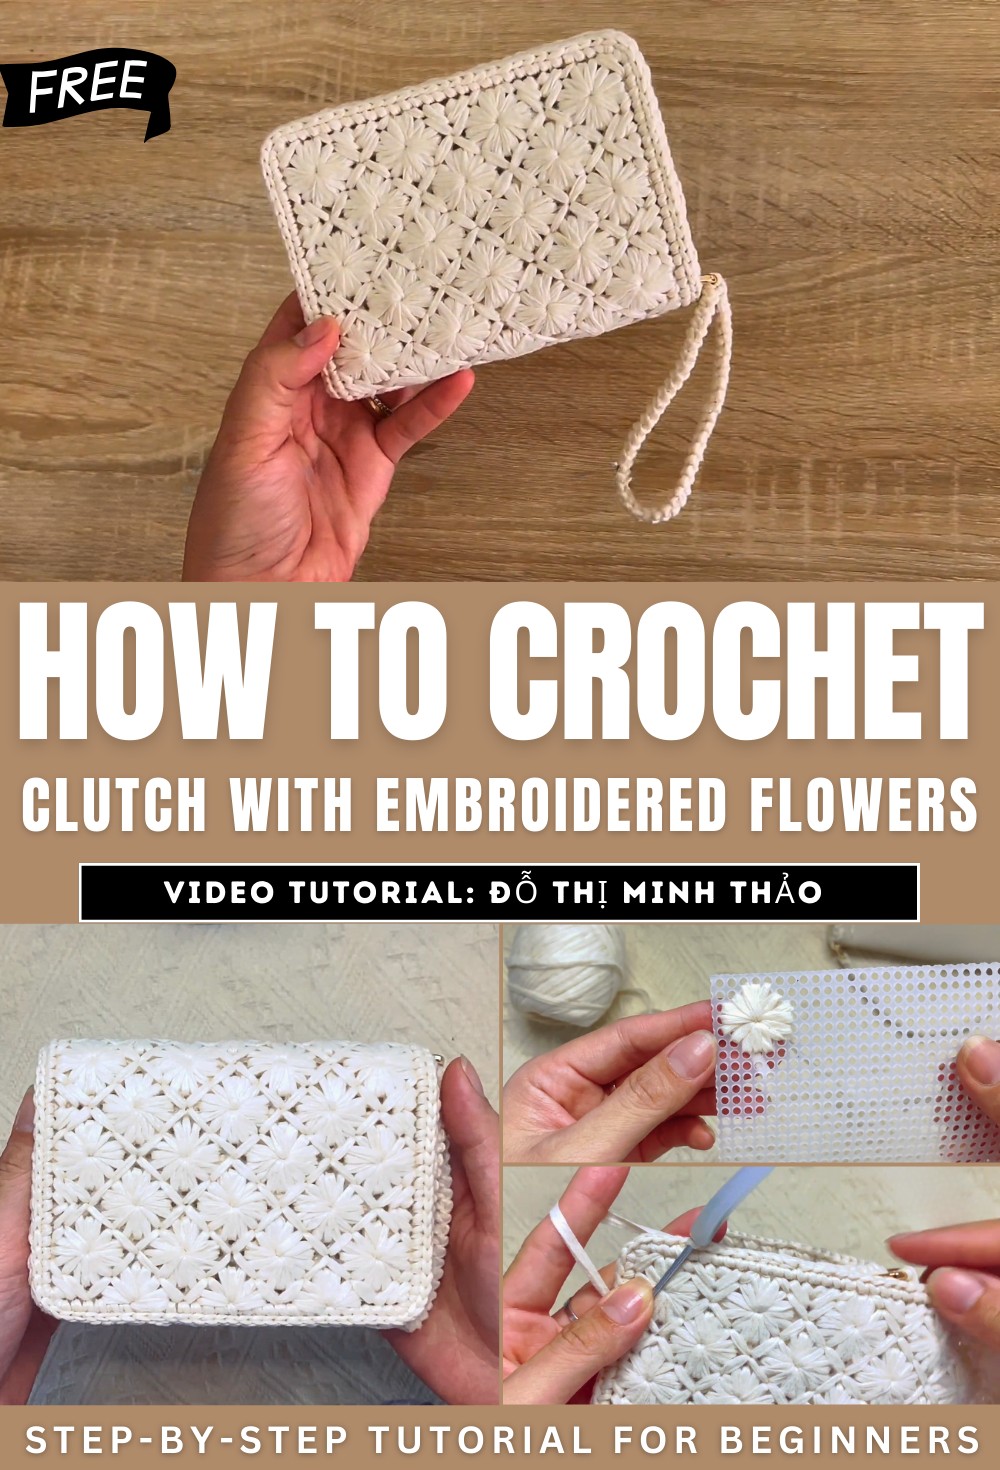
How to Crochet A Textured Clutch for Beginners
With a step-by-step tutorial, learn how to crochet a small clutch or mini handbag for beginners. The project features a floral embroidery design on a canvas sheet, which is then attached to a pre-made wallet base. The tutorial covers everything from the materials needed, such as Iri yarn and D-rings for the wrist strap, to the specific embroidery technique for a 16-petal flower pattern. The creator also provides step-by-step instructions on how to crochet the edges of the canvas, make the wrist strap, and finally, assemble the bag by attaching the crocheted canvas to the wallet base using a slip stitch.
The use of a pre-made wallet base simplifies the process, ensuring a clean and professional finish. The finished product is a practical and stylish accessory, perfect for carrying cash and cards. So, follow through with us for the complete tutorial.
Project Overview
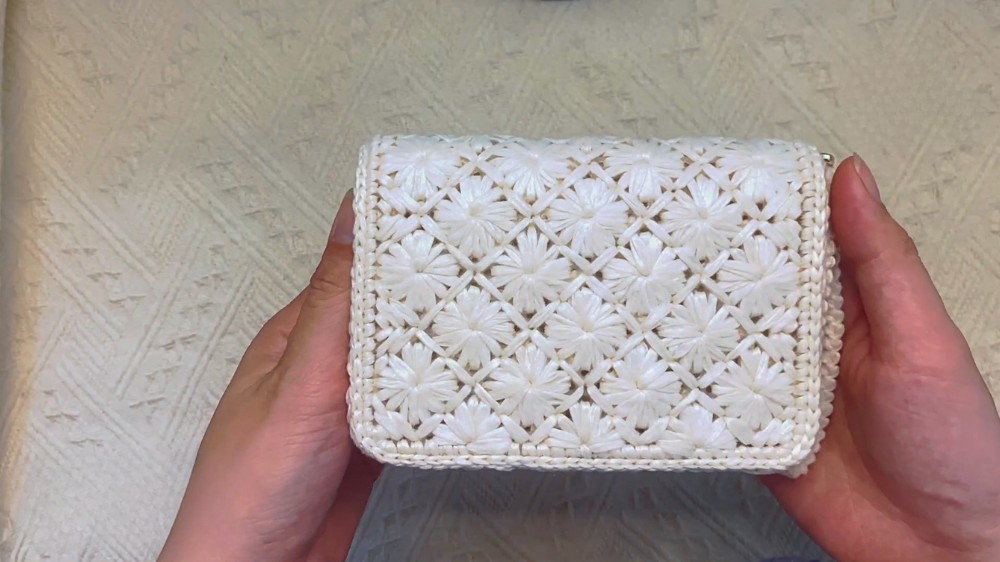
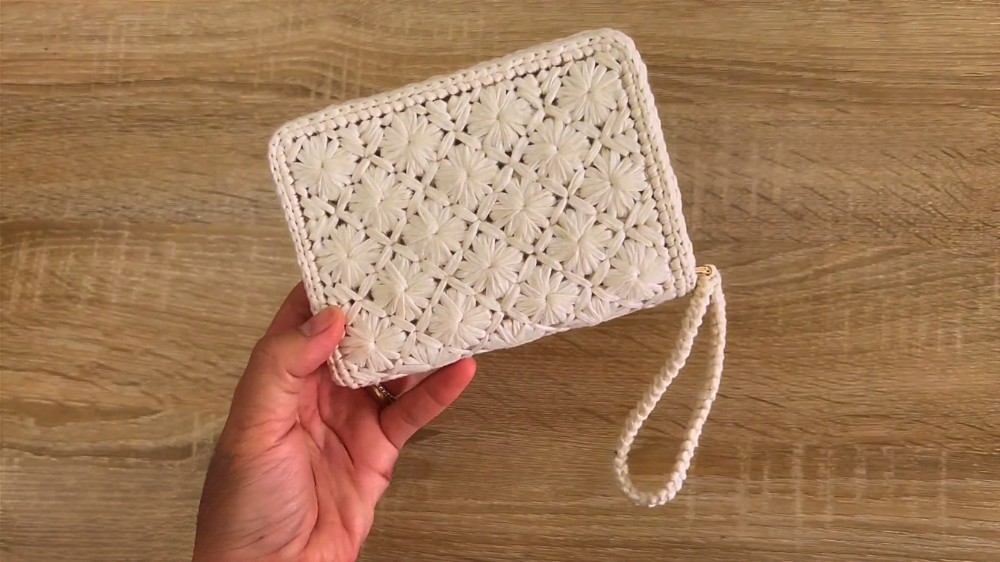
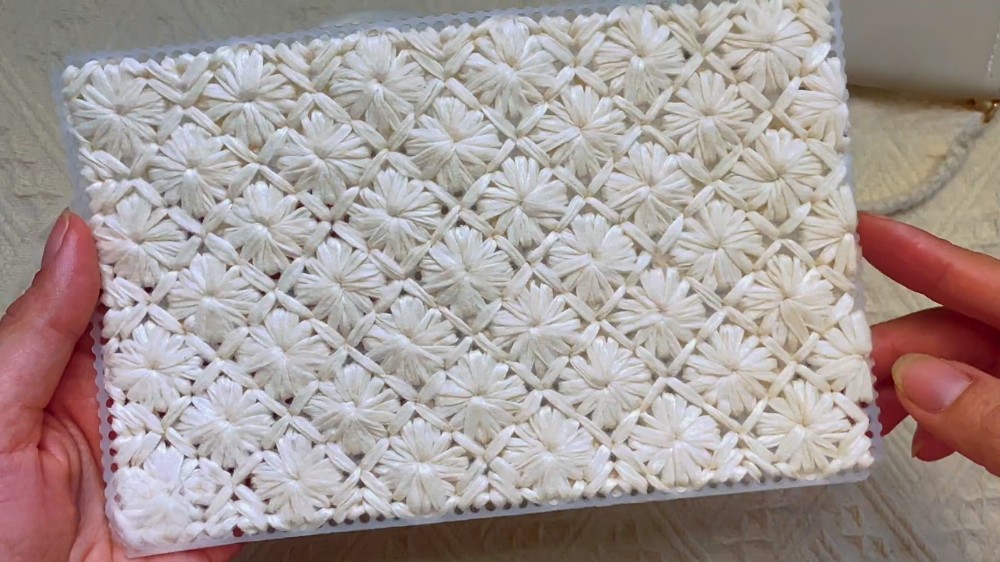
This video provides a tutorial for creating a mini embroidered clutch. The clutch is a small and practical accessory, measuring about 14 cm, making it suitable for carrying cash and cards for daily use. The creator showcases the finished product with various color combinations for the thread and the clutch body.
Materials
To make this clutch, you will need several materials:
- A canvas fabric for the embroidery section.
- D-rings for a wrist strap.
- A spool of Iri thread, which is a special type of ribbon-like thread that works well for this kind of embroidery.
- A pre-made 13 cm clutch body.
- A crochet hook (size 2.5 mm).
- A tapestry needle for weaving in ends.
Embroidery Instructions
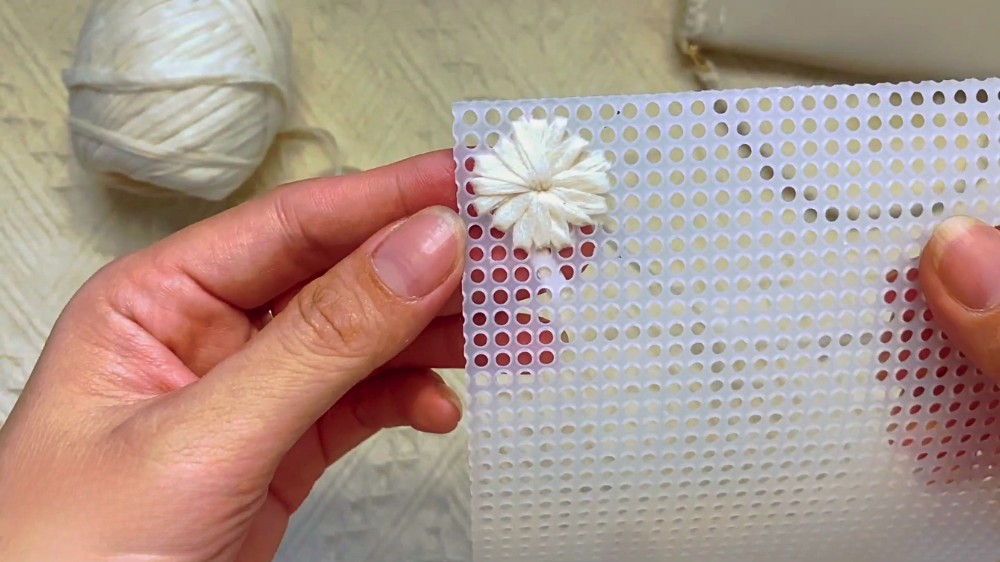
The tutorial focuses on embroidering a flower pattern on the canvas fabric. The canvas should be large enough to fit the clutch body.
- Mark the frame for one flower by counting in 7 squares from the side and 7 squares down from the top edge.
- The center of the flower is located at the fourth square from the side and the fourth square down from the top edge.
- To embroider a petal, bring the needle out from the center of the flower to the outermost square, which is 3 squares long. Continue this process, moving clockwise one square for each new petal.
- The creator advises holding the thread with your thumb while embroidering to keep it flat.
- The petals are made in a repeating pattern of three long petals followed by one shorter one to create a circular shape.
- The second row of flowers should be staggered from the first.
- After completing the flowers, fill in the empty spaces with background stitches that resemble small leaves.
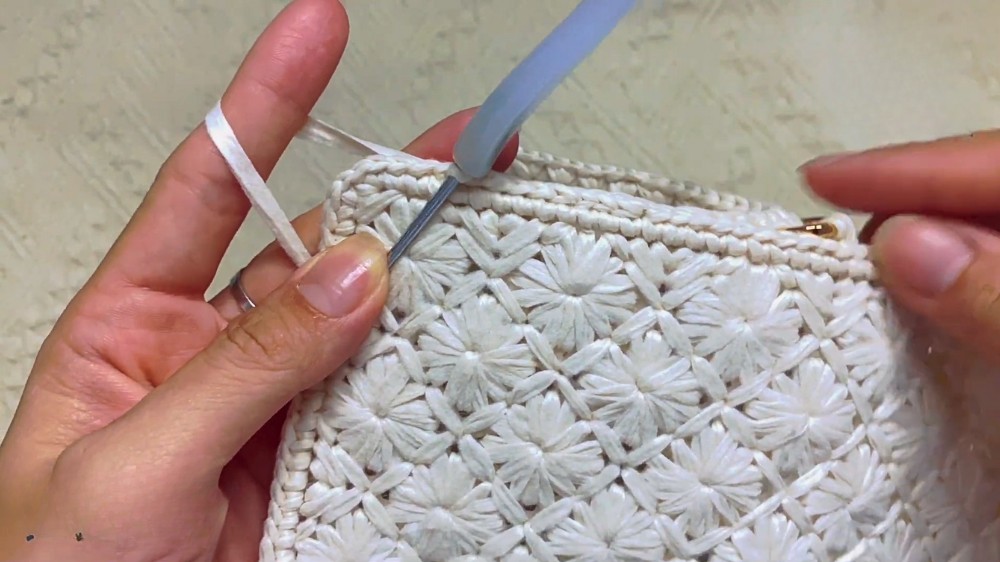
- Once the embroidery is finished, trim the excess canvas at the corners before attaching it to the clutch body.
Assembly Instructions
After the embroidery is complete, you will crochet the border and assemble the clutch.
- Use a crochet hook to create a single crochet border around the canvas to cover the exposed edges.
- Next, create a wrist strap that is approximately 25 cm long. Attach it to one of the D-rings with a slip stitch.
- Use the crochet hook to work two single crochet stitches into each of the pre-made holes around the clutch body.
- When you get to the zipper area, be sure to crochet around the D-ring with the strap to attach it to the clutch.
- Finally, attach the embroidered canvas to the clutch body using slip stitches. You can use clips to hold the canvas in place before you start stitching.
The completed clutch is a charming, handmade accessory and a great gift idea.