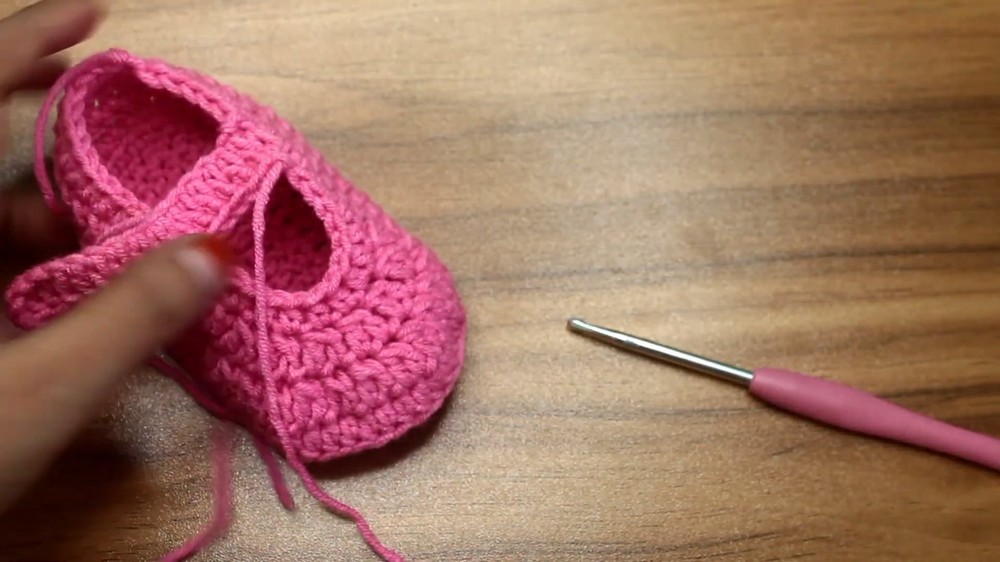
How to Crochet Baby Shoes for Moms
Learn how to crochet cute and easy baby shoes, perfect for gifting at baby showers with this step-by-step tutorial for beginners. It covers the materials, including wool and a 4mm crochet hook, and guides viewers through creating the shoe’s sole and body. The tutorial also includes instructions for crocheting a belt and finishing touches like adding flowers and pearls, resulting in a simple yet elegant design for babies aged 6 to 12 months.
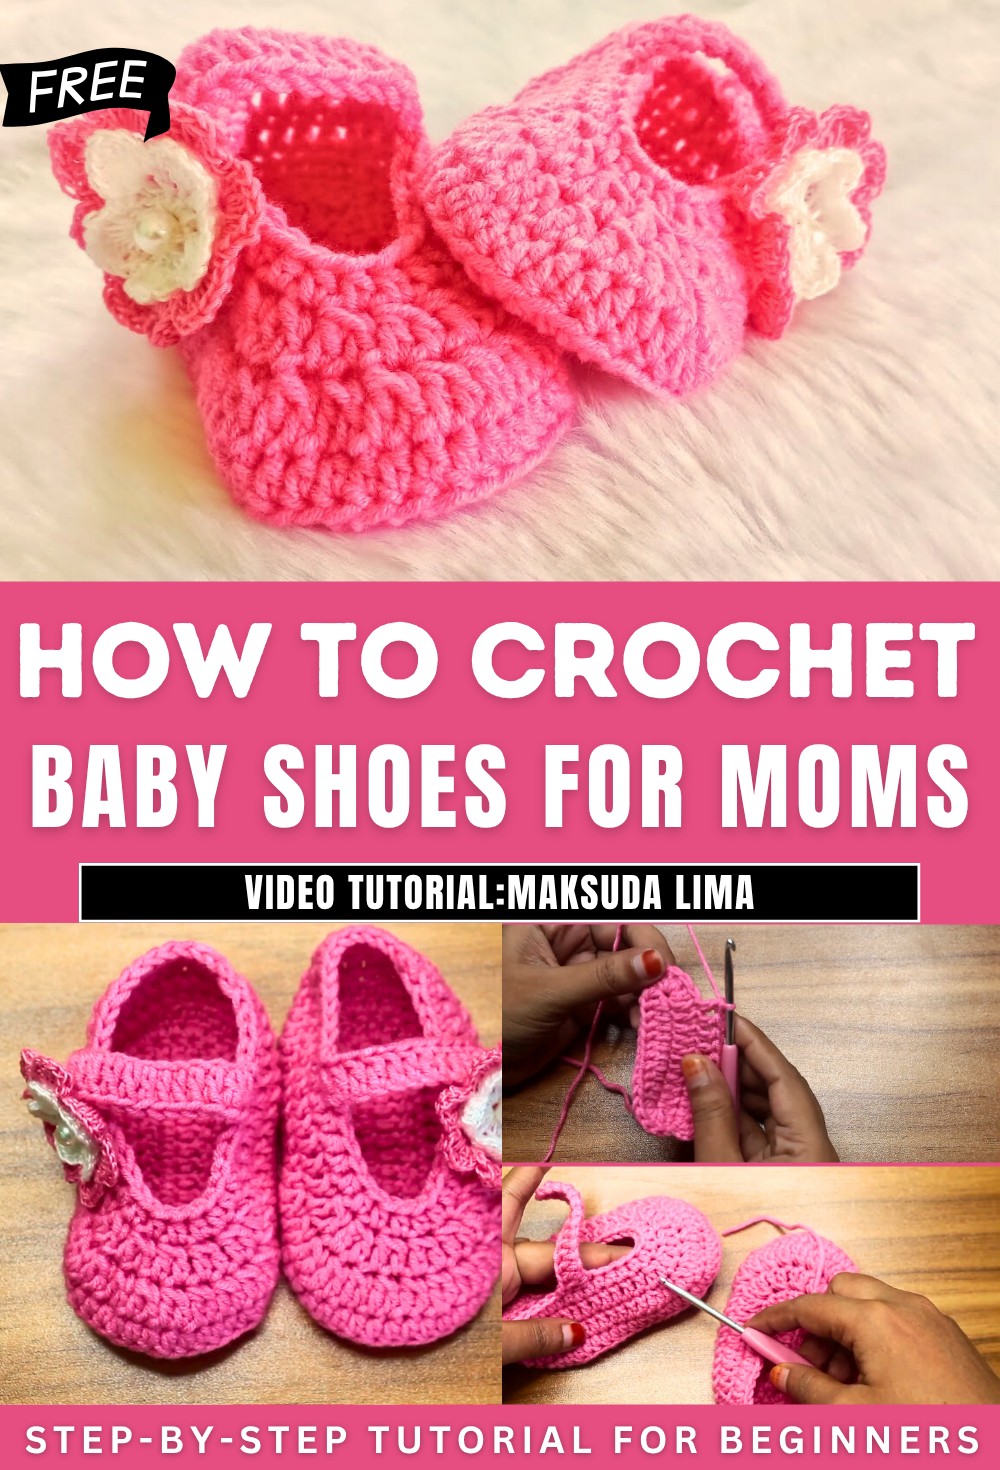
This video offers a comprehensive tutorial on crocheting pink and bow baby shoes, suitable for infants aged 6 to 12 months. The guide is designed to be easy to follow, allowing crocheters to create a practical accesory for winter, perfect for gifting at baby showers too!
Introduction to the Project
-
-
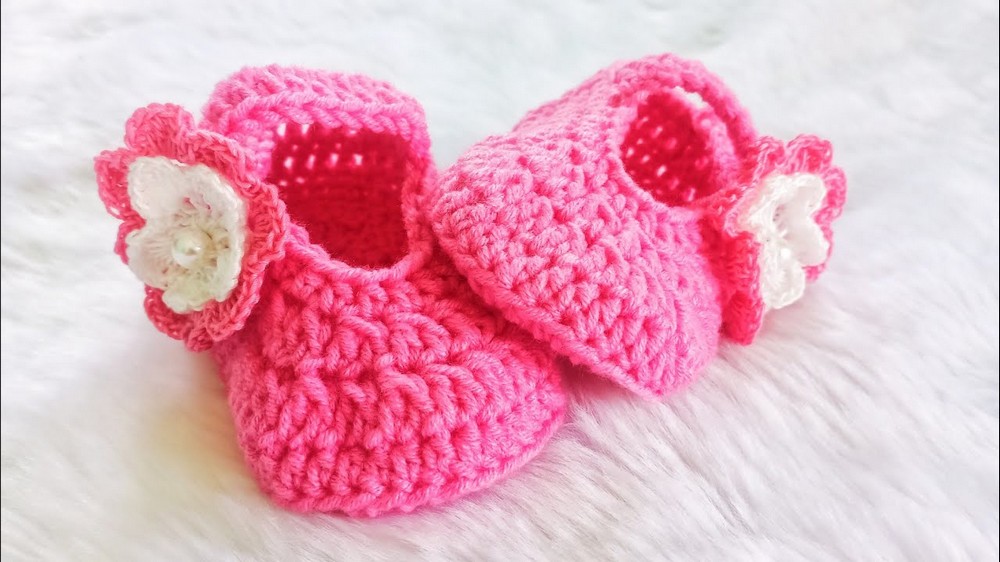
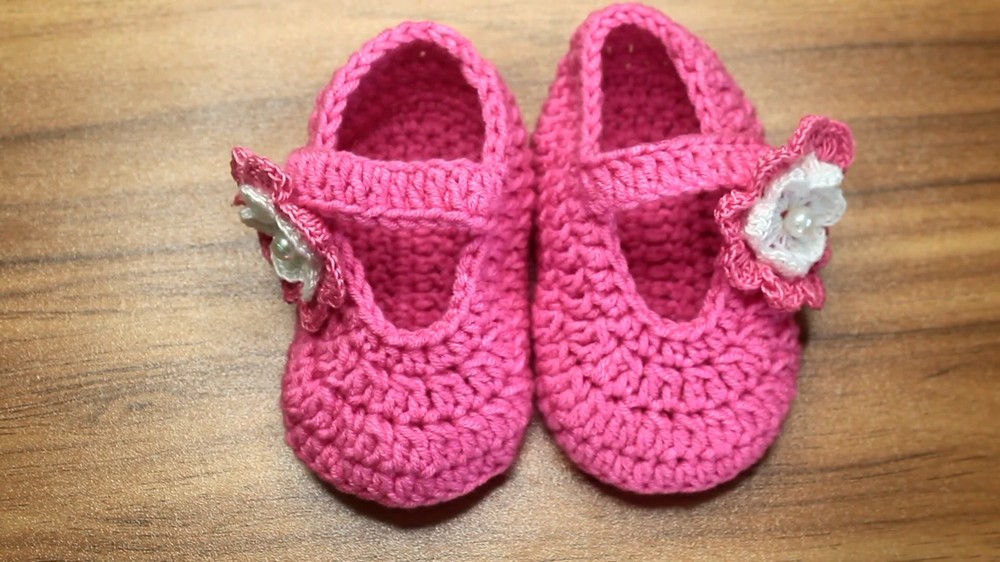
The video begins by showcasing the finished baby shoes, highlighting their delicate appearance and suitability for young children.
-
It emphasizes the simplicity of the design, making it accessible even for those with moderate crocheting experience.
-
- The completed shoes are presented with decorative elements, such as small flowers and pearls, demonstrating potential for personalization.
Materials and Tools
-
-
The creator specifies the essential materials and tools required for this project.
-
The primary material is wool, chosen for its softness and warmth, ideal for baby items.
-
A 4mm crochet hook is recommended for the main construction, providing a good gauge for the chosen yarn.
-
For crocheters who find the 4mm hook too large for their tension or preferred fabric density, a 3.5mm hook is suggested as a viable alternative, ensuring flexibility for different crafting styles.
-
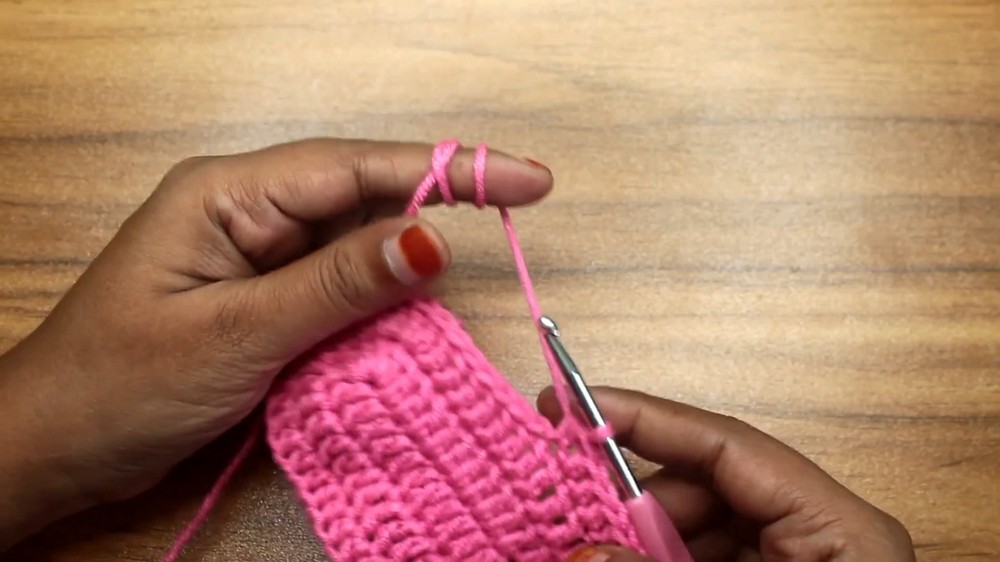
Starting the Project: The Sole Foundation
-
-
The tutorial meticulously guides viewers through the initial steps of creating the shoe’s sole, which forms the base of the entire shoe.
-
The process begins with a slip knot, a fundamental starting point in crochet.
-
This is followed by creating a chain of stitches, which establishes the length of the sole.
-
Additional chains are then added to form the first stitch, setting up the foundation for the subsequent rows.
-
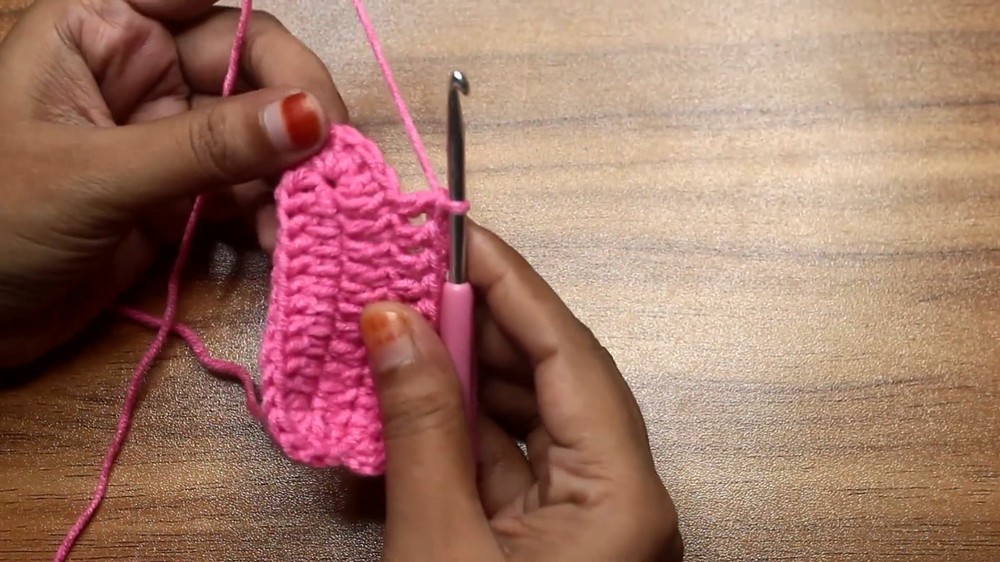
Crocheting the First Row of the Sole
-
-
The video provides clear instructions for working the first row of the sole.
-
Each subsequent chain receives a specific type of stitch until the last chain.
-
In the final chain, multiple stitches are worked into the same point, creating a rounded end for the sole. This technique is crucial for shaping the toe and heel areas.
-
The remaining stitches along the other side of the initial chain are then worked with a single stitch each, completing the first row of the oval-shaped sole.
-
Crocheting the Second Row of the Sole
-
-
The tutorial continues with the second row, further shaping the sole and adding width.
-
This row begins with a specific number of chains and a particular stitch in the following stitch.
-
A series of stitches are then worked along the side, followed by a pattern of increasing stitches. This increase pattern, repeated multiple times, helps to create the necessary curve for the sole.
-
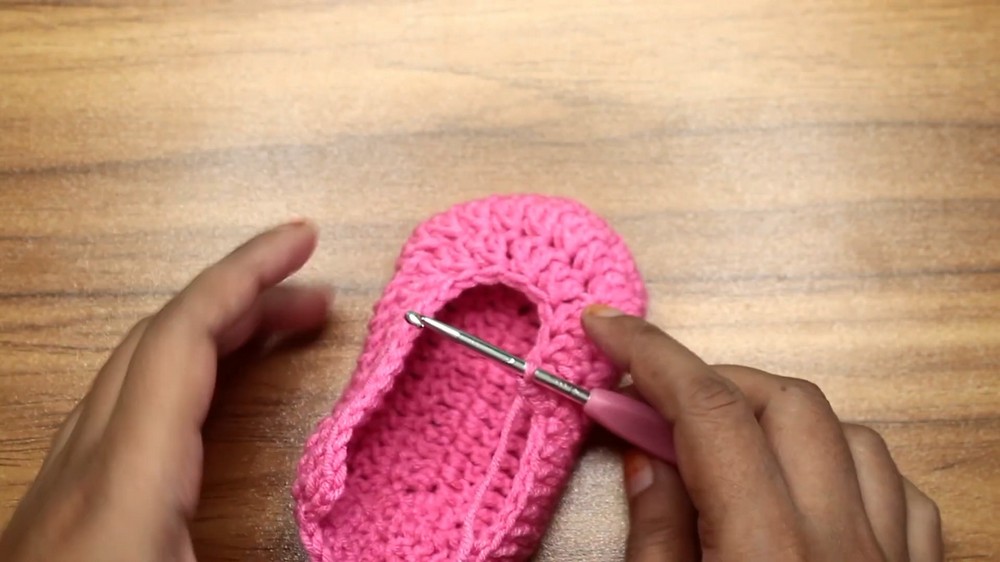
Building the Shoe’s Body
-
-
After completing the sole, the video moves on to constructing the main body of the shoe.
-
This involves folding the work to create the upright sides of the shoe.
-
A specific number of stitch clusters are formed across the front of the shoe, which will create the opening for the foot. This technique helps to define the shape of the shoe’s upper.
-
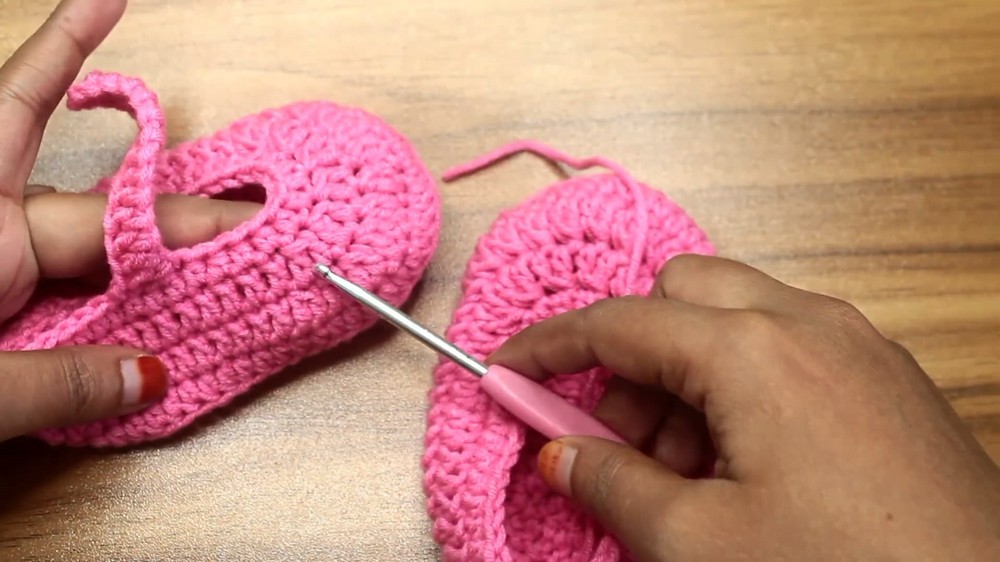
Final Touches and Embellishments
-
-
The tutorial concludes by demonstrating how to add the finishing details that enhance the shoe’s appearance and functionality.
-
Instructions are provided for crocheting a small belt for the shoe, which can be used for decoration or to help secure the shoe on the baby’s foot.
-
The video showcases the completed shoes, adorned with charming embellishments such as small crocheted flowers and a pearl in the center of each flower. These details add a touch of elegance and cuteness to the final product.
-