How to Crochet Beautiful Flower Earrings for Spring
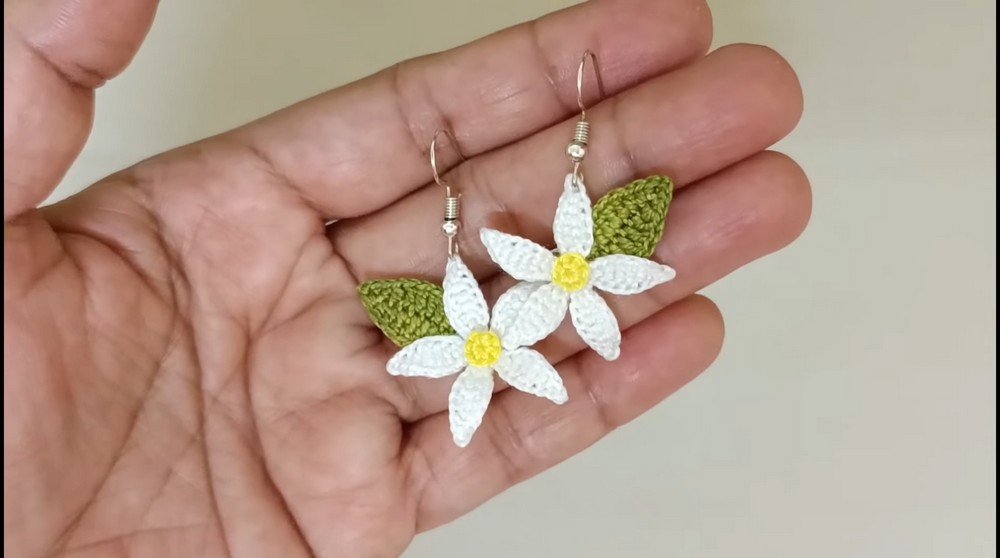
With a quick tutorial for spring, learn how to crochet flower earrings with lace yarn and lovely daisy colors, including white and yellow. The creator begins by listing the necessary materials: crochet thread, a 0.5 mm hook, scissors, fabric glue, earring hooks, pliers, and starch. The tutorial then walks through the process of creating the different components of the earring: the petals, the flower center, and a leaf. These earrings will be easy even for novices.
After all the pieces are crocheted, the creator shows how to assemble them by trimming threads, applying glue and starch, and finally attaching an earring hook. The video concludes by showcasing the finished pair of crocheted earrings. So, follow through with us for the complete tutorial.

Crocheting Flower Earrings: A Detailed Tutorial
This video provides a tutorial on how to crochet flower earrings. The creator begins by listing the necessary materials.
Materials Needed
-
Crochet Thread: The creator uses Anchor’s number eight thread.
-
Hook: A 0.5 mm hook is used.
-
Tools: Scissors, fabric glue, earring hooks, and pliers.
-
Finishing: Starch is used to stiffen the finished pieces.
Crocheting the Components
The tutorial then walks through the process of creating the different components of the earring.
-
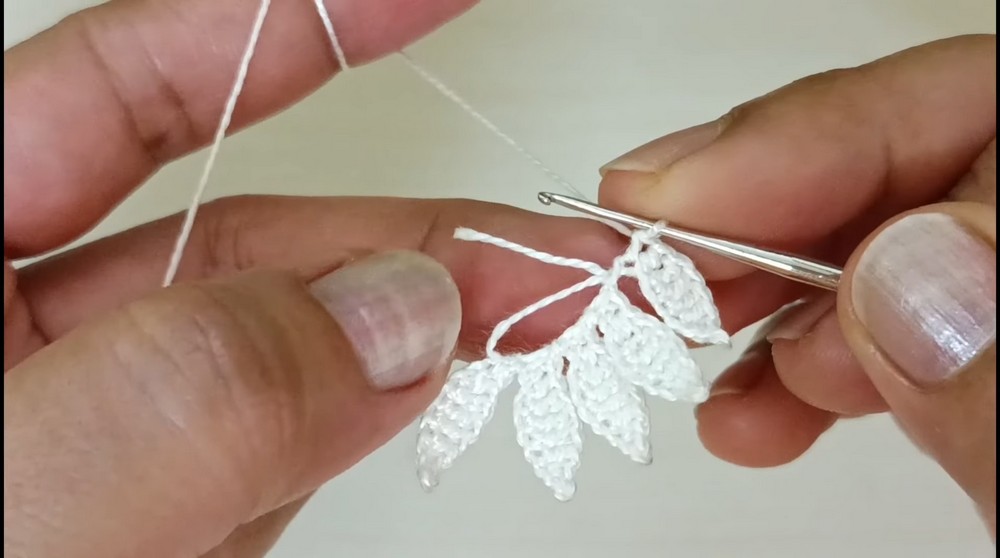
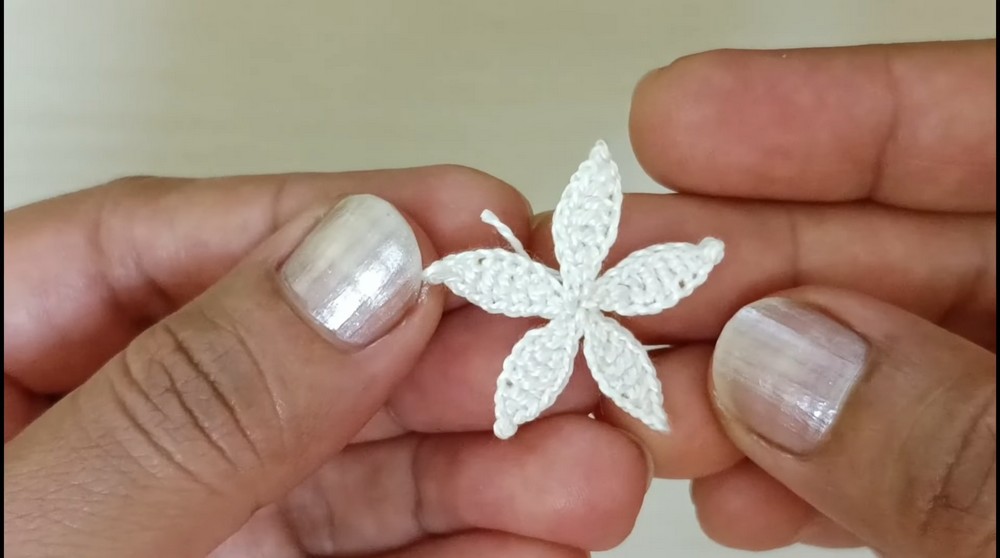
Petals: The creator demonstrates how to make a ring and then crochet five petals using a sequence of chain, single crochet, half-double crochet, and double crochet stitches.
-
Flower Center: A small circular piece is crocheted to serve as the center of the flower.
-
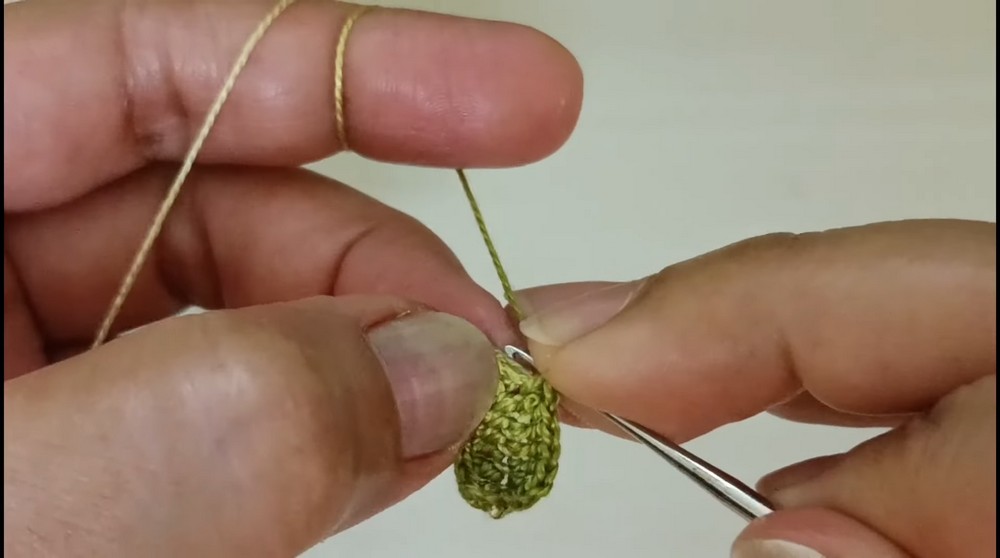
Leaf: A leaf shape is crocheted using a similar pattern of stitches.
Assembly and Finishing
After all the pieces are crocheted, the creator shows how to assemble them.
-
Securing Threads: Excess threads are trimmed and secured with glue on the back of each piece.
-
Shaping: Starch is applied to the back of the pieces, and they are shaped before being left to dry.
-
Gluing: The leaf and the flower center are glued onto the back of the flower petal piece.
-
Attaching the Hook: An earring hook is attached to the top of the assembled piece.
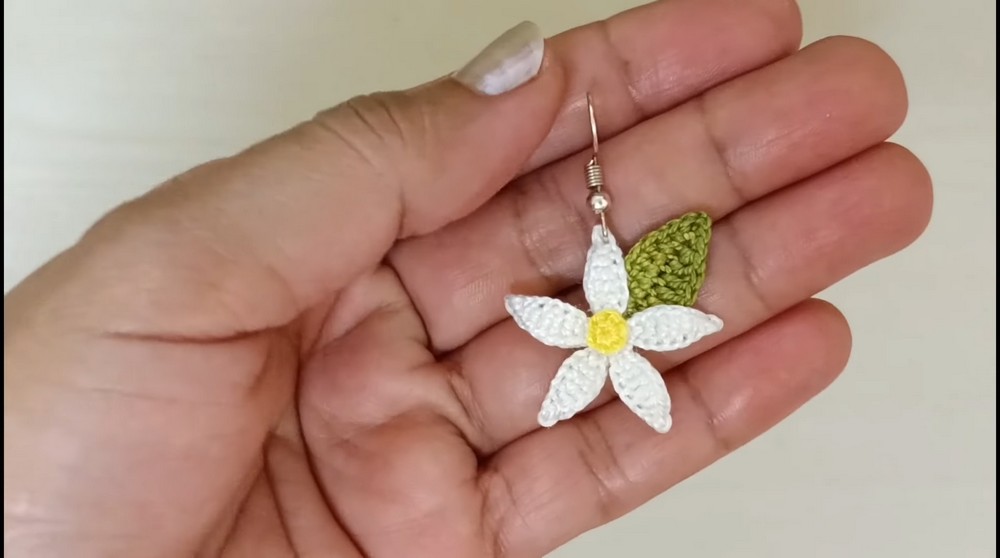
The video concludes by showcasing the finished pair of crocheted earrings.
Tips for Working with Fine Yarns
Working with thin yarn can be a rewarding experience, but it requires a bit of patience and a few specific techniques. Here are some tips to help you get started:
Choosing the Right Hook and Yarn
-
Select the Correct Hook Size: A smaller hook is essential for thin yarn.1 The right size will prevent your stitches from being too loose or too tight.2 A good rule of thumb is to check the yarn label, which usually recommends a hook size.
-
Opt for Light-Colored Yarn: When you’re just starting out, using a light-colored yarn can make it easier to see your stitches. Darker yarns can hide the detail and make it difficult to identify where to insert your hook, leading to frustration.
-
Choose a Smooth Yarn: Yarns with a smooth texture are easier to work with than fuzzy or textured ones. This helps prevent the yarn from splitting and makes it easier for your hook to glide through the stitches.

Mastering Your Technique
-
Maintain Consistent Tension: One of the biggest challenges with thin yarn is maintaining even tension.3 Hold the yarn so that it flows smoothly and consistently through your fingers. You may need to wrap the yarn around a finger or use a tension ring to help regulate the flow.
-
Practice Your Grip: A comfortable grip on your hook is crucial. A “knife grip” or “pencil grip” can work, but the best grip is the one that allows you to work for extended periods without hand cramps. Experiment to find what works for you.
-
Use a Solid Surface: When working on a project, a flat surface can provide stability and support. This helps prevent the yarn from getting tangled and keeps your stitches even.
Troubleshooting and Best Practices
-
Avoid Splitting the Yarn: Thin yarns are prone to splitting. Pay close attention to the tip of your hook as you insert it into each stitch. Ensure you are catching all the strands of the yarn.
-
Use Good Lighting: Proper lighting is non-negotiable. A well-lit workspace will reduce eye strain and make it much easier to see the small details of your work, especially when working with dark colors.
-
Take Your Time: Don’t rush. Thin yarn projects are often intricate and time-consuming. Take breaks, stretch your hands, and enjoy the process. The detailed and delicate result is worth the extra effort.