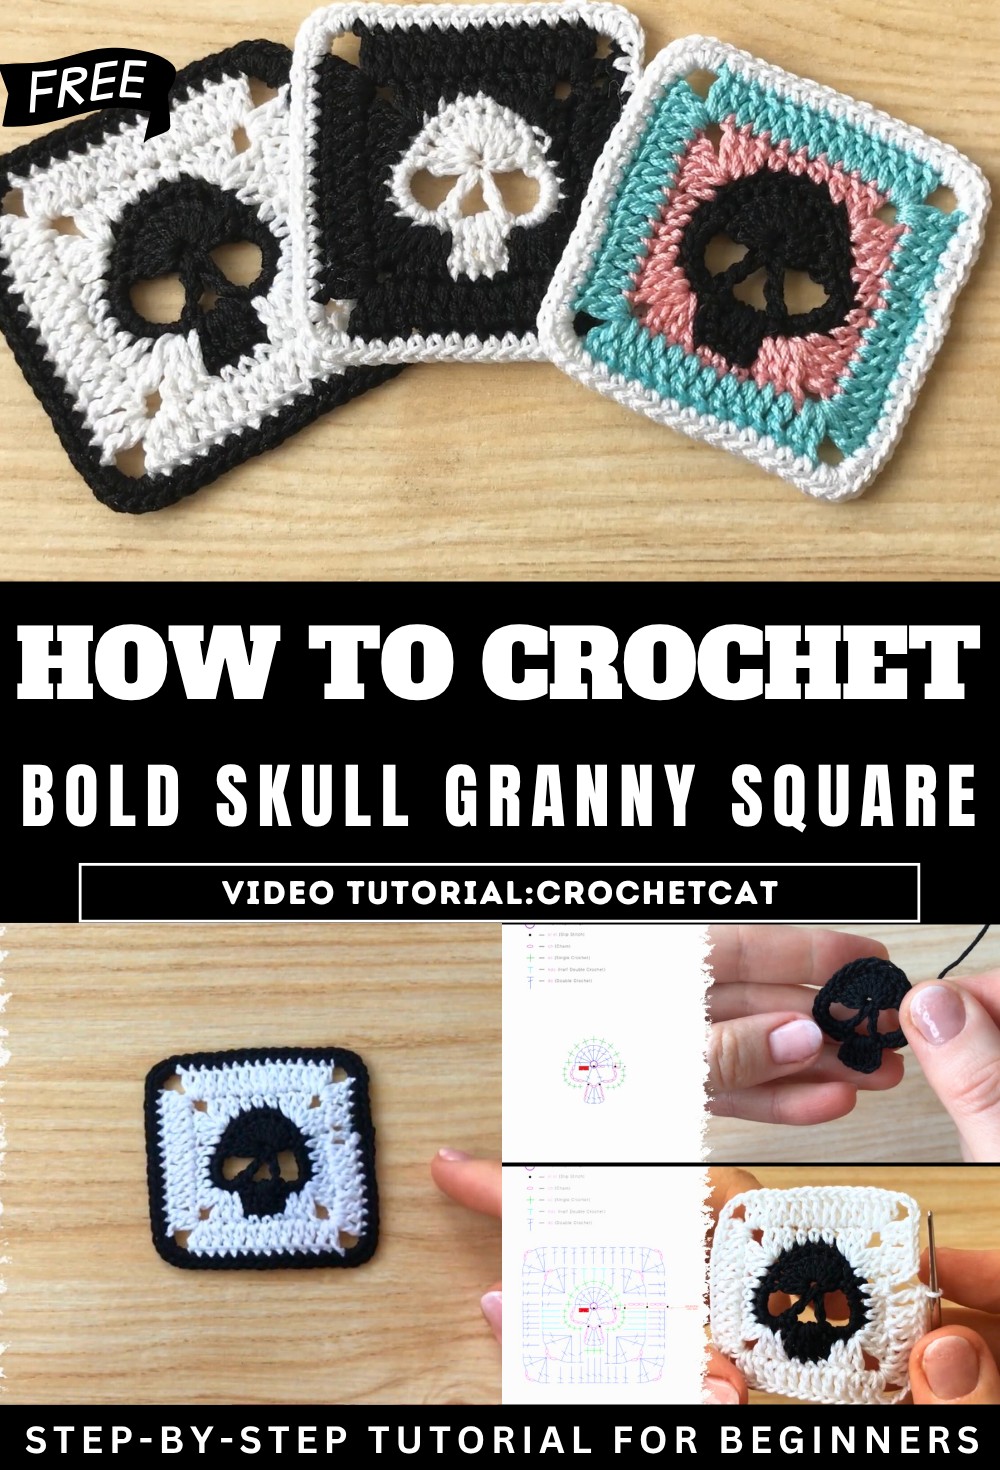
How to Crochet Bold Skull Granny Square for Halloween

Learn how to crochet an intricate skull granny square, perfect for beginners and advanced crocheters alike with a step-by-step tutorial for beginners. Using two yarn colors (black and white), the project begins with a magic ring and builds up through rows of double and single crochet stitches, adding corners to shape the square. It is perfect for Halloween decor and accessory-making. So, let’s get started!
Crochet Skull Granny Square Tutorial
This video tutorial provides step-by-step instructions for crocheting a unique skull granny square, blending beginner-friendly techniques with artistic detail. Below is a detailed breakdown of the process as explained:
Introduction
- The tutorial begins with an introduction to the project, showcasing the skull granny square design and its versatility.
- Required materials include:
- A crochet hook.
- Scissors.
- Two yarn colors — black and white (though viewers can use any color combination they prefer).
- The instructor notes that the yarn thickness affects the final size of the square and encourages viewers to subscribe for more tutorials.
Starting the Skull Base
Step 1: Magic Ring Creation
- The tutorial begins with the black-colored yarn.
- A magic ring is wrapped to start the project, creating the foundation for the skull design.
Step 2: First Row
- Double crochet stitches are worked into the magic ring.
- Chains and stitches are added to shape the base, incorporating loops for specific features.
- The first row is completed with slip stitching and ends hidden for a clean look.

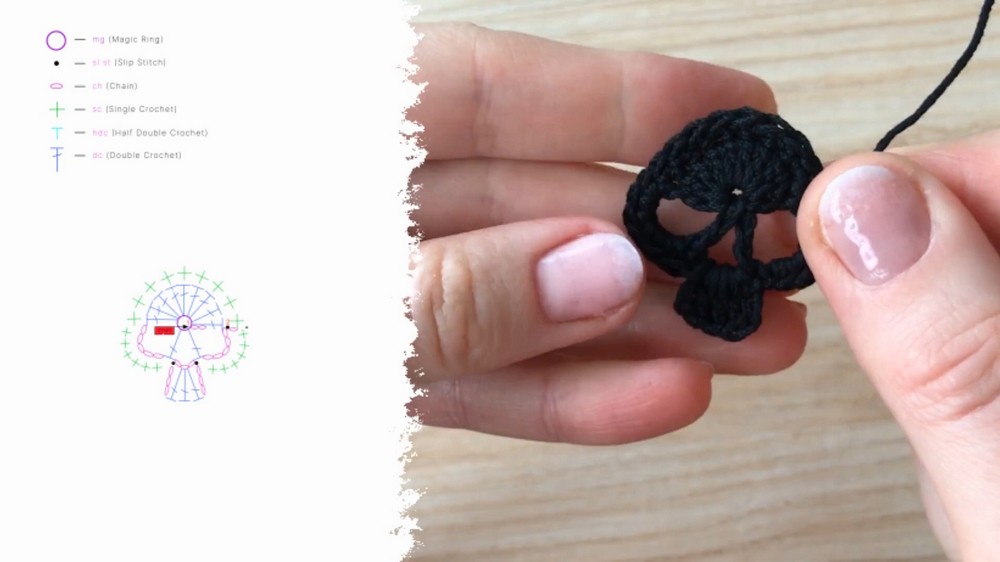
Building the Skull Design
Step 3: Second Row
- The next row begins with single crochet stitches to shape the details of the skull and loops for the face’s outline.
- Loops are positioned strategically for future rows, creating edges and transitions for the elements of the square.
- The design forms into recognizable features such as eye sockets.
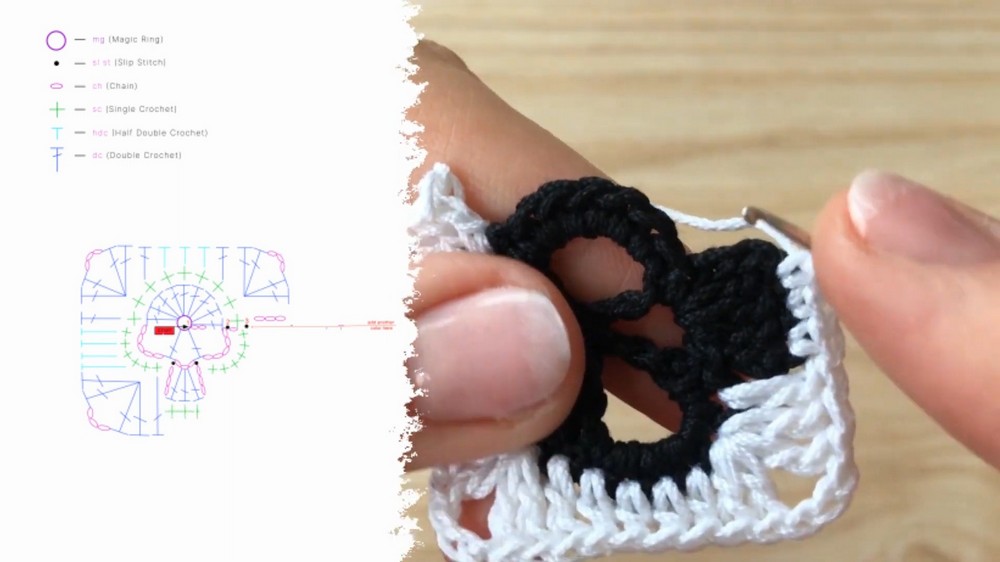
Transition to Square Shape
Step 4: Color Change
- The black yarn is replaced with white yarn.
- The skull design is transitioned into a square shape, beginning the border.
Step 5: Square Formation (Third Row)
- Double crochet stitches are used to create corners and edges for the square’s border.
- The instructor demonstrates how to make corners with repeating patterns.
- Multiple sections are worked with alternating corner structures and flat edges.
Expanding the Square
Step 6: Increasing Square Size
- A new row is added with identical patterns to expand the square larger.
- The corners are emphasized with additional double crochet clusters to keep the symmetrical square shape.
- This process can be repeated if viewers want a larger design for greater versatility.

Final Row
Step 7: Border Addition
- Black yarn is reintroduced to provide a finishing touch to the square.
- Single crochet stitches are worked along the edges, providing defined borders.
- Loops are cleaned with additional single crochet stitches to create a neat finish.
Step 8: Hiding Ends
- Yarn ends from the stitches are trimmed and tucked away for a polished look.
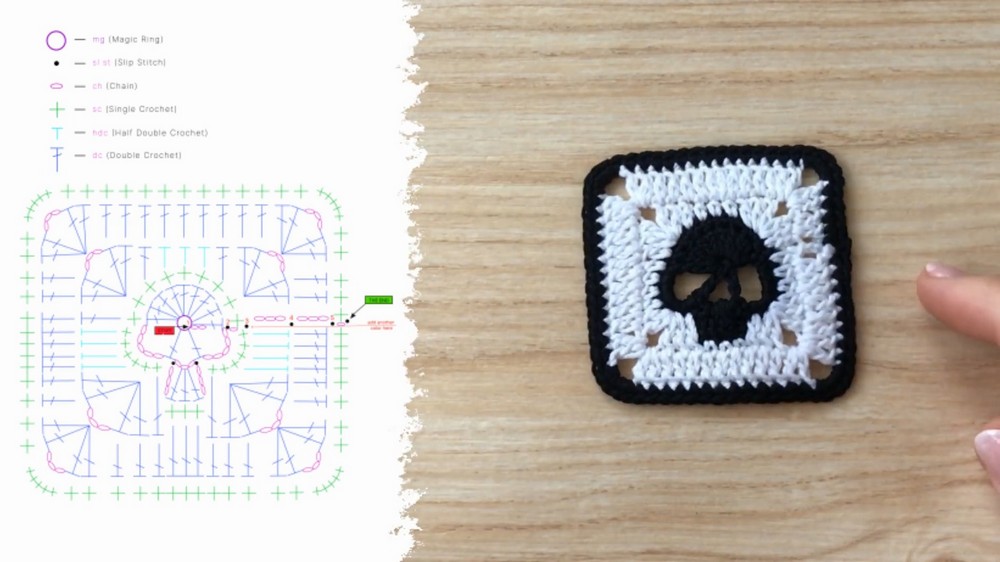
Final Result
- The completed skull granny square is showcased as a unique project.
- The instructor encourages viewers to personalize the design with their own colors or modifications, making it suitable for various crochet projects.
Conclusion
- The final square design combines creativity and beginner-friendly techniques, allowing crocheters of all levels to enjoy crafting a spooky-themed embellishment.