How to Crochet Carrot Plushie for Beginners
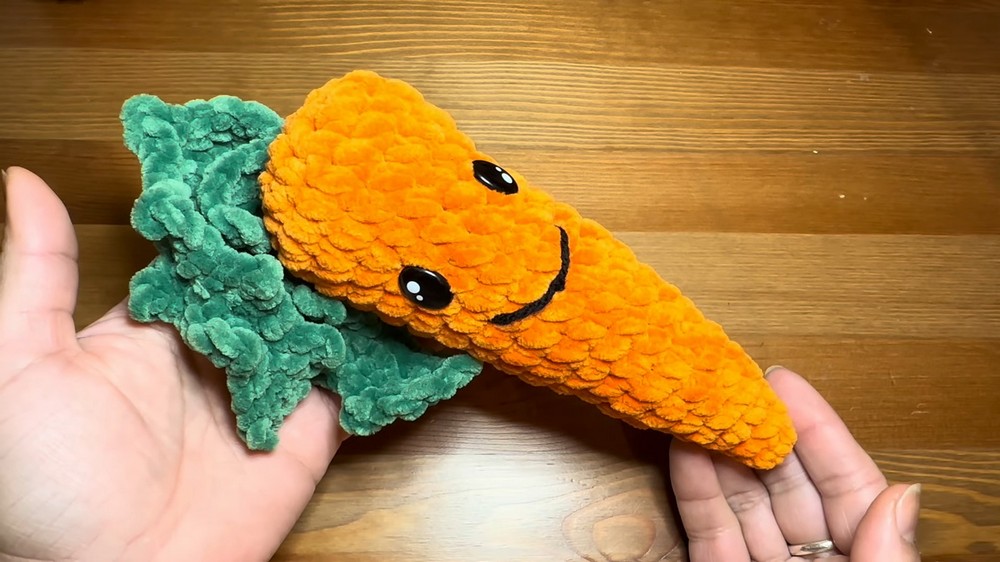
Learn how to crochet an adorable plush carrot, complete with leaves and embroidery details with a step-by-step tutorial for beginners. With step-by-step techniques, including single crochets, increases, magic rings, and Pico stitches, it is easy to crochet.
The tutorial also includes assembly guidance, crafting the carrot’s smile, and securing the leaves. Perfect for beginners, it’s a creative way to enhance crochet skills. So, continue reading till the end!

Crochet Carrot Tutorial
In this tutorial, the creator demonstrates how to crochet a cute plush carrot with detailed, step-by-step instructions. From creating the carrot’s body to assembling the leaves and embroidering the face, this project is perfect for beginners and intermediate crocheters alike. Below is a summarized outline of the tutorial.
Materials Needed
- Yarn: Orange plush yarn (for the carrot), green yarn (for the leaves), and black DK yarn (for the mouth embroidery).
- Hook: 5.5 mm crochet hook.
- Other Tools: Plastic security eyes (1.5 cm x 1 cm), scissors, stitch marker, darning needle, and fiberfill stuffing.
Creating the Carrot Body
-
Starting the Base
- Begin with orange yarn and create a slip knot. Options for starting include chains or a magic ring, depending on your preference.
- Work multiple rounds of single crochet, increasing gradually to form the base of the carrot.

-
Building the Shape
- Continue crocheting with a combination of single crochets and incremental increases to shape the wider body of the carrot.
- Once the desired width is reached, work several rounds without increases to give the carrot some height.
-
Adding Facial Features
- Insert plastic safety eyes four rounds below the top of the structure. Adjust their position until satisfied.
- Use black yarn and a darning needle to embroider a small smile two rows beneath the eyes. This is achieved by pulling the yarn and shaping it into a curved smile.

-
Decreasing and Closing the Top
- Start decreasing the stitch count gradually to taper the carrot’s top into a pointed shape.
- Before fully closing, stuff the carrot securely with fiberfill to give it a complete and firm shape.
- Close the final gap using decreases or a darning needle to ensure a neat finish.

Crocheting the Leaves
-
Creating the Foundation Chain
- Use green yarn to create a slip knot and chain the desired length for the leaf.
-
Adding Pico Stitches
- Work single crochets on the chain foundation, adding decorative pico stitches at intervals to shape the leaf’s edges.

-
- After completing one side, turn the work and crochet along the opposite edge, repeating the process to create a symmetrical look.
-
Repeat for Two Leaves
- Follow the same steps to crochet a second leaf.
Assembling the Carrot
-
Attaching the Leaves
- Tie the two leaves together at their bases using a secure knot.

-
Securing the Leaves to the Carrot
- Insert the tails of the leaf knot into the top of the carrot’s body using a crochet hook and tie them securely inside.
- To further secure the leaves, weave in the yarn ends and hide them within the carrot body.
-
Finishing Touches
- Adjust the shape of the carrot by massaging and reshaping the fiberfill.
- Ensure all loose ends are secured and trimmed neatly.
Final Notes
- The tutorial concludes with tips for tying off yarn and shaping the carrot for a polished look. The result is an adorable plush carrot, complete with leafy tops and a smiling face.
This project is fun, easy to follow, and ideal as a handcrafted gift or decorative item.