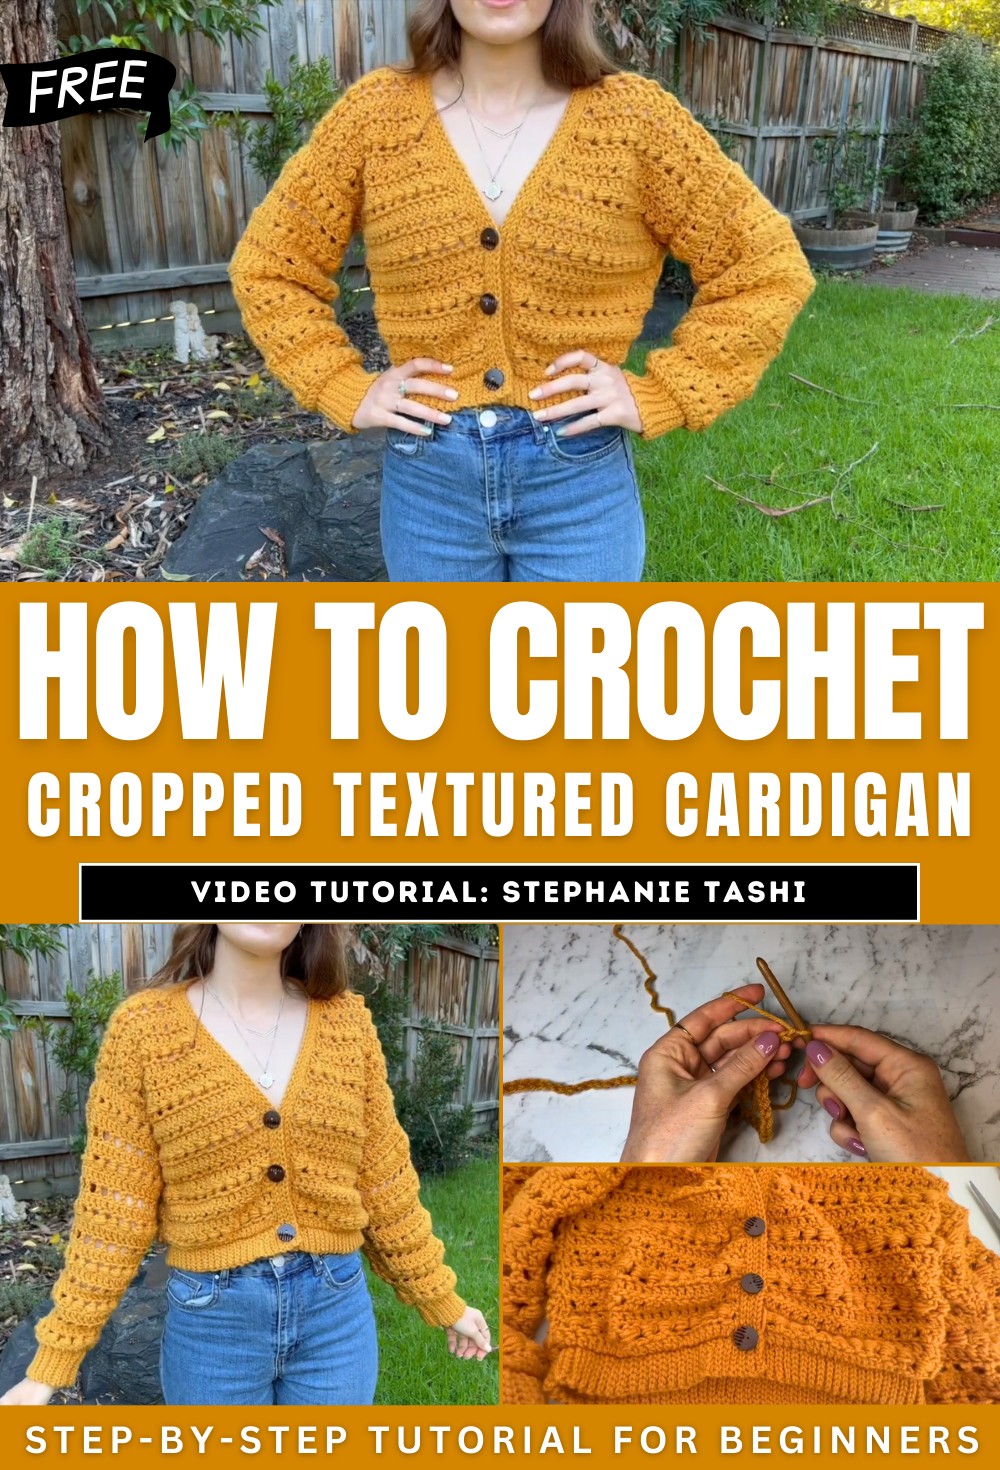
How to Crochet Cropped Textured Cardigan Tutorial

Learn how to crochet a textured, cropped cardigan, designed in an extra small size but fully adjustable for other sizes. The project uses 450 grams of medium-weight yarn, a 6mm hook, stitch markers, a darning needle, scissors, and buttons. The instructions cover creating the back panel, front panels, sleeves, ribbing, and assembly with clear explanations for various stitches like double crochet, seed stitch, and v-stitch.
Additionally, the video includes details on incorporating buttonholes, adjusting measurements, and completing the cardigan with button placement and finishing touches. Perfect for crochet enthusiasts of all skill levels! So, follow through with us for the complete tutorial.
Cropped Textured Cardigan Tutorial
The tutorial features a step-by-step guide on crocheting a textured cardigan, designed to be beginner-friendly and adjustable for various sizes. Using medium-weight yarn, a 6mm hook, and buttons, this cardigan can be made in multiple sizes ranging from XS to 3XL. The presenter offers instructions on adjusting the size and shape, while providing tips for creating the panels, arms, and finishing touches, including ribbing and button attachment.
Materials Needed
- Yarn: Medium-weight yarn (450 grams for XS)
- Hook: 6mm crochet hook
- Tools: Scissors, stitch markers, a darning needle, and buttons

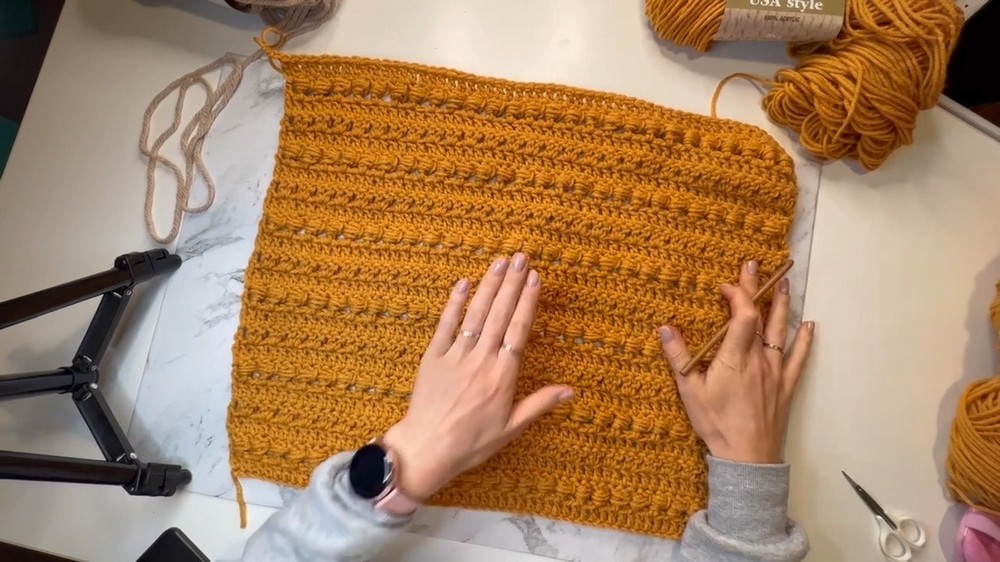
Back Panel
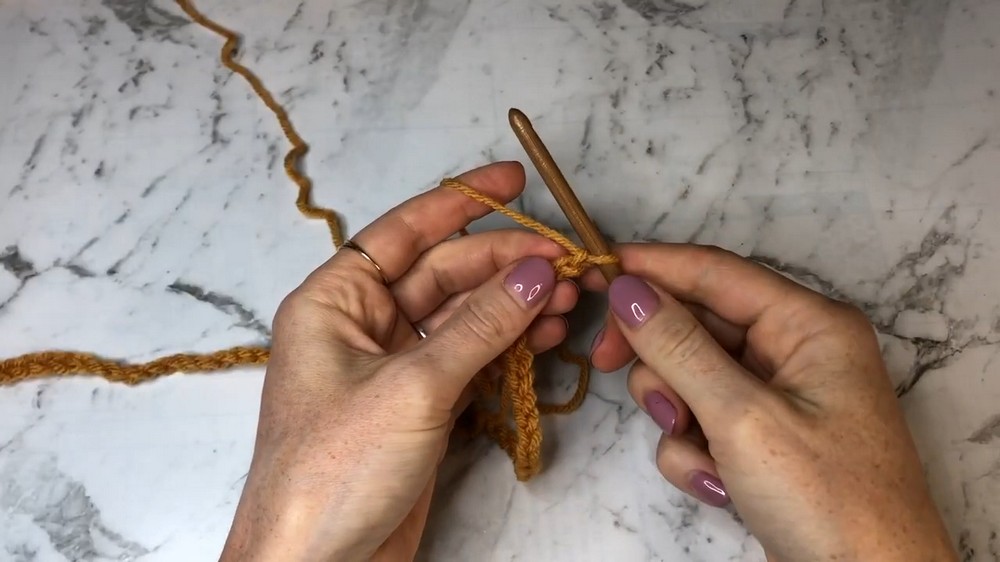
- Foundation Chain: Make the foundation chain according to the size you’re creating. Adjustable length dimensions are provided to ensure a comfortable fit.
- Double Crochet Rows: Work the first row entirely using double crochets. Odd-numbered rows always consist of double crochets.
- Seed Stitch Pattern: For even-numbered rows, create alternating seed stitches and double crochets, skipping every second stitch.
- V Stitch Pattern: The next even row alternates double crochet pairs to form V-shaped stitches.
- Repeat Pattern: Continue the pattern—double crochets, seed stitches, V stitches—until completing 23 rows in total. Adjust the panel’s length depending on personal preference.

Front Panels
- Foundation Chain: Create the foundation chain like the back panel, but with half the stitch count for each side.
- Pattern Formation: Follow the same double crochet, seed stitch, and V stitch pattern as the back panel.
- Decreases for Shape: After 12 rows, decreases are introduced at alternating points to shape the neckline. Ensure the right and left panels mirror each other to maintain consistency.
Sleeves
- Foundation Chain: Begin with the specified stitch count for your size.
- Row Pattern: Create rows in a repeating pattern of double crochets, seed stitches, and gap stitches. Gap stitches involve chain spaces between every other stitch.
- Reductions for Tapering: Starting at row 12, perform decreases on both sides of alternating double crochet rows to taper the sleeve.
- Complete Rows: Work until reaching 23 rows or to a preferred sleeve length.
Assembly
- Join Panels: Stitch the shoulder seams of the front panels to the back panel.
- Attach Sleeves: Align the middle point of the sleeve with the shoulder seam and stitch securely.
- Fold and Seal: Fold the cardigan and stitch along the sides and sleeve edges to complete the base construction.

Adding Ribbing
- Bottom Ribbing: Create a ribbing strip using slip stitches and back-loop stitching until it matches the width of the cardigan’s bottom edge. Attach securely.
- Neck Ribbing: Work along the neckline edge, adding back-loop slip stitches while inserting buttonholes. This step allows the cardigan to open or close as needed.
- Sleeve Cuffs: Crochet smaller ribbing for the sleeves to fit snugly around the wrist. Attach cleanly to the end of each sleeve.

Finishing Touches
- Button Attachment: Match buttons to the planned buttonholes and stitch them on. Ensure alignment for a polished look.
- Weaving Ends: Use a darning needle to hide loose yarn ends neatly.
- Final Review: Examine the cardigan for consistent stitching and correct any unevenness.

Conclusion
The tutorial provides detailed guidance for crafting a textured cardigan, emphasizing customization options and ensuring the user can achieve professional-looking results. By following the patterns, assembly instructions, and finishing steps, viewers can create a stylish and practical wardrobe staple.