How to Crochet Daisy Granny Squares & Join Them

In this post, you’ll learn how to join daisy granny squares to create a blanket for beginners and experts. Starting from preparing the squares and identifying the right and wrong sides, to weaving ends and mastering single crochets for a raised join effect. She offers tips for aligning stitches, correcting mistakes, and maintaining tension to ensure a smooth finish.
The tutorial also explains how to add borders using half double crochets, chain stitches, and neat corners to give the blanket a polished look. With clear instructions, this video is perfect for crocheters of all levels, crocheting beautiful blankets. So, follow through with us for the complete tutorial.
@sleepykittycrochetwithkimb3489

Daisy Meadows Blanket Tutorial
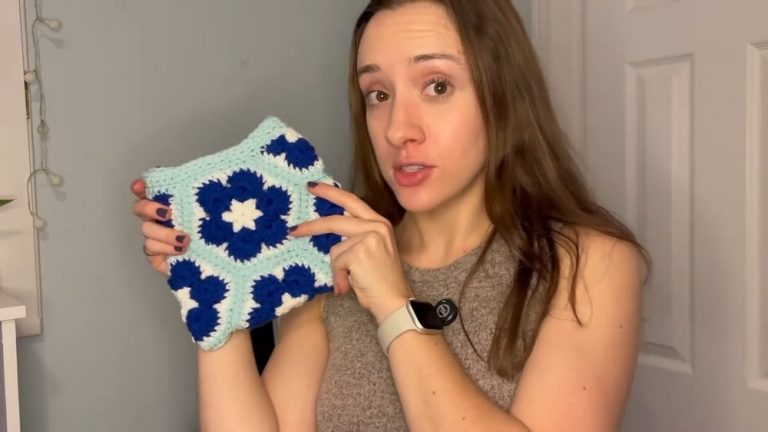
This tutorial by Kimberly demonstrates how to crochet a charming “Daisy Meadows Blanket,” a granny square throw featuring spring-inspired daisy designs. The project is simple, beginner-friendly, and cost-effective, making it accessible to anyone. Below is a structured summary of the steps and materials used in the tutorial.
Introduction
- Kimberly introduces the “Daisy Meadows Blanket,” designed to bring a touch of springtime to brighten up gloomy weather.
- Originally intended as a baby blanket, it was adapted into a small throw (48 squares: 6 rows by 8 columns).
- The blanket features daisy-themed granny squares with a simple border, perfect for beginners.
Materials Needed
- Yarn: Kimberly uses Big Twist yarn, but any worsted-weight yarn will work.
- Colors: Light Green, White, Varsity Yellow.
- Tools:
- 5.5 mm crochet hook (preferred size for this project).
- Scissors for trimming loose ends.
- Yarn needle for weaving in ends.
- Measuring tape (optional).

Overview of the Process
The tutorial is divided into steps, starting with the individual daisy granny squares, followed by assembly, and finishing with a border design.
1. Making the Daisy Granny Square
Center of the Square: The Magic Ring
- Kimberly demonstrates creating a magic ring for the square’s center.
- A golden yellow yarn is used to form the middle circle with evenly spaced stitches.

Adding Petals
- After completing the center, white yarn is added to create daisy petals.
- The tutorial shows how to use stitches to make petals that consist of clusters, creating a soft, floral effect.
Turning the Circle into a Square
- Using light green yarn, the circle with petals is turned into a square.
- Specific stitches adjust the transitions to create straight edges and corners.

Expanding the Granny Square
- The square is made larger with subsequent rounds of green and white yarn.
- Additional double crochets and chain patterns create a clean square shape.
Finishing the Square
- Kimberly explains how to securely finish each square and how to weave in the yarn ends for a polished look.

2. Joining the Squares
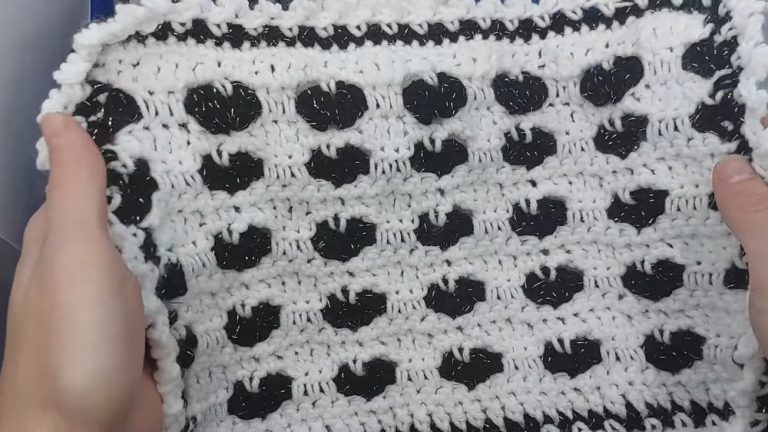
- The squares are joined together using a single crochet join in bright yellow yarn.
- This technique creates a vibrant frame around each square, enhancing the daisy design.
3. Adding the Border
- A simple border is added to complete the blanket using yellow and white yarns.
- The border ties the design together while maintaining the project’s simplicity and elegance.

Tips and Final Notes
- Kimberly offers advice on:
- Counting stitches to ensure even patterns.
- Adjusting the design if desired (e.g., color variation).
- Properly securing and weaving in loose ends to prevent unraveling.
Project Outcome
- The finished “Daisy Meadows Blanket” consists of bright, daisy-covered squares with a simple yet beautiful border. It’s lightweight, durable, and perfect for springtime use.