How to Crochet Elephant Amigurumi for Beginners
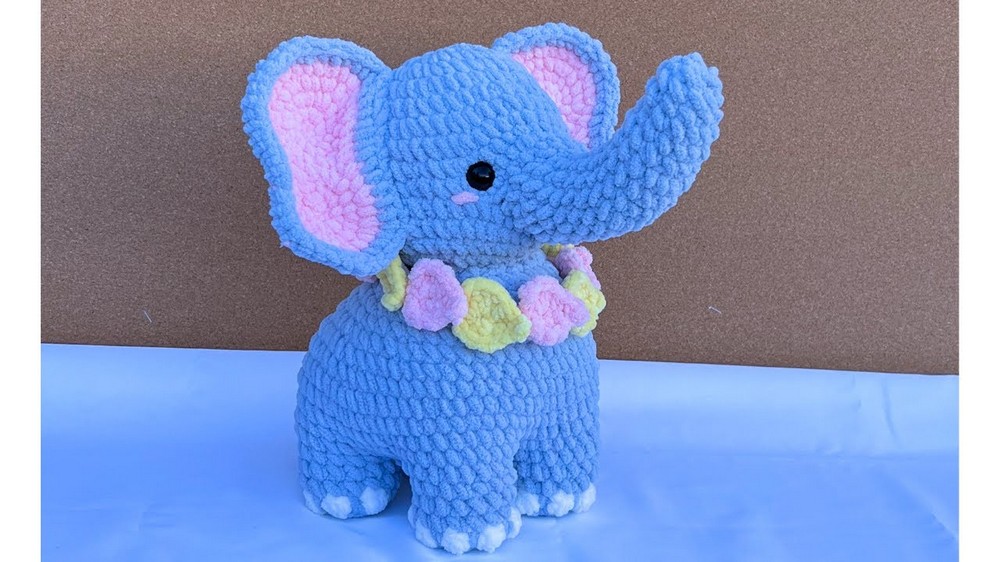
Learn how to crochet an adorable amigurumi animal using Bernat Blanket super bulky yarn perfect for adding to your nursery. The creator guides through making the feet, body, head, trunk, ears, and tail, sharing detailed techniques like magic rings, stitch markers, single and bubble stitches, and decreases for shaping.
Featuring vibrant yarn colors—pink, white, yellow, and blue—the project adds safety eyes, stuffing, and finishing touches like blush for personality. This comprehensive tutorial is perfect for passionate crocheters and is perfect for gifting when finished.
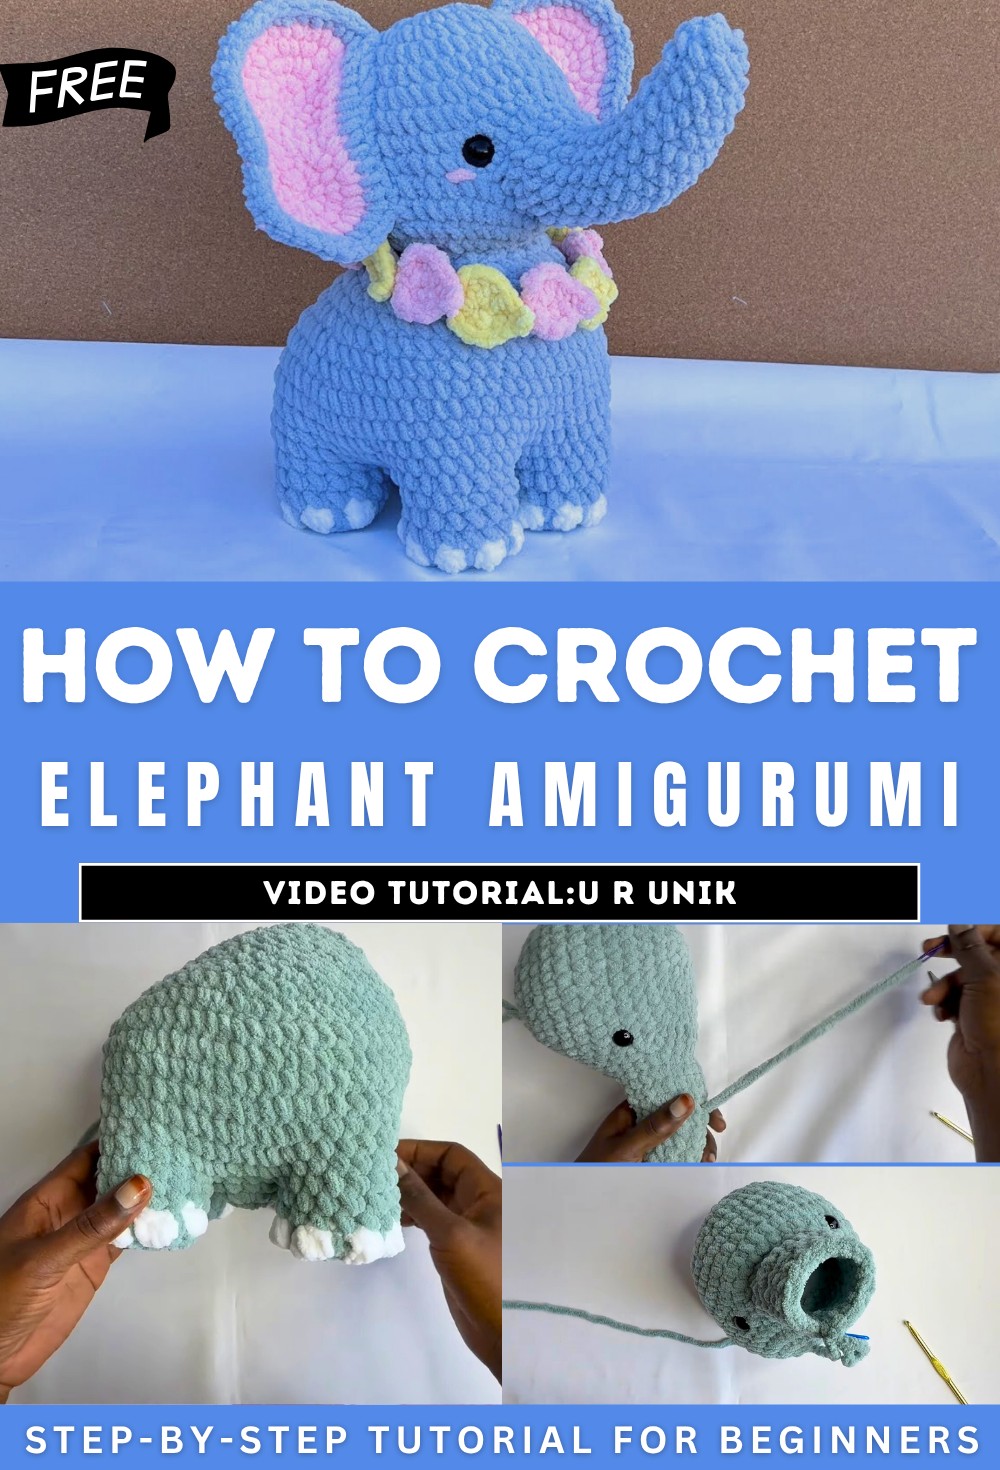
Crochet Elephant Amigurumi Tutorial
Introduction to Amigurumi
- The video starts with the host introducing the concept of amigurumi, which hasn’t been covered yet on the channel.
- The creator emphasizes the versatility of crochet and encourages viewers to experiment with creating different designs beyond bags.
- The project for this tutorial is a medium-sized amigurumi elephant, designed to inspire passionate crocheters.
Materials and Tools
- Yarn: The tutorial uses bulky yarn from the Bernat Blanket brand in four colors—pink, white, light blue, and yellow. The yellow yarn is later used for creating a decorative flower for the elephant’s neck.
- Additional items:
- Fiber stuffing.
- Pair of scissors.
- Crochet hook (size 5).
- Two 24mm safety eyes.
- Stitch markers.
- A needle for sewing seams.
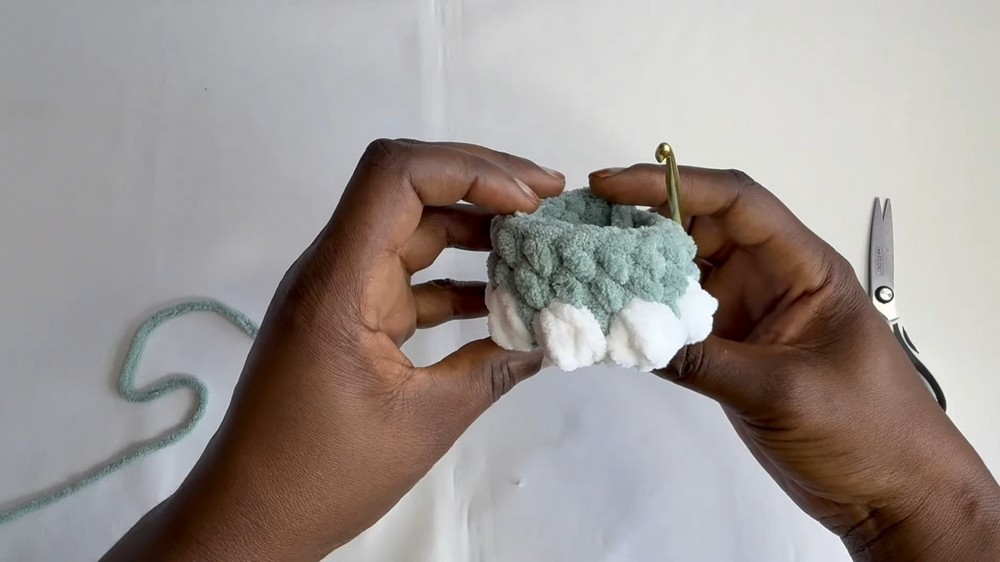
Making the Elephant’s Feet
- The elephant requires four feet. The tutorial demonstrates how to crochet one, while three feet are pre-made.
- The process begins with a magic ring, followed by multiple crochet rounds to shape and expand the foot.
- Color changes are introduced, with blue and white used in alternating rounds.
- Special stitch techniques, such as bubble stitches, are used for texture and detailing.
- After completing the rounds for shaping, the feet are set aside to be attached to the body later.

Crocheting the Body
- The tutorial transitions to creating the elephant’s belly using the same starting technique—a magic ring.
- Multiple rounds of crochet follow, with increases to shape and expand the belly.
- After constructing the base, the feet are directly connected to the belly using single crochets.
- The joining process is carefully explained, ensuring the alignment of legs and uniform distribution of stitches.
- Once the legs are attached, additional rounds are worked to add height and define the torso.

Adding Shape and Stuffing
- After completing the initial rounds of the torso, fiber stuffing is added to the legs and body to define the shape and make it sturdy.
- The host outlines how to decrease stitches across several rounds to taper the body upward, providing a natural contour for the elephant’s design.
- Viewers are directed to an Etsy shop for detailed pattern instructions for continuing the body shaping process through later rounds.

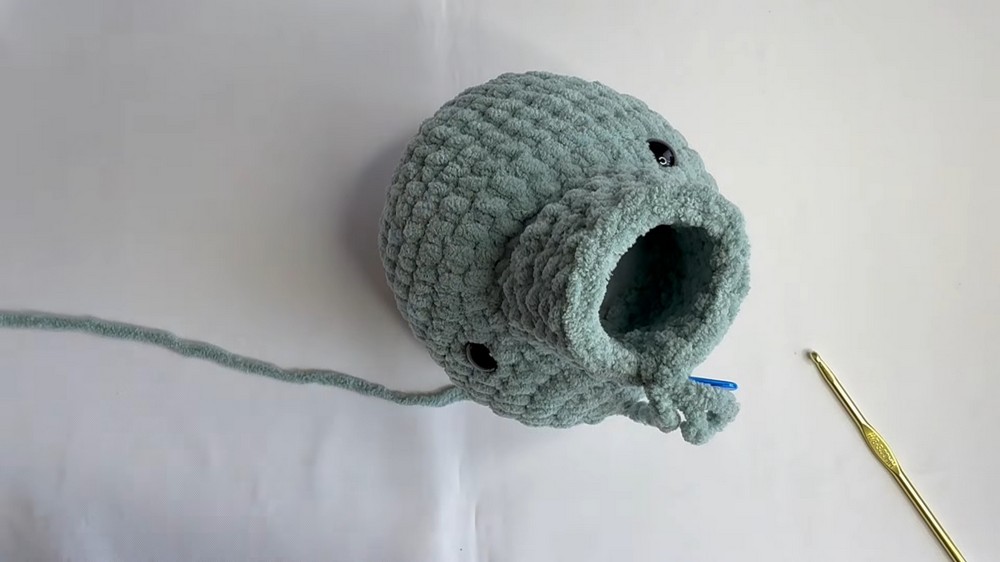
Creating the Head
- The head begins with a magic ring and follows a similar pattern of rounds and increases to achieve the desired size and shape.
- A gap is created at the front of the head by chaining stitches mid-round for the elephant’s trunk.
- After shaping the head and trunk, the safety eyes are placed correctly between rows 9 and 10, close to the trunk.
- The trunk is crocheted separately with rows worked in rounds to create its curved appearance. Strategic yarn adjustments ensure the trunk faces correctly.
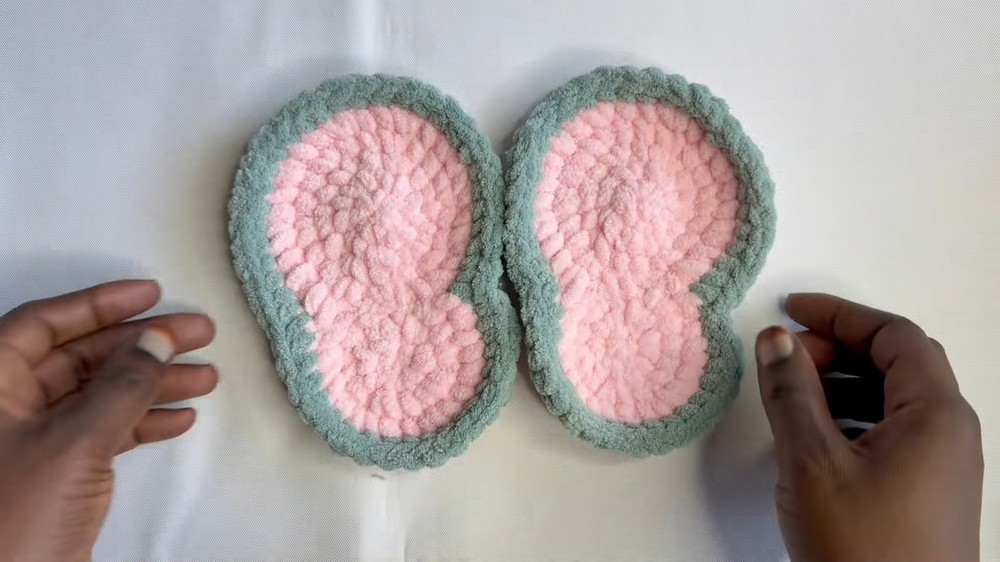
Crocheting the Ears
- The ears are created in two parts: a smaller inner section and a larger outer section, both crocheted separately.
- After completing the pieces, the two sections are sewn together, and a border of single crochet stitches is added.
- Color changes in the stitching are used to highlight the edges and enhance the overall aesthetic.

Crafting and Attaching Remaining Parts
- The tail is crocheted separately as a simple cylindrical shape with rounds worked continuously.
- Makeup/blush is added for decorative purposes using yarn for subtle accents on the face.
- The ears are sewn onto the head from row 3 to row 10, ensuring symmetry on both sides.
- Finally, the head is attached securely to the body using doubled yarn to maintain sturdiness, while the tail is sewn onto the back.
Final Touches
- The completed elephant is displayed, showcasing the intricate details of the design, including the trunk, ears, and blush accents.
- The creator ensures the finished product is secure and encourages viewers to share their creations or purchase the complete pattern for detailed instructions.