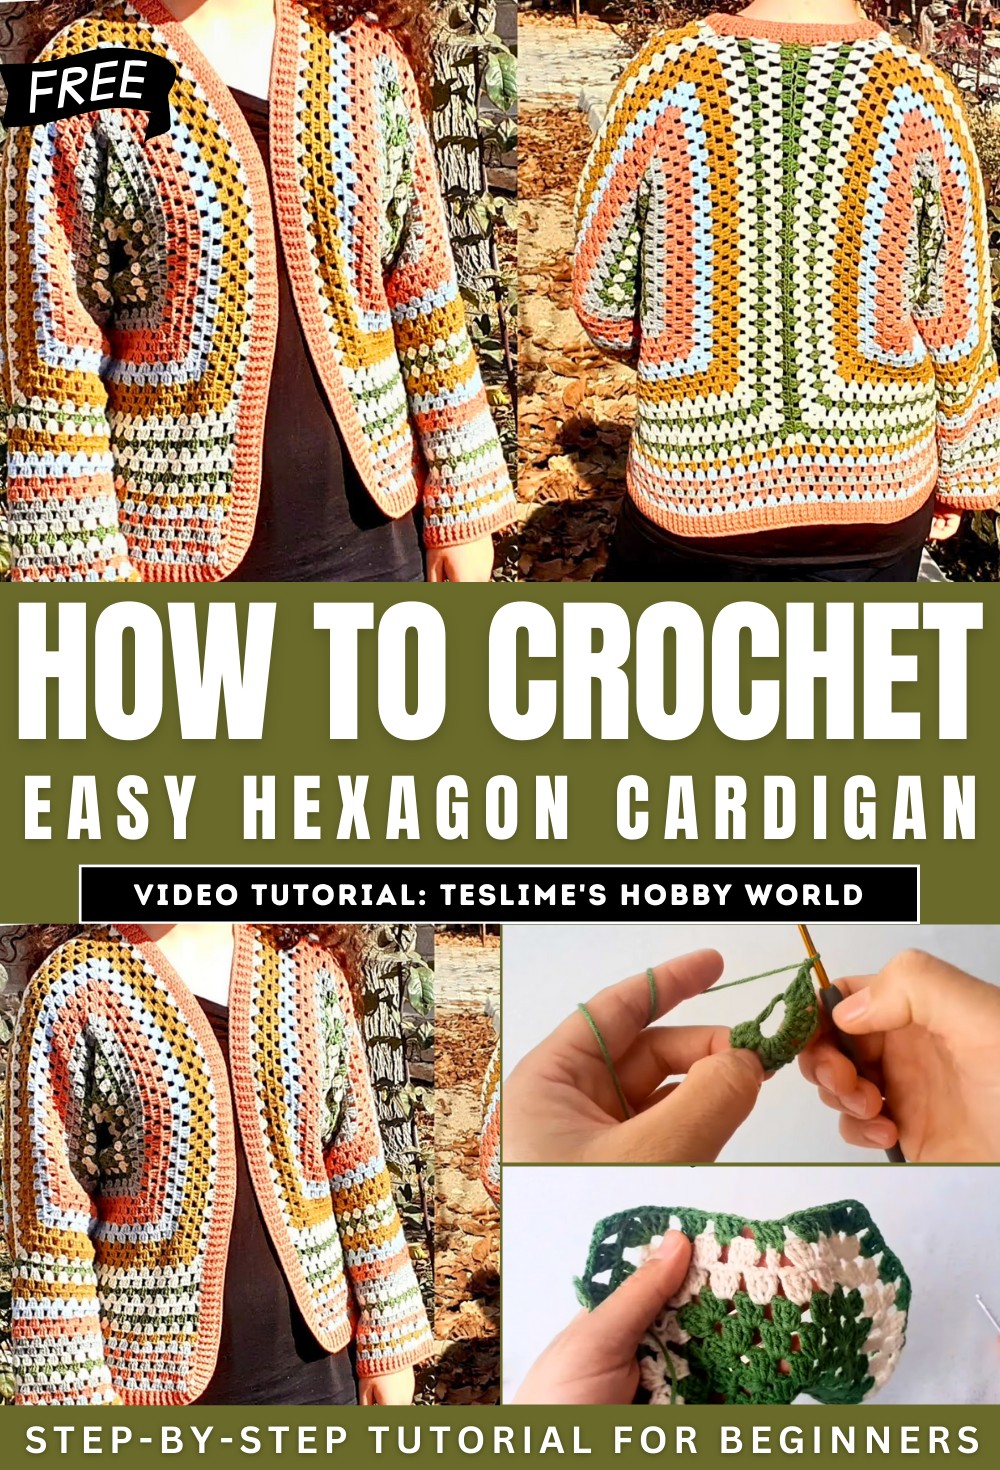
How to Crochet Fall Cardigan for Ladies With Granny Stitch
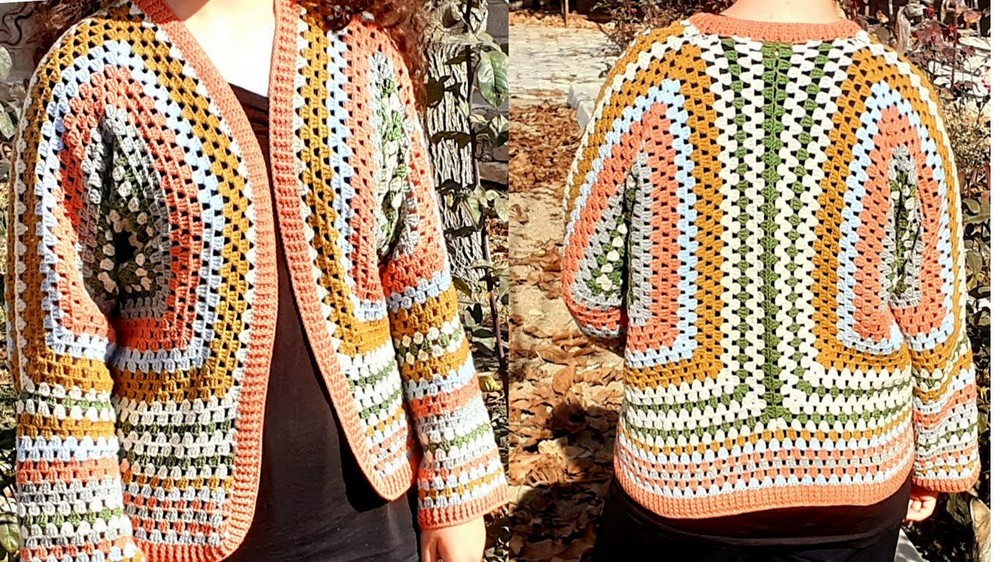
In this post, you’ll learn how to crochet a hexagon fall granny cardigan for beginners and experts. It is an easy-to-follow project that beginners can complete. The cardigan is created by making two separate hexagon pieces that are later joined together. The tutor suggests using cotton yarn for the project, and notes that using a batik yarn can simplify things by eliminating the need to change colors.
The main stitches used are double crochet and triple crochet, and the video also shows how to decrease stitches for a narrower sleeve. The project is versatile as it can be easily adjusted to fit different sizes. Using a stitch marker can be very helpful to keep track of your stitches and prevent mistakes.
Materials
- Yarn: The creator uses cotton yarns like “etrofil Jean” and “Alize Koton Gold” but mentions that any cotton or batik yarns can be used.
- Crochet Hook: A 3 mm and a 3.5 mm hook are used for this project.
Cardigan Construction
The cardigan is made by crocheting two hexagonal pieces. The video shows how to make one of these pieces, which will be the basis for the entire cardigan.
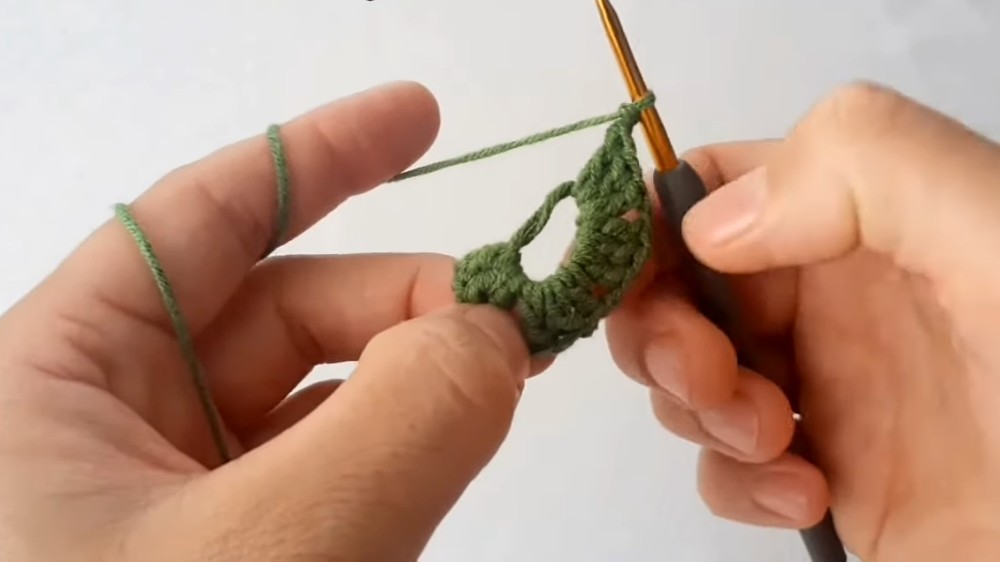
- Starting with a Magic Ring: The process begins with a magic ring.
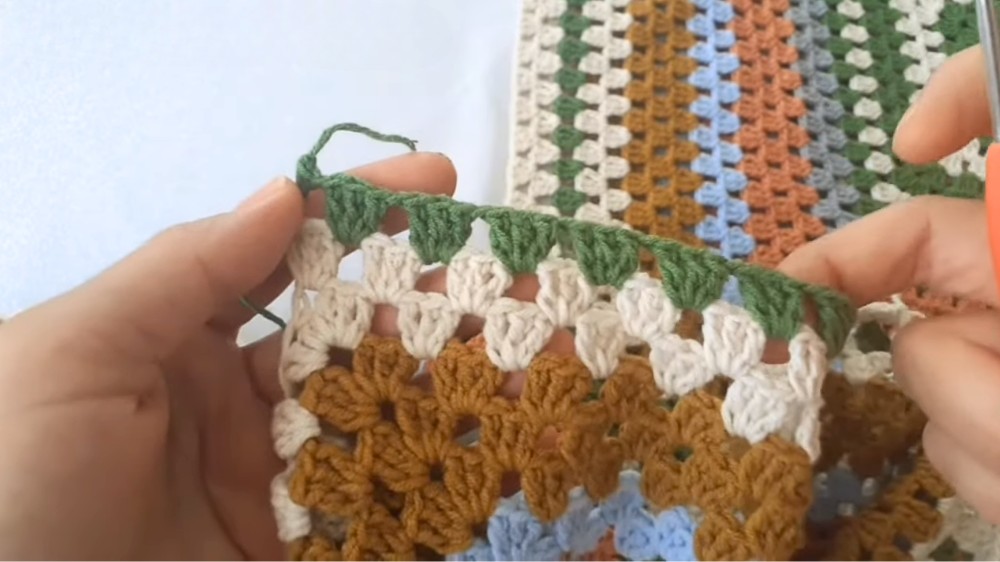
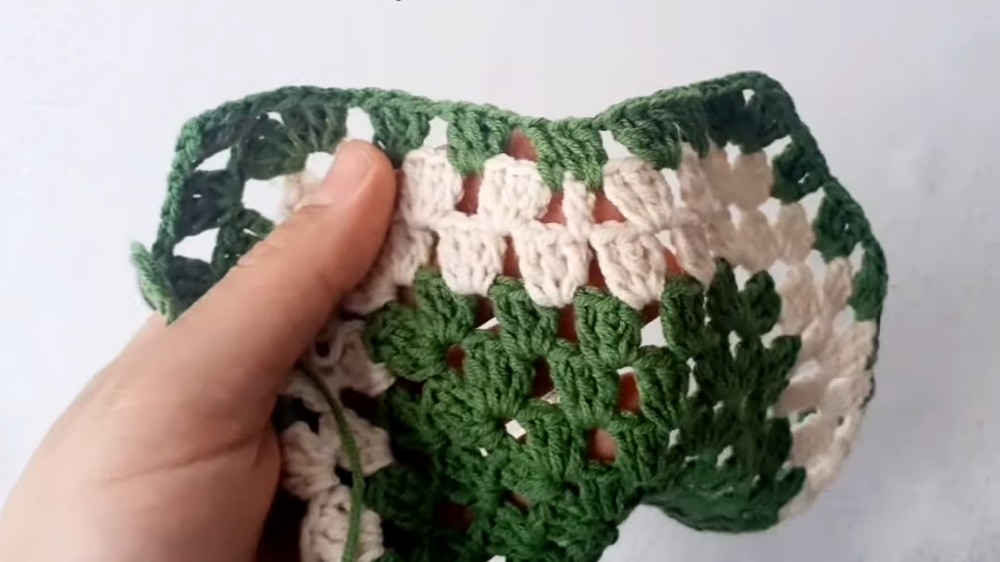
- Subsequent Rows: The first row is made with six clusters of three double crochets, separated by two chain stitches. For the next rows, a single chain is used for straight sections, while two chains are used for corners, to form the hexagonal shape.
- Changing Hook Size: After completing three rows with the 3 mm hook, the creator switches to the 3.5 mm hook for the fourth row. From this row onwards, all stitches are worked as triple crochets instead of double crochets.
- Changing Colors: The video demonstrates how to seamlessly change colors after completing a set number of rows. To change colors, you end the row with two chain stitches and a slip stitch to join the first stitch. The yarn is then cut and the new color is started with a triple crochet in the corner space.
- Sleeve Decreases: To shape the sleeves, decreases are made on the arm sections. The video states that this process is repeated three times for the sleeve.
- Assembling the Cardigan: The two hexagonal pieces are joined by crocheting them together at the shoulder and the back.
- Extending the Body and Sleeves: Once joined, the video shows how to extend the length of the body and sleeves by continuing to work in rows around the entire circumference.
- Adding Ribbing: The last step is to add ribbing to the cuffs and the front edges and bottom of the cardigan. The ribbing is created using a combination of front post and back post double crochets. After the ribbing rows, a final row of single crochets is worked around the entire edge for a clean finish.