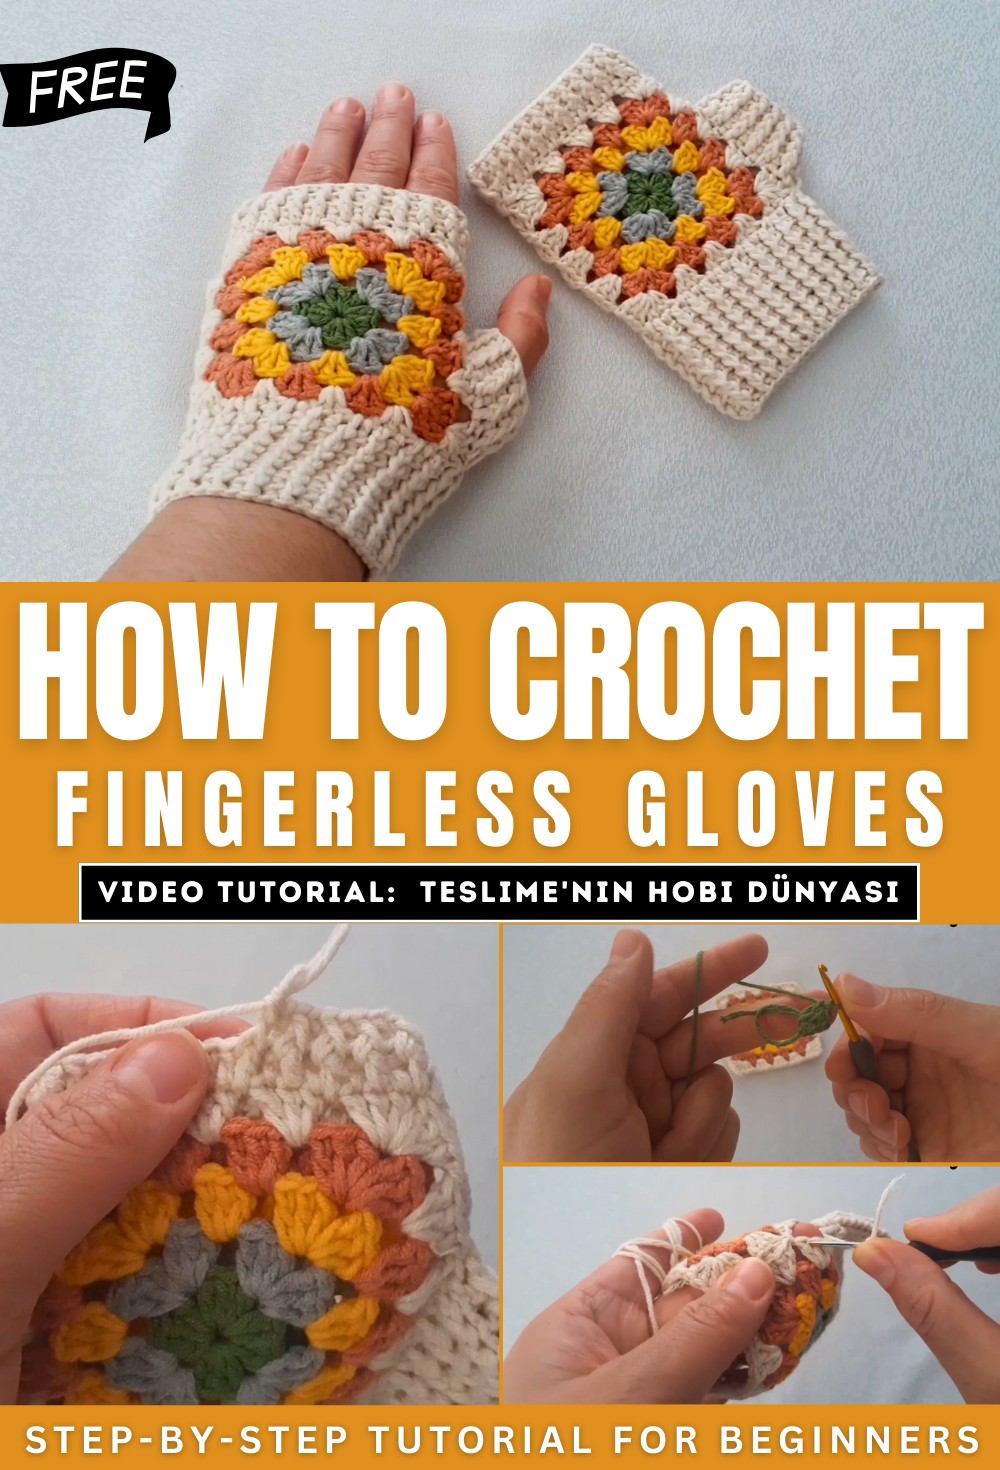
How to Crochet Granny Square Fingerless Gloves for Girls

With a step-by-step tutorial, learn how to crochet a pair of fingerless gloves using granny squares, perfect for spring and summer. The process is broken down into three main stages. First, the video demonstrates how to create the individual granny square motifs, starting with a magic ring and then adding subsequent rounds of different colored yarn. Next, it shows a clever method for joining the motifs together as you crochet the final row of the second square, leaving a space for the thumb opening.
Finally, the tutorial explains how to finish the gloves by continuing to crochet from the joined motifs to form the cuff, followed by the ribbed sections for the thumb and fingers using a combination of front and back post double crochet stitches. So, follow through with us for the complete tutorial.
Crochet Fingerless Gloves Tutorial
This video provides a detailed tutorial for crocheting a pair of fingerless gloves using a granny square motif. The project is broken down into three main sections: creating the motifs, joining them, and then finishing the gloves by crocheting the cuff, thumb, and finger sections.
Materials and Tools
- Cotton yarn in multiple colors.
- A 2.5 mm crochet hook.

Step-by-Step Instructions
- Crocheting the Motif: The tutorial begins with creating a magic ring. The first round consists of double crochet clusters and chain spaces to form the corners. Subsequent rounds are worked in new colors, with the corners being formed by a cluster of three double crochet stitches, a chain, and another cluster of three double crochet stitches. The spaces between the corners are filled with three double crochet stitches.

- Joining the Motifs: The video demonstrates how to join the motifs as you crochet the final round of the second motif. The joining is done by using slip stitches to connect to the corresponding chain spaces and corners of the first motif, leaving an opening for the thumb.

- Crocheting the Cuff, Finger, and Thumb:
- Cuff: After joining the motifs, you continue crocheting in the round to form the cuff. The first round is made of double crochet stitches, and then the pattern switches to alternating front post and back post double crochet stitches to create a ribbed texture. The video suggests making six rows for the cuff.

-
- Thumb: The yarn is joined at the thumb opening, and a round of double crochet stitches is worked. This is followed by a few rows of the front post and back post double crochet pattern for a ribbed thumb finish.
- Fingers: The process for the finger opening is the same as the thumb, beginning with a round of double crochet stitches and then transitioning to the ribbed pattern for the final rows.