How To Crochet Granny Triangle for Beginners

Learn how to crochet a beautiful granny triangle pattern, perfect for bunting decoration or projects like shawls. Starting with a slip knot and magic ring, the pattern alternates between chain stitches, double crochets, and slip stitches to form corners and structured rows. The creator uses multiple yarn colors to add vibrancy and explains each step in detail, including color changes and finishing touches. This guide is beginner-friendly and ideal for enhancing crochet skills with a versatile triangle design.

Crochet Granny Triangle Tutorial
The tutorial explains how to crochet a beautiful granny triangle pattern. It is suitable for beginners, and you can use any yarn with the appropriate hook size. The design is versatile and can be used for various projects like shawls, decorations, or as part of larger patterns.
Materials Required
- Yarn in at least three colors (or as preferred for customization).
- A crochet hook matching the yarn size.
- Scissors to trim yarn.
- A tapestry needle to weave in ends.
Crocheting the Base (Round 1)
-
Starting the Triangle:
- Begin with a slip knot and make a ring using chain stitches and a slip stitch.
- This forms the base into which the stitches will be worked.
-
Forming the Triangle’s Structure:
- Create a starting row of double crochets into the ring and separate sections with chains.
- Work sets of double crochets into the ring, creating three distinct clusters to shape the triangle’s corners.
- Finish the round with a slip stitch to close the triangle.
-
Finishing the First Round:
- The first round completes a small triangle. The instructor shows how to finish off the round by cutting the yarn and securing it, preparing for the next color.
Adding a Second Color (Round 2)
-
Changing the Yarn:
- Introduce a second color with a slip knot, connecting the new color to one of the corner spaces from the previous round.
-
Building the Corners:
- Work a new set of double crochets and chains into the corner space to maintain the triangular shape.
- Each corner involves clusters of double crochets, separated by chains, to allow the triangle to expand.

-
Filling the Sides:
- Between the corners, chains are worked into the spaces along each side, continuing the pattern of clusters separated by chains.
- The instructor emphasizes the importance of maintaining symmetry as the triangle grows.

Adding Additional Rounds (Round 3 and Beyond)
-
Changing Colors Again:
- Each new round begins with a change of color, following the same process of knotting the new yarn and securing it to a corner space.
-
Continuing the Pattern:
- Repeat the same sequence: add clusters of double crochets in each corner with chains for shaping and work evenly spaced clusters along the triangle’s sides.
- Each round adds more rows and gradually expands the triangle.
-
Focus on Symmetry:
- The tutorial emphasizes maintaining consistent chains and double crochet clusters to produce a neat, even triangle.
Finishing the Granny Triangle
-
Final Slip Stitch:
- After completing the desired size, the pattern is secured with a slip stitch, and the yarn is cut off.
- The instructor demonstrates how to weave in yarn ends for a clean finish.
-
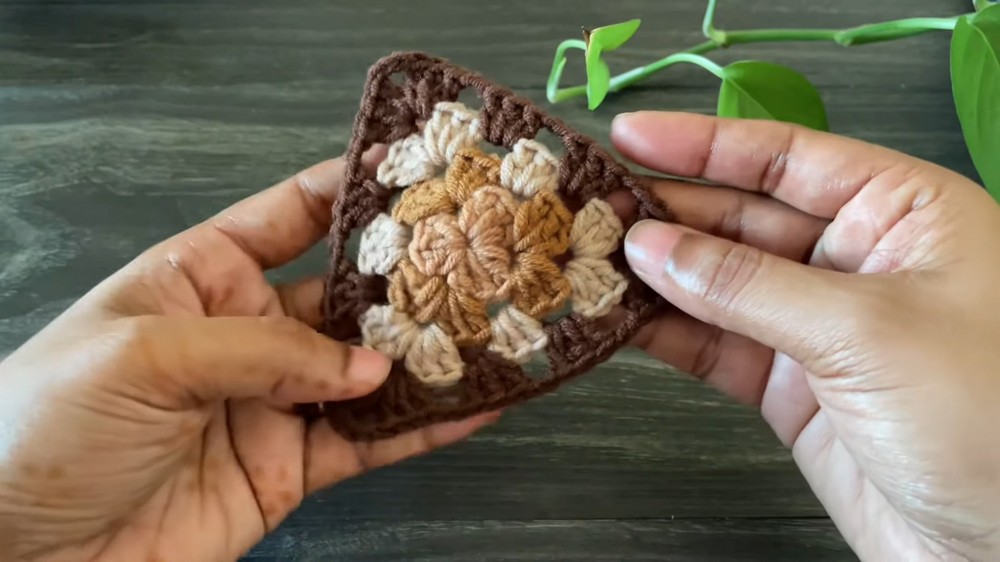
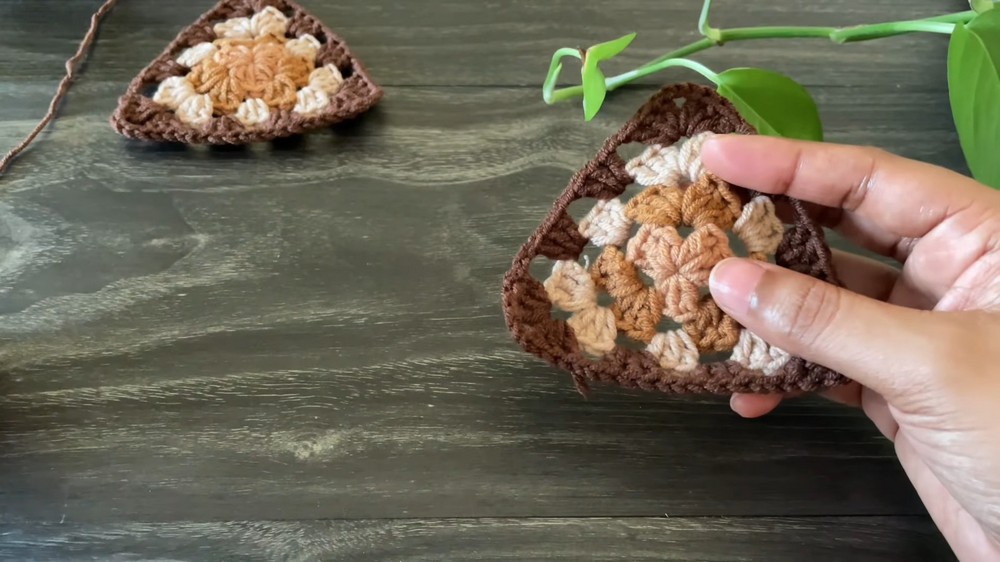
Final Design Review:
- The finished triangle is presented as a vibrant, symmetrical piece with clear granny-style corners and edges.

Additional Notes
- The tutorial encourages viewers to customize with different color combinations or additional rounds to suit their needs.
- The triangle pattern can be used individually or combined to craft larger projects.

Conclusion
- The video concludes with a positive note, encouraging viewers to like, subscribe, and explore more tutorials from the channel.
- This granny triangle pattern is beginner-friendly and a great project to enhance crochet skills.