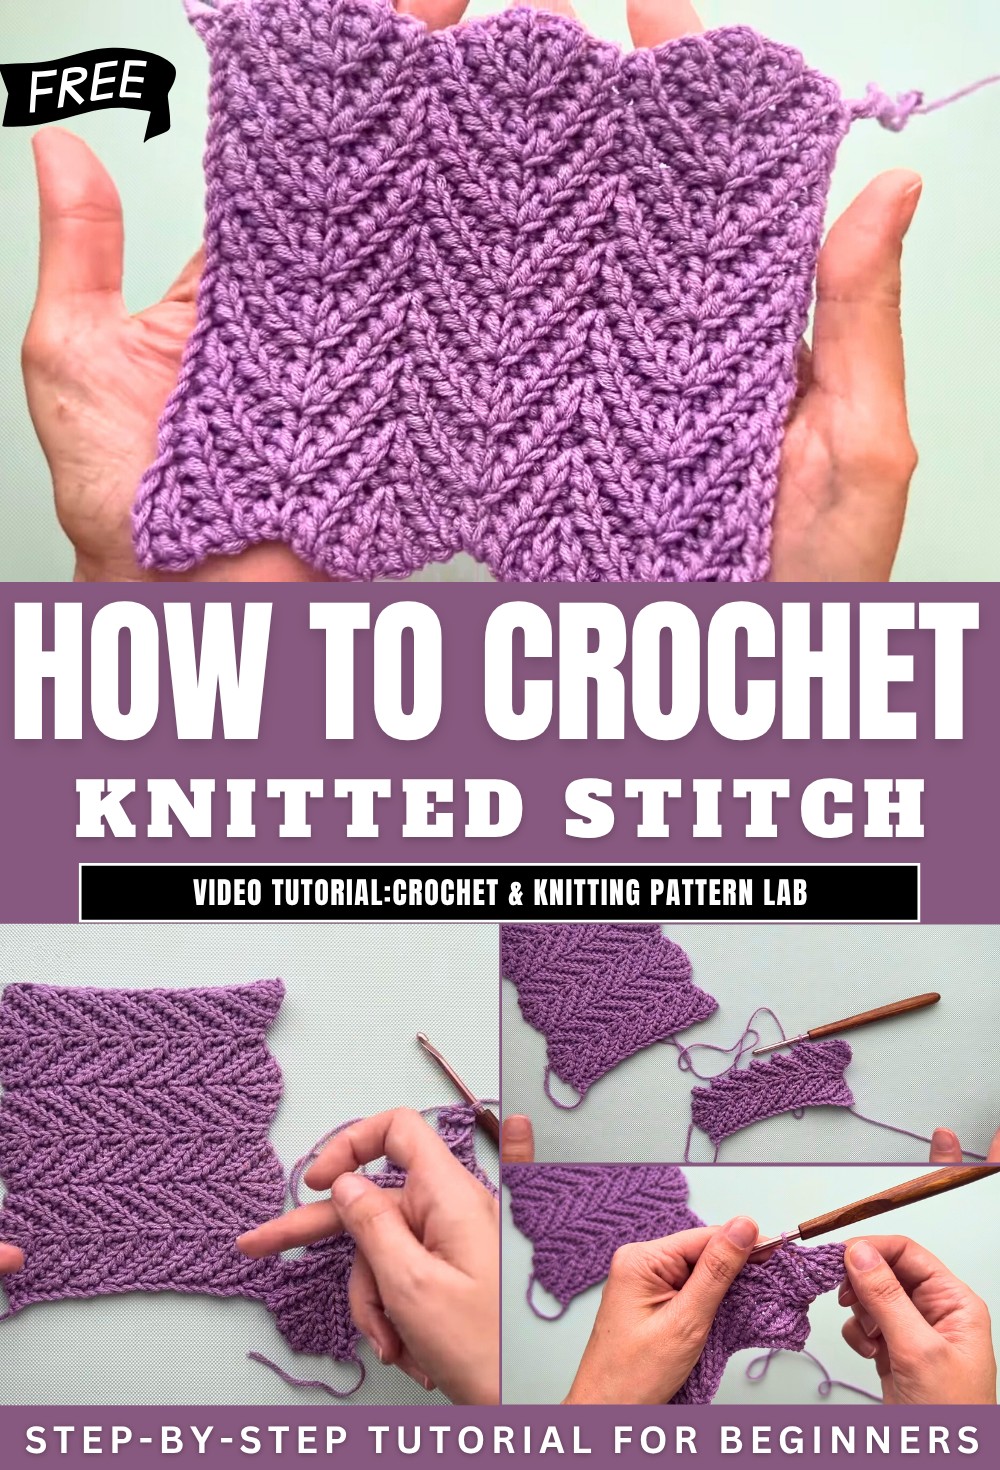
How to Crochet Knitted Stitch That Fools EVERYONE
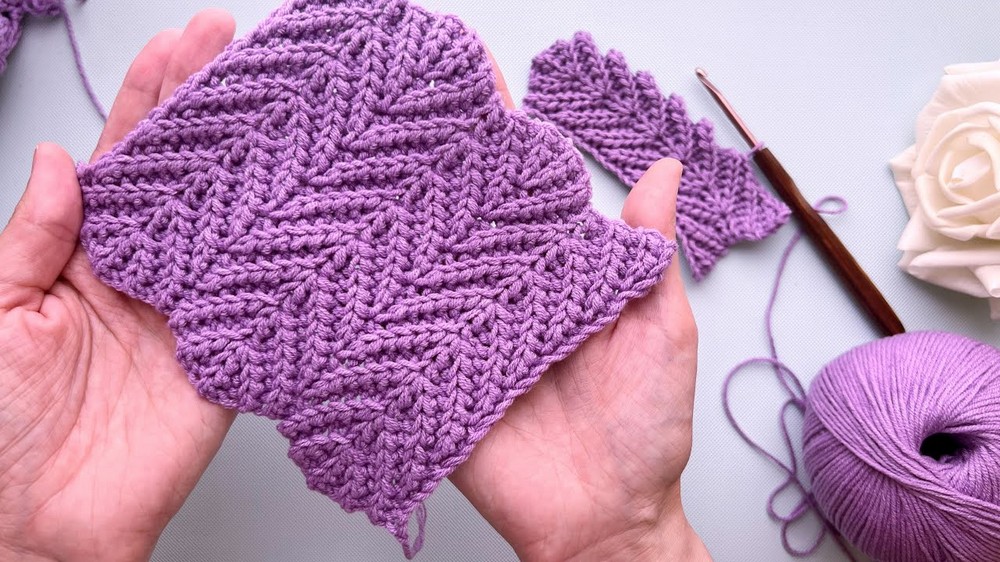
With a step-by-step tutorial, learn how to crochet a beautiful, textured herringbone crochet pattern using a technique called “bio crochet.” The pattern is simple, consisting of two rows repeated for the desired height and involving basic stitches like chain stitches, slip stitches, and yarn-over slip stitches. The tutorial explains the process step-by-step, including tips for making the pattern reversible or one-sided.
It’s a versatile design suitable for scarves, hats, or even socks. Clear instructions are provided for managing joins, edges, and repeats, making it beginner-friendly yet elegant. Follow through us for the complete tutorial.
Crochet Knit Stitch Tutorial
The tutorial provided in the video focuses on teaching viewers how to create a beautiful and textured herringbone crochet pattern. The design, described as both stylish and versatile, is crafted using a technique referred to as “bio crochet.” Below is a structured summary of the tutorial’s key components organized under headings and bullet points.
Introduction to the Pattern
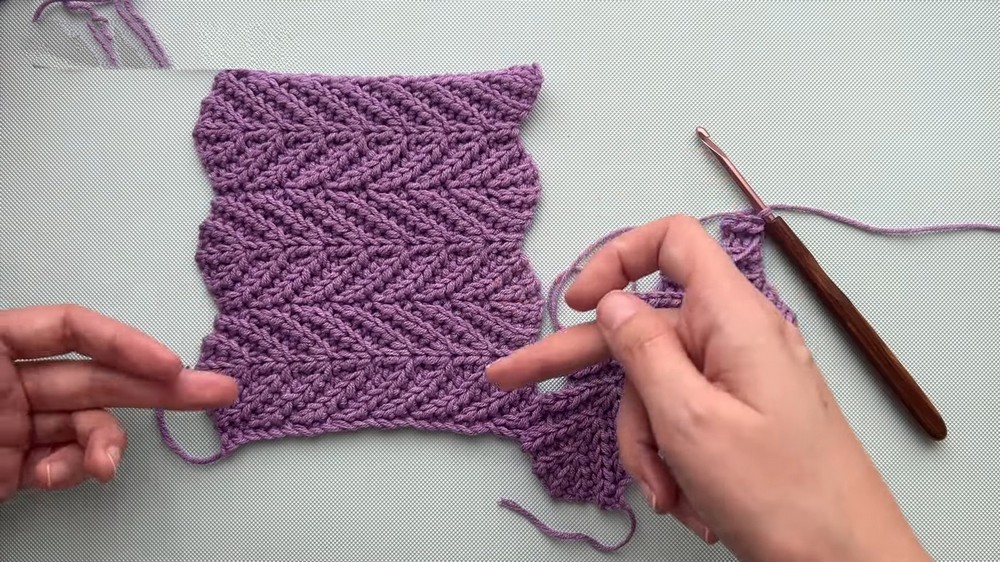
- The pattern consists of intricate branches and leaves, with the design appearing neat and textured.
- It is worked using a crochet hook and crochet techniques rather than knitting.
- There is both a one-sided version and an option to make a two-sided reversible pattern.
- This pattern can be used in multiple projects, such as scarves, hats, socks, and other accessories.
- The technique is relatively simple and requires basic crochet skills such as:
- Chain stitches
- Slip stitches
- Yarn-over slip stitches
- The technique and similar patterns are part of the creator’s “bio crochet” playlist, which viewers can explore for related projects.
Pattern Overview
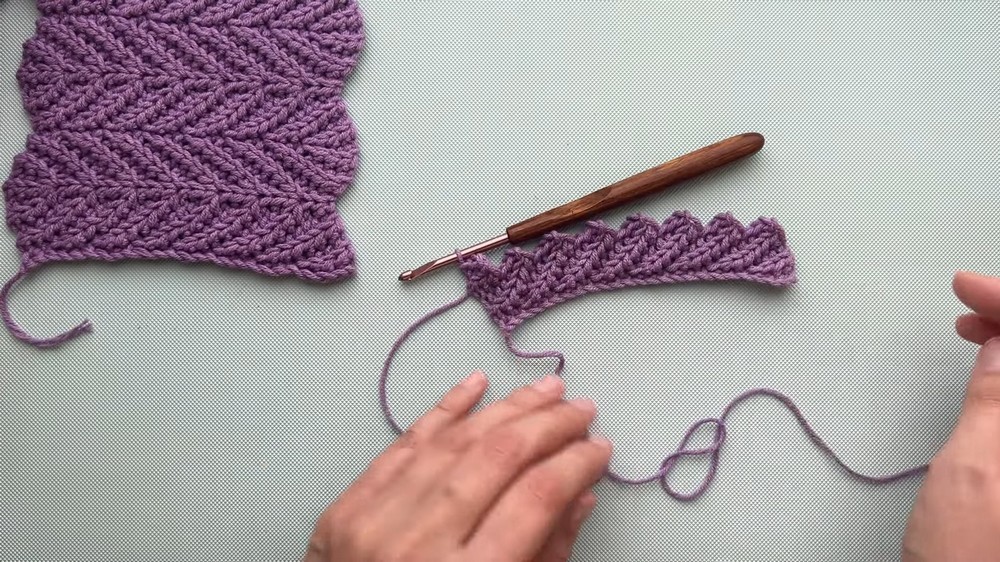
- The crochet design is created row by row, and the pattern consists of two primary rows that are repeated.
- Row 1 is worked from right to left.
- Row 2 is worked from left to right.
- The rows are broken into simple and easy-to-follow sections rather than complicated short rows.
- The odd-numbered rows (e.g., Row 1) and even-numbered rows (e.g., Row 2) alternate directions.
Step-by-Step Crochet Instructions
Setting Up the Foundation Chain:
- Start with a number of stitches that is a multiple of three, depending on the project size.
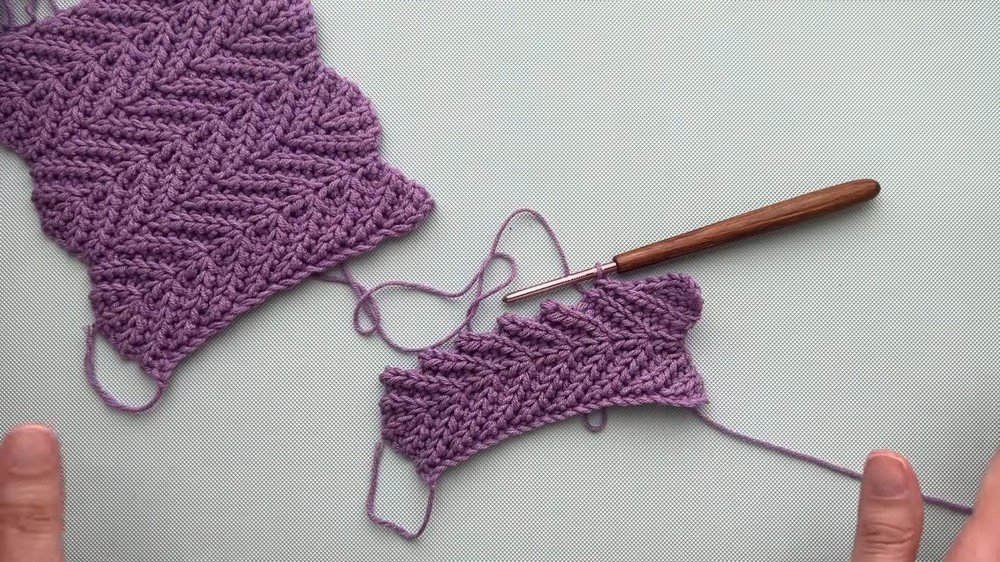
Row Construction:
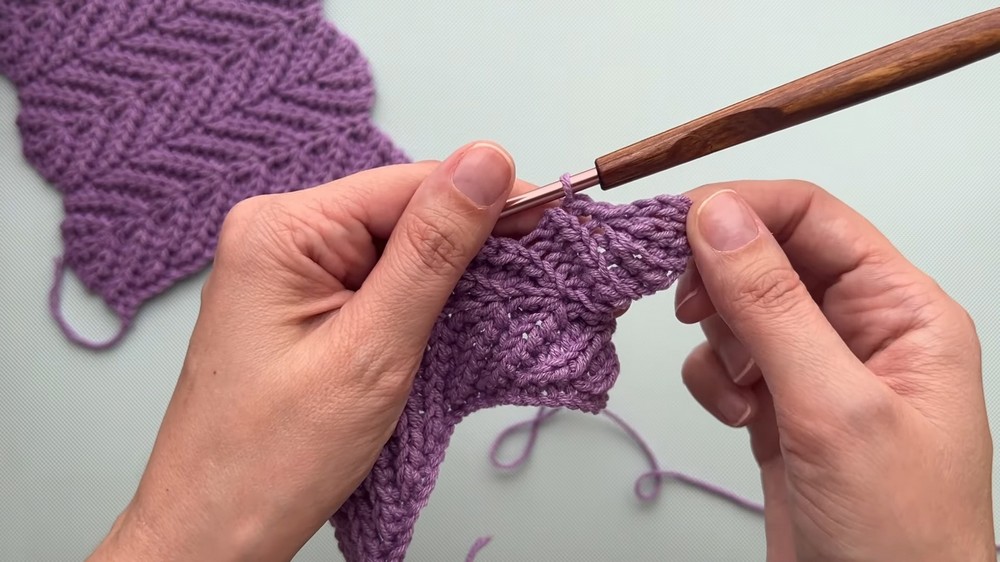
- In Row 1, sections use regular slip stitches (for one-sided patterns) or yarn-over slip stitches (for reversible patterns).
- In Row 2, the process is repeated with slight adjustments, such as integrating joins for continuous transitions between sections and rows.
- The herringbone pattern begins to form as sections are alternated in sequence, creating visual texture.
Joins:
- Joins are made by inserting the hook into rows below or specific sections (depending on the direction).
- A different join method is demonstrated for a two-row join for those wanting a neat and reversible look.
Reversible vs. One-Sided Pattern
- For a reversible pattern, only yarn-over slip stitches are used throughout to ensure volume and symmetry.
- For a one-sided pattern, alternate between using regular slip stitches and yarn-over slip stitches in odd and even sections.
How to Finish and Smooth Edges
- Instructions are given for smoothing out the edges of the project for clean finishing—this is helpful when ending a scarf or similar project.
- The video provides guidance for working a finishing row to ensure the ribbed edge becomes flat and uniform.
Conclusion
- The herringbone pattern can be easily adapted for any height by repeating rows one and two.
- The creator offers tips and answers frequently asked questions on creating smooth joins, transitioning rows, and perfecting the edges.
- Tutorials like this are part of the “bio crochet” series, which offers many textured patterns.
- Viewers are encouraged to subscribe, like, and explore other tutorials on the channel.
The tutorial is structured for both beginners and advanced crocheters, with clear, step-by-step instructions to ensure success in achieving the finished herringbone design.