How to Crochet Large Pumpkin Amigurumi for Beginners
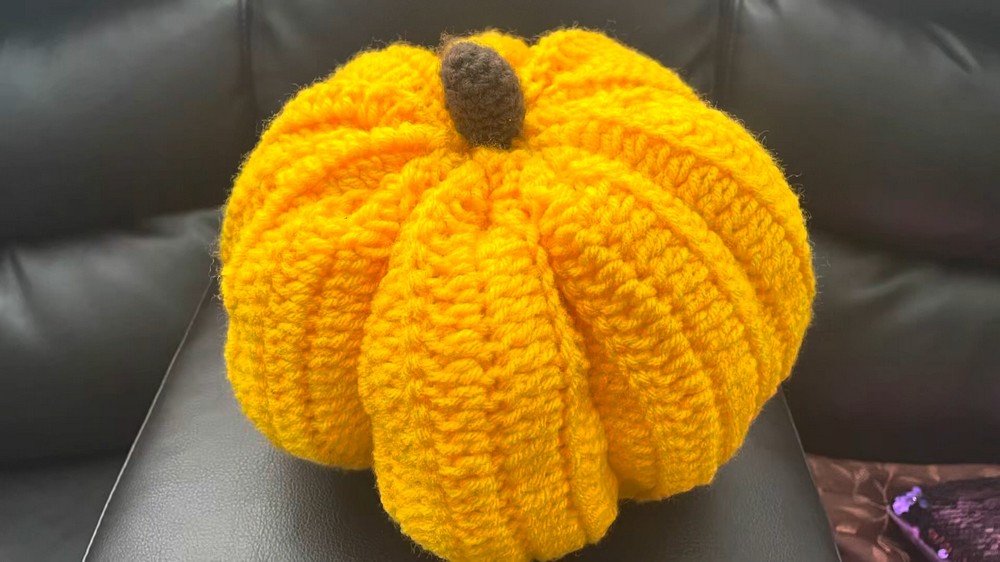
Learn how to crochet a reusable pumpkin decoration, perfect for Halloween and fall decor. Using simple stitches like double crochet and single crochet, the video guides you to create a rectangular piece with a textured back-loop-only pattern. The piece is stitched together, cinched at both ends, and stuffed to form the pumpkin shape.
Additional shaping is done with yarn to create the signature grooves. The stem is crocheted or replaced with a twig, and optional embellishments like leaves are added. The project is beginner-friendly, customizable in size, and a sustainable alternative to real pumpkins. So, follow through with us for the complete tutorial.

Pumpkin Crochet Tutorial
This tutorial demonstrates how to crochet a reusable pumpkin decoration that is perfect for Halloween or seasonal home decor. The video provides step-by-step instructions, creating a practical and beautiful project for crocheters of all skill levels. Below is a detailed summary broken into sections with clear headings and highlights of each step.
Why Crochet a Pumpkin?
The tutorial starts by explaining the benefits of crocheted pumpkins over traditional ones. Real pumpkins rot, but crocheted pumpkins are durable, reusable, and maintain their charm over time. This makes them eco-friendly and cost-effective decorations for festive seasons.
Materials Needed
- Yarn (in the color of your choice for the pumpkin and stem).
- Crochet hook (size suitable for your yarn).
- Scissors.
- Yarn needle for weaving and sewing.
- Stuffing to fill your pumpkin.
- Optional: A twig for the stem and hot glue for attaching it.

Initial Instructions: Starting the Project
- Create the Foundation Chain:
Begin by chaining a length based on the desired size of your pumpkin. The tutorial uses a foundation chain of 42 stitches but encourages adjusting the length depending on how large or small you want the pumpkin. - First Row:
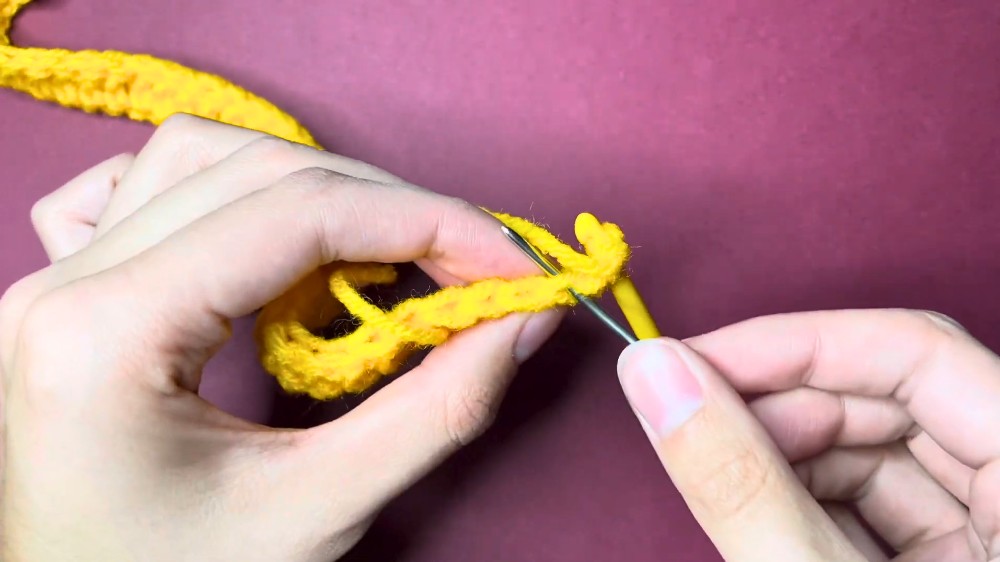
From the second chain, work double crochet stitches across all stitches. This forms the first row of the pumpkin’s fabric.
Building the Pumpkin Fabric
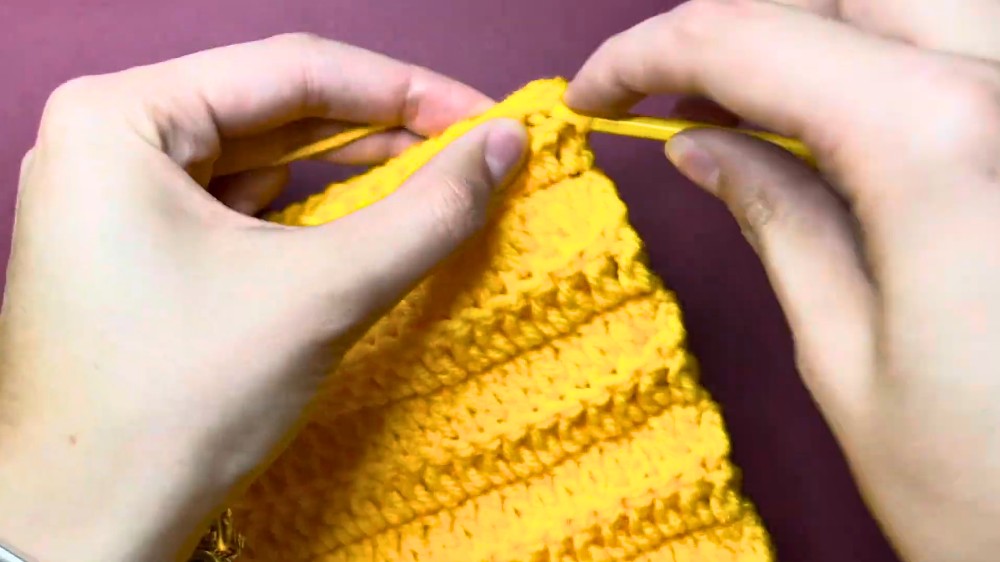
- Back Loop Only Technique:
For subsequent rows, work double crochet stitches into the back loop only. This technique creates a textured pattern that enhances the pumpkin’s aesthetic. Continue crocheting back-loop-only double crochet rows until the fabric reaches your desired size. - Connecting the Edges:
Once the rectangular fabric is complete, fold the piece and align the short edges. Use single crochet stitches to seam the two ends together, forming a tube-like structure for the pumpkin.
Shaping the Pumpkin
- Closing the Bottom:
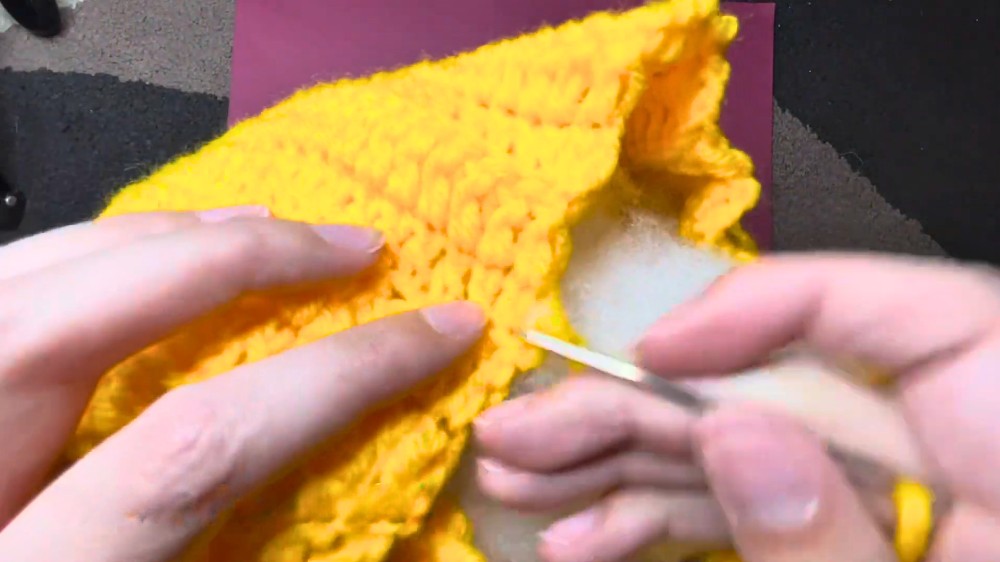
Weave the yarn around the bottom edge of the tube using a yarn needle. Pull tightly to cinch the bottom closed, knotting securely to prevent it from loosening. - Stuffing:
Fill the pumpkin with plenty of stuffing to give it volume and shape. - Closing the Top:
Repeat the same weaving and cinching process for the top. Pull tightly to close the pumpkin, knotting securely to keep the stuffing in place.
Adding Pumpkin Grooves
To give the pumpkin its signature grooves, wrap yarn tightly around its body several times, pulling it taut to create indentations that mimic the natural shape of a pumpkin. Knot the yarn securely at the top to maintain the shape.
Creating the Stem
- Crocheted Stem (Optional):
Begin with a magic ring and work single crochet stitches to create a tube for the stem. Add rounds or rows until the stem reaches the desired height. Stuff and attach securely to the pumpkin using glue or sewing.
- For a natural look, use a real twig as the stem and attach it with hot glue.
Adding Final Touches
The creator adds additional embellishments, such as a decorative sprig or small leaves hot-glued onto the pumpkin. These personal touches can enhance the appearance, adding a splash of color or texture.
Conclusion
This fun and beginner-friendly tutorial equips viewers with the skills to crochet a reusable pumpkin that is perfect for seasonal decor. With opportunities for personalization, this project allows creativity to shine—whether you adjust colors, sizes, or embellishments. The crocheted pumpkin offers a sustainable alternative to traditional decorations, ensuring it stands the test of time for a festive and eco-conscious home.