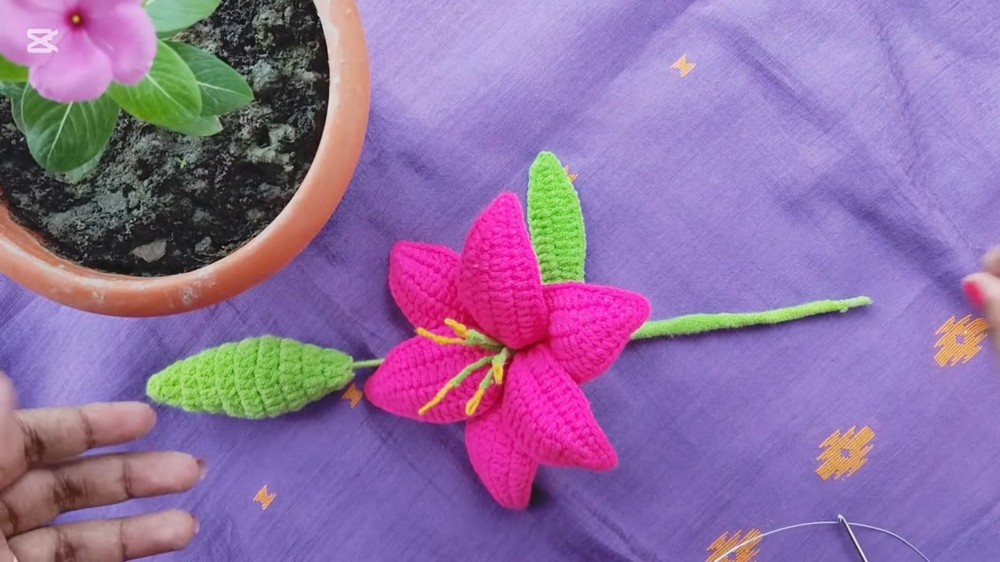
How To Crochet Lily Flower for Spring Decor

Learn how to crochet a beautiful handmade lily flower using milk cotton yarn, a 2.5mm hook, and some basic crochet techniques. It demonstrates creating petals, assembling them, and adding decorative elements like renu for the flower’s center. The creator explains each step clearly, emphasizing precision and firmness to ensure a neat finish.
The tutorial is perfect for crafting enthusiasts looking to create elegant floral decor or thoughtful handmade gifts. Follow through with us for the complete tutorial!

Make Lily Flower Tutorial
The video demonstrates a step-by-step guide to creating beautiful handcrafted lily flowers using crochet techniques. Materials include milk cotton yarn, a 2.5mm crochet hook, wires, yellow and green yarn, and optional glue for securing threads. The creator gives clear instructions suitable for crochet enthusiasts looking to craft elegant decor or gifts.
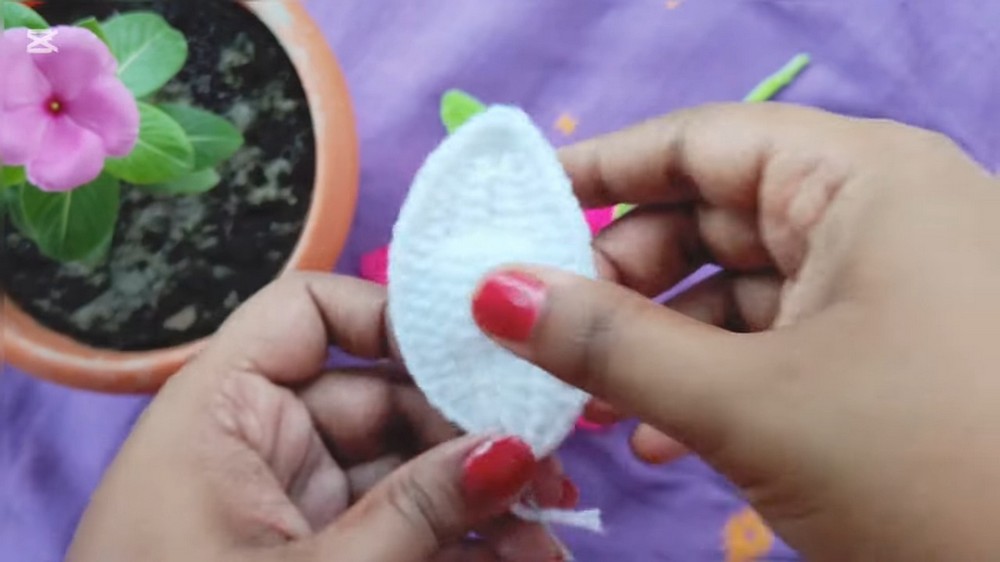
Creating the Petal
- Start by forming a slip knot and creating a chain foundation.
- Utilize a combination of single crochet, half-double crochet, and double crochet techniques to shape the petal.
- Pay attention to transitions between spaces to maintain symmetry and structure.
- After completing the first side of the petal, mark the center chain with a stitch marker for alignment.
- Proceed to work on the second side of the petal using a similar pattern, ensuring consistent alignment with the first side.
- Complete the petal by tying off the yarn, securing the ends, and shaping it for a natural look.
Making the Renu (Flower Center)
- Take a piece of wire and twist yellow yarn around it firmly to create the stamen (renu).
- Ensure the thread is tightly wound to prevent it from unraveling.
- Apply glue to secure the yarn if necessary, especially where the wire begins and ends.
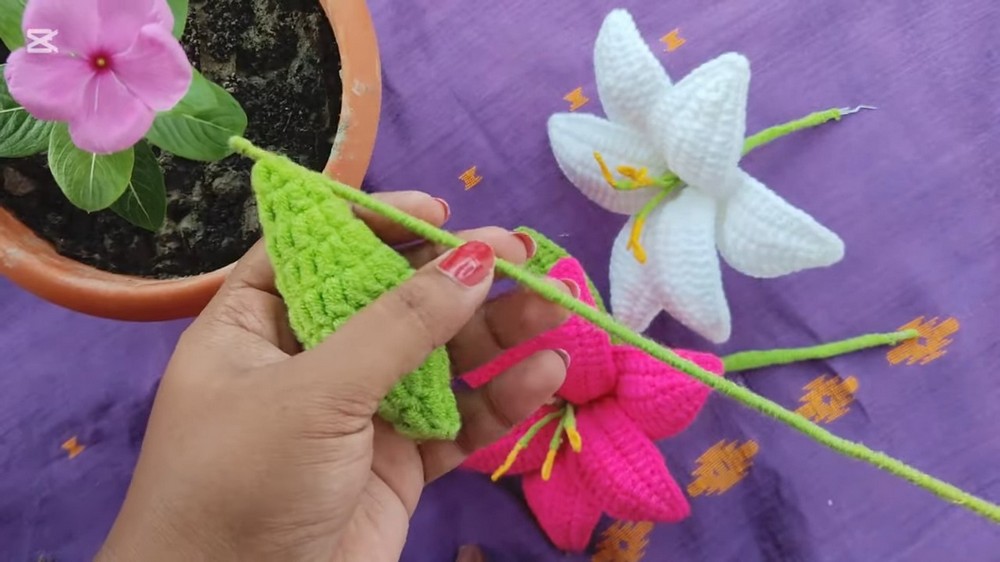
- Add green yarn at the bottom of the stamen to mimic the natural look of a flower’s stem.
- Create multiple stamen pieces (five are used in the video) and twist them together to form the complete flower center.
Assembling the Flower
- Create additional petals following the same process (six petals total for this flower).
- Begin assembling by arranging three petals evenly around the stamen.
- Place the portion where the threads were tied off at the bottom for a neat finish.
- Secure the petals together at the base using thread, ensuring a firm grip to prevent movement.
- Add the remaining three petals to complete the shape of the flower, arranging them evenly around the first layer.

Shaping and Securing the Flower
- Once the petals are secured, adjust their positioning to achieve a natural look.
- Wrap yarn tightly around the base of the flower and the underlying wire stem, ensuring all wires are completely covered.
- Keep adjusting the petals during this process to maintain symmetry.
Final Touches
- Apply glue to secure the thread after wrapping, ensuring the base and stem are firmly set.
- Optionally, attach the completed flower to a stick for further stability and decorative use.
- The final lily flower can be used for home decor (e.g., drawing or living rooms) or as a thoughtful handmade gift.