How to Crochet Micro Arch Earrings for Beginners
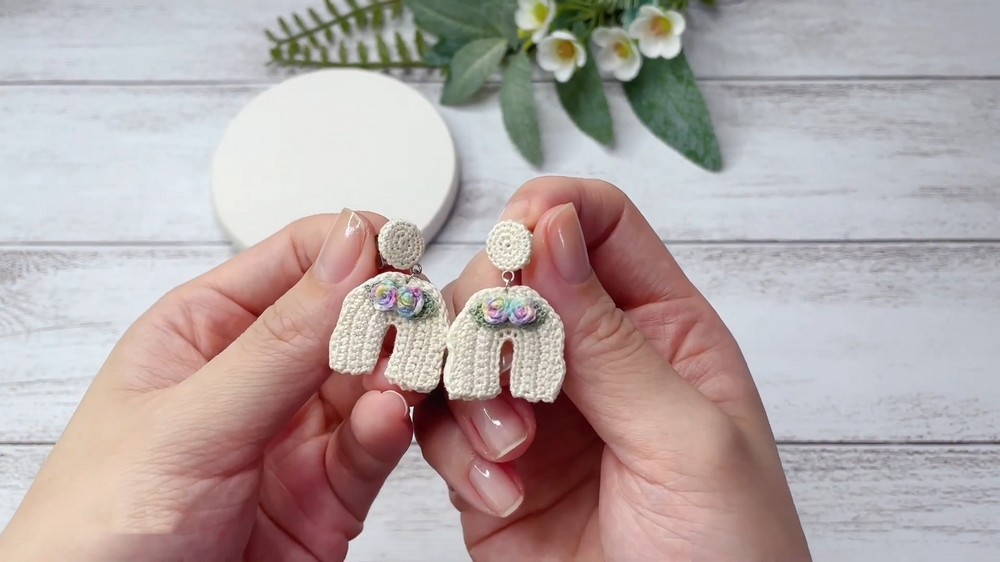
Learn how to crochet beautiful floral Wavy Arch Earrings using crochet techniques for all skill levels. Key materials include tatting lace yarn in various sizes, embroidery floss, stud earrings, and jump rings. The earrings can be crocheted by crocheting wavy arches with Single Crochet, Half Double Crochet, and Double Crochet stitches, and assembling mini roses, leaves, and stud covers.
Craft glue is used to attach the pieces, with stationery clips holding them together while drying overnight. The earrings are completed by connecting the components with jump rings. The result is a delicate and elegant handmade accessory perfect for special occasions. So, follow through with us for the complete tutorial.

Crochet Floral Wavy Arch Earrings Tutorial
This tutorial guides viewers through the detailed process of creating delicate floral Wavy Arch Earrings using crochet techniques. The video covers each step clearly, from preparing materials to assembling and finishing the intricate design.
Materials and Tools
The tutorial begins by introducing the necessary materials and tools for the project:
- Yarn & Threads: Medium and thin tatting lace yarn, #80 tatting thread, embroidery floss.
- Additional Components: Mini roses, mini leaves, 8mm stud earrings with loops, jump rings (3mm).
- Tools: Clover crochet hook (0.50mm), sewing needle, threader, tweezers, scissors, pliers, craft glue, and stationery clips.

Creating the Wavy Arch Pieces
- Step 1: Start with a Slip Knot: The process begins with making a slip knot on the hook.
- Step 2: Crochet the Wavy Arch Pattern: The tutorial demonstrates the step-by-step process for creating the wavy arch pieces, ensuring the arches have structured increases and decreases while incorporating a gentle wave design.
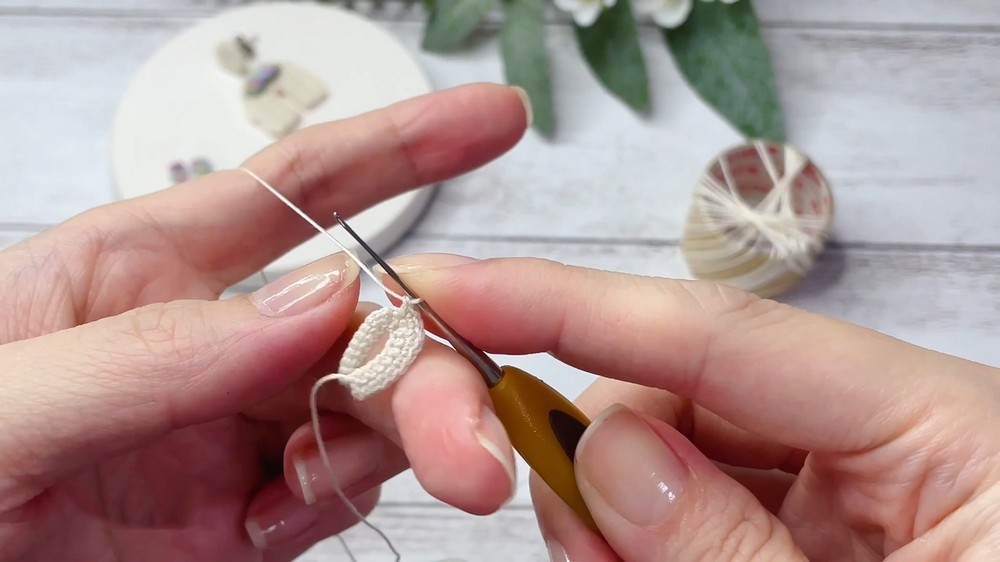
- Step 3: Completing the Wavy Arch: After crocheting, the tails are prepared using a sewing needle and carefully woven in. The finished wavy arch pieces are lightly stretched for shaping.
Two identical wavy arch crochet pieces are needed for each earring.
Finishing the Wavy Arch
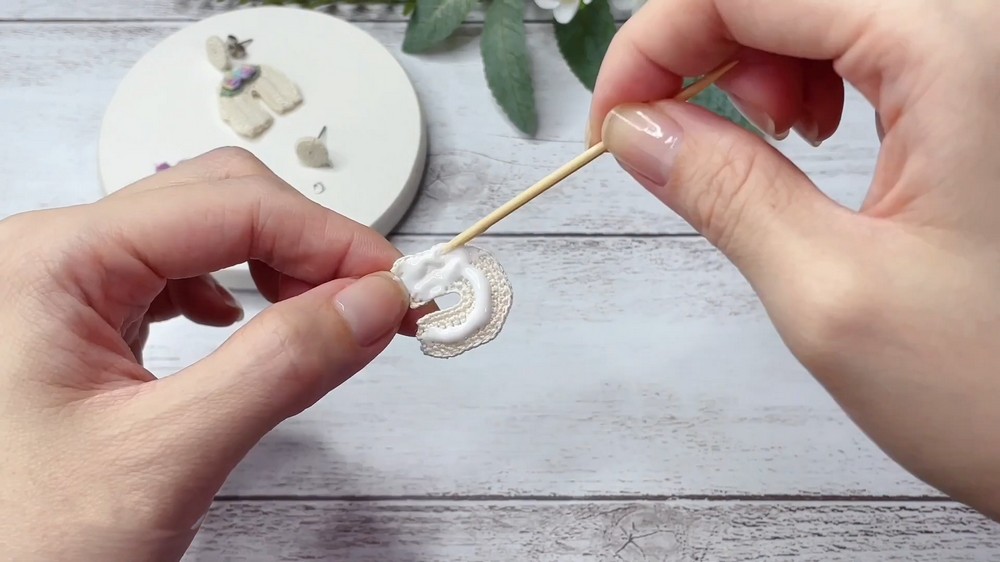
- Step 4: Join the Crochet Pieces: Thinly applying craft glue to one piece, the two wavy arch pieces are attached together.
- Step 5: Drying: To ensure proper adhesion, a stationery clip is used to hold the pieces together while drying overnight.
Preparing Additional Components
The tutorial references previous videos for crafting individual components:
- Crochet-Covered Stud Earrings: Created by crocheting a cover for flat round studs, then turning the crochet cover inside out for this earring design.
- Mini Leaves: Small crochet leaves made from tatting thread.
- Mini Roses: Tiny rolled roses crocheted from embroidery floss.
Assembling the Earrings
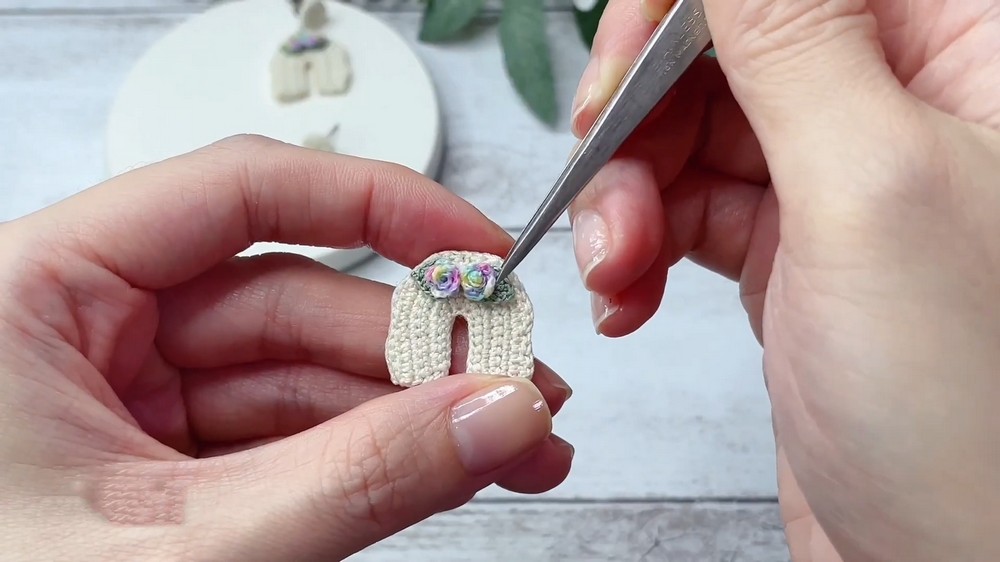
- Step 6: Attach Leaves and Roses: Using craft glue, the mini roses and mini leaves are carefully attached to the wavy arch crochet pieces.
- Step 7: Adding the Jump Ring: A jump ring is attached to the center of the crochet wavy arch, providing a connector for the stud earring.
- Step 8: Final Assembly: The crochet-covered stud earring is linked to the jump ring, completing the earring.