How to Crochet Mini Rose Flower Bouquet for Spring

Learn how to crochet a cute mini bouquet, ideal for personal use or as a heartfelt gift, with this step-by-step tutorial for beginners. Step-by-step guidance is shared, covering techniques like creating magic rings, chaining, single crochets, and crocheting flowers and leaves. The bouquet is assembled with care, highlighting the beauty of handmade crafts. By following the instructions, viewers can recreate the design effortlessly. Perfect for beginners and crochet enthusiasts.

Crochet Mini Rose Flower Bouquet Tutorial
Introduction
- The creator begins the tutorial by introducing the mini bouquet project.
- They mention the bouquet can be made for personal use or as a gift for loved ones.
- Encourages viewers to follow along and learn the step-by-step process.
Creating the Base Shape
-
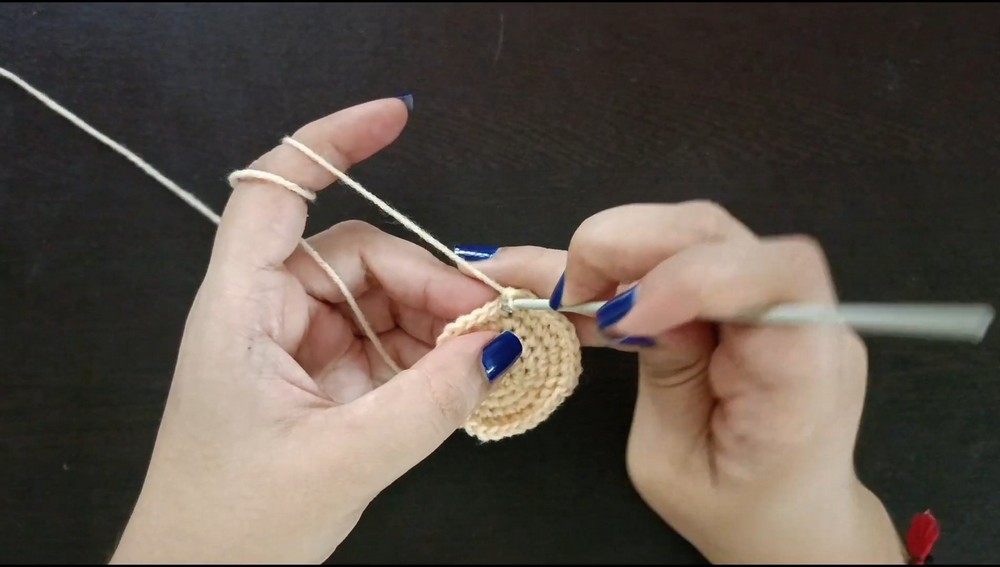
Foundation Setup:
- The project begins with making a magic ring, followed by single crochets to form the initial circular base.
- A slip stitch is used to connect the first chain and complete the round.
-
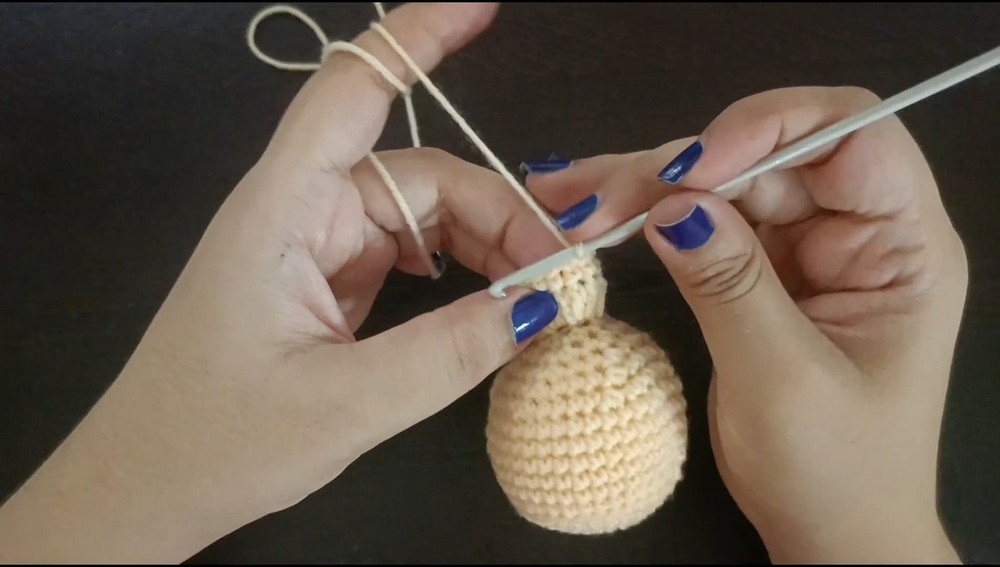
Increasing Rounds:
- Subsequent rounds involve increasing single crochets systematically to expand the base shape.
- Each round introduces increases (adding stitches evenly) to form a gradual expansion.
-
Transition to Frill Formation:
- By the seventh round, single crochets are made in the back loops to create a ridge effect and leave the front loops exposed for later use.

Adding Frills to the Bouquet Base
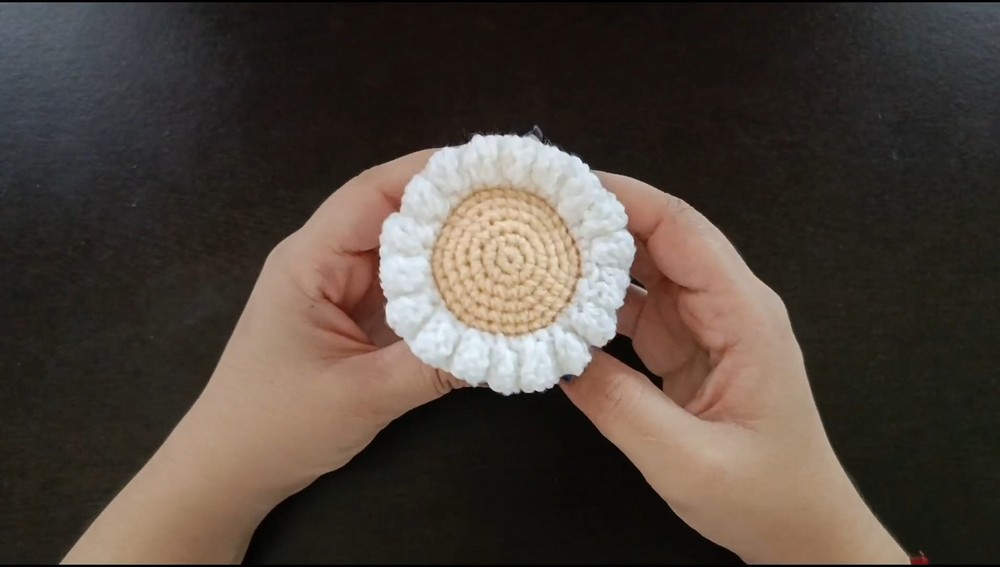
- Frills are added along the seventh-round loops to create decorative ridges.
- Double crochets are alternated between front and back loops to complete this frill design.
- The creator uses slip stitches and chain selections to close off rounds and shape the design further.
Making Mini Flowers
-
Flower Formation:
- The flowers are individually crafted using chain stitches.
- Single crochets are made along the chains to create a petal-like design.
- The finished chain is rolled into a flower and secured with glue.
-
Leaf Making:
- Leaves are created using a magic ring base and worked into small loops resembling leaf shapes.
- The process involves single crochet, half-double crochet, and slip stitches to refine each leaf.
Attaching Flowers and Leaves
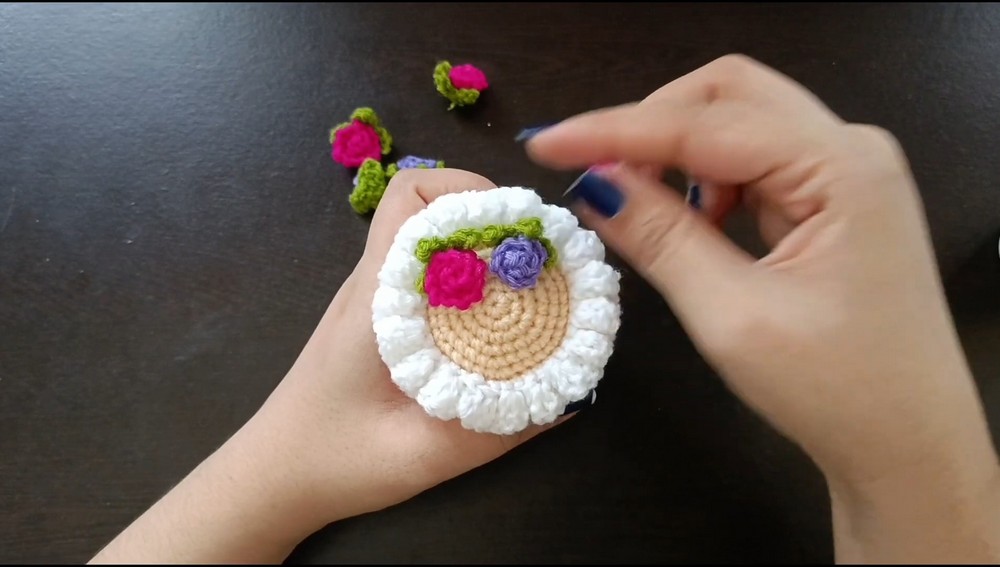
- The flowers and leaves are glued together to prepare decorative sets.
- The sets are prepared in batches (e.g., six to seven sets) for attaching to the bouquet.
Assembling the Final Bouquet
-
Chain for Bouquet Handle:
- A long chain stitch is created to form the handle or support for the bouquet.
- The creator carefully measures and secures this part.

-
Flower Placement:
- Flowers with attached leaves are pasted around the bouquet base using glue in a circular pattern.
- Careful alignment ensures a visually appealing arrangement.

-
Securing the Handle:
- Once flowers are placed, the chain handle is tied securely to the bouquet.
Conclusion
- The finished bouquet is presented as stylish and cute.
- The creator encourages viewers to try crafting the bouquet themselves, noting its suitability as a thoughtful gift or decoration.
Additional Notes
- The tutorial provides detailed instructions with visible demonstrations.
- Supplies required include yarn, crochet tools, glue, and cotton for stuffing the base.
- While the video avoids providing exact stitch counts for brevity in this summary, the instructions emphasize the gradual increase and decrease patterns essential for shaping the final pieces.
This tutorial offers a relaxing, creative activity that results in a beautiful handmade bouquet.