How to Crochet Mini Small Flowers for Spring Decor

In this tutorial, you’ll learn how to crochet a simple spring flower in any color you wish all with a step-by-step tutorial. Using a size 5 crochet needle, the instructor demonstrates creating flowers with customizable petal counts, from clover-like three petals to multi-petal designs. The process begins with a magic ring, followed by a three-step structure: chains, treble crochet, and slip stitches to form the petals.
The project is quick, beginner-friendly, and adaptable with different yarn types and colors. The video encourages creativity and offers inspiration for spring-themed crochets.
Viewers are invited to share their creations, subscribe, and explore more tutorials for additional ideas.

Crochet Spring Flower Tutorial
This tutorial from DIY Ideas provides a clear and simple guide to crocheting a spring flower. The project is beginner-friendly and offers room for personalization through adjustments to the number of petals, yarn type, and colors. Below is a structured summary of the tutorial’s key points.
Introduction
- The tutorial focuses on creating a spring-themed crochet flower.
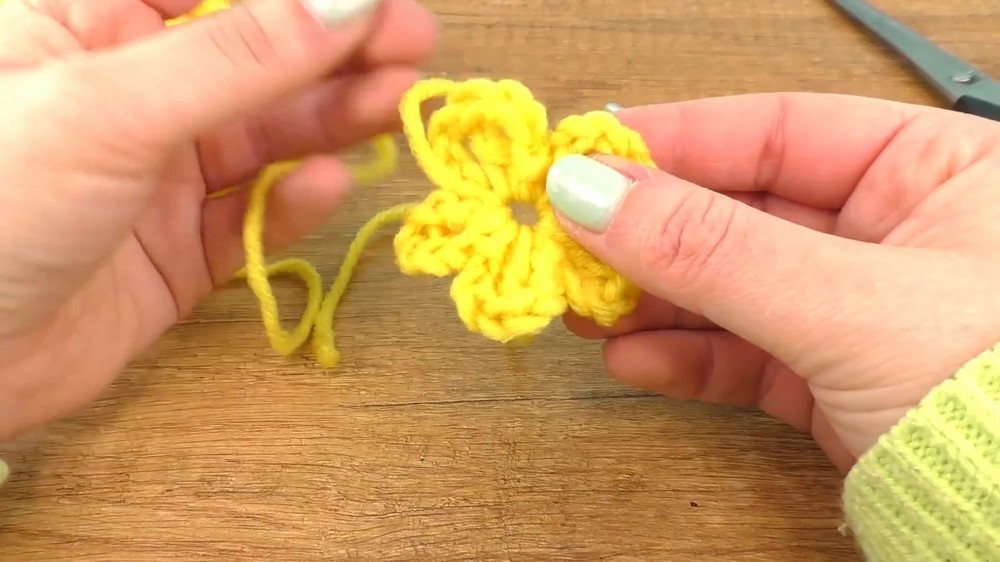
- The presenter showcases three flower variations, including a baby-blue design resembling a clover with three petals.
- The tutorial encourages creativity, allowing viewers to customize their flower’s shape and size.
Materials Required
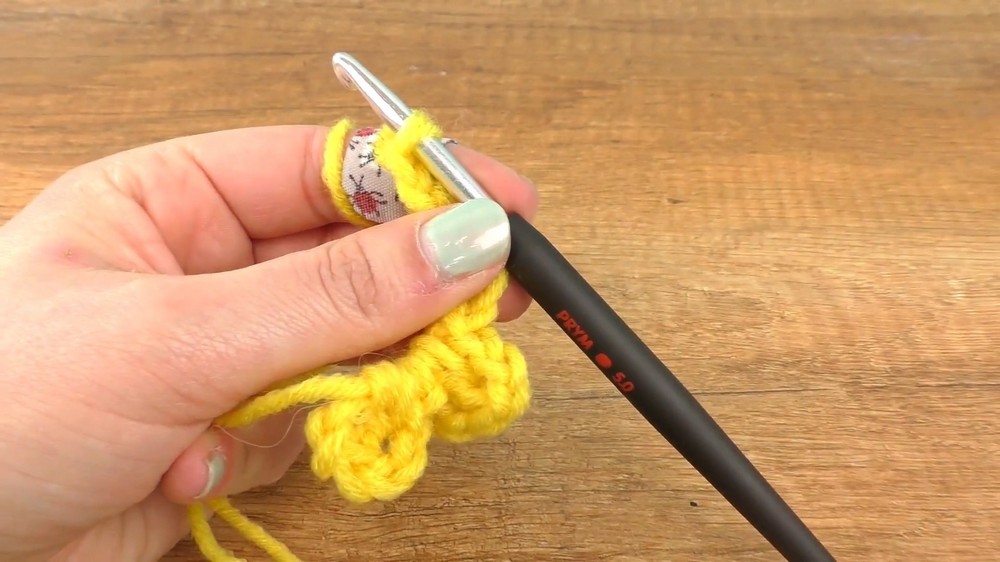
- Needle: Size 5 crochet hook.
- Yarn: Any type or color of your choosing to achieve different results.
Starting the Flower
-
Magic Ring:
- The tutorial begins with a magic ring, a foundational element in crochet.
- The presenter keeps the ring loose initially for easier work.

-
Creating the Petal Framework:
- Using chains, a basic framework for the petals is established.
- The tutorial simplifies the process into repeatable steps for consistent petal formation.
Forming the Petals
-
Process Overview:
- Each petal is created using a structured three-part process: chains, crochet work, and slip stitches to anchor the petal into the ring.
- Repetition of this method allows the viewer to form a complete flower with any number of petals.
-
Customization:
- The tutorial highlights the flexibility to change the number of petals to achieve various designs, such as clovers or multi-petal flowers.
- Personalization can also be done with different wool types and colors.
Completing the Flower
-
Finishing Steps:
- Once all petals are added, the thread is cut, and the end is pulled through the final loop to secure the flower.
- The magic ring is tightened by pulling the starting thread, giving the flower stability and form.
-
Tying and Tidying:
- The two thread ends are tied together to finalize the structure.
- The presenter suggests trimming the thread ends unless they are being used to hang the flower.

Creative Possibilities
- Viewers are encouraged to experiment with yarn styles, colors, and petal counts to achieve unique results.
- Suggestions include creating clover-like designs or flowers with multiple petals for different effects.
Conclusion
- The tutorial ends with an invitation for viewers to share their finished flowers in the comment section.
- The presenter encourages feedback on petal counts and customization preferences.
- Viewers are reminded to like the video, subscribe to the channel, and explore other tutorials for more inspiration and ideas.

Final Thoughts
The tutorial is straightforward and perfect for beginners who are seeking fun, creative crochet projects. With its flexibility and ability to customize, this flower design can add charm to any craft collection.