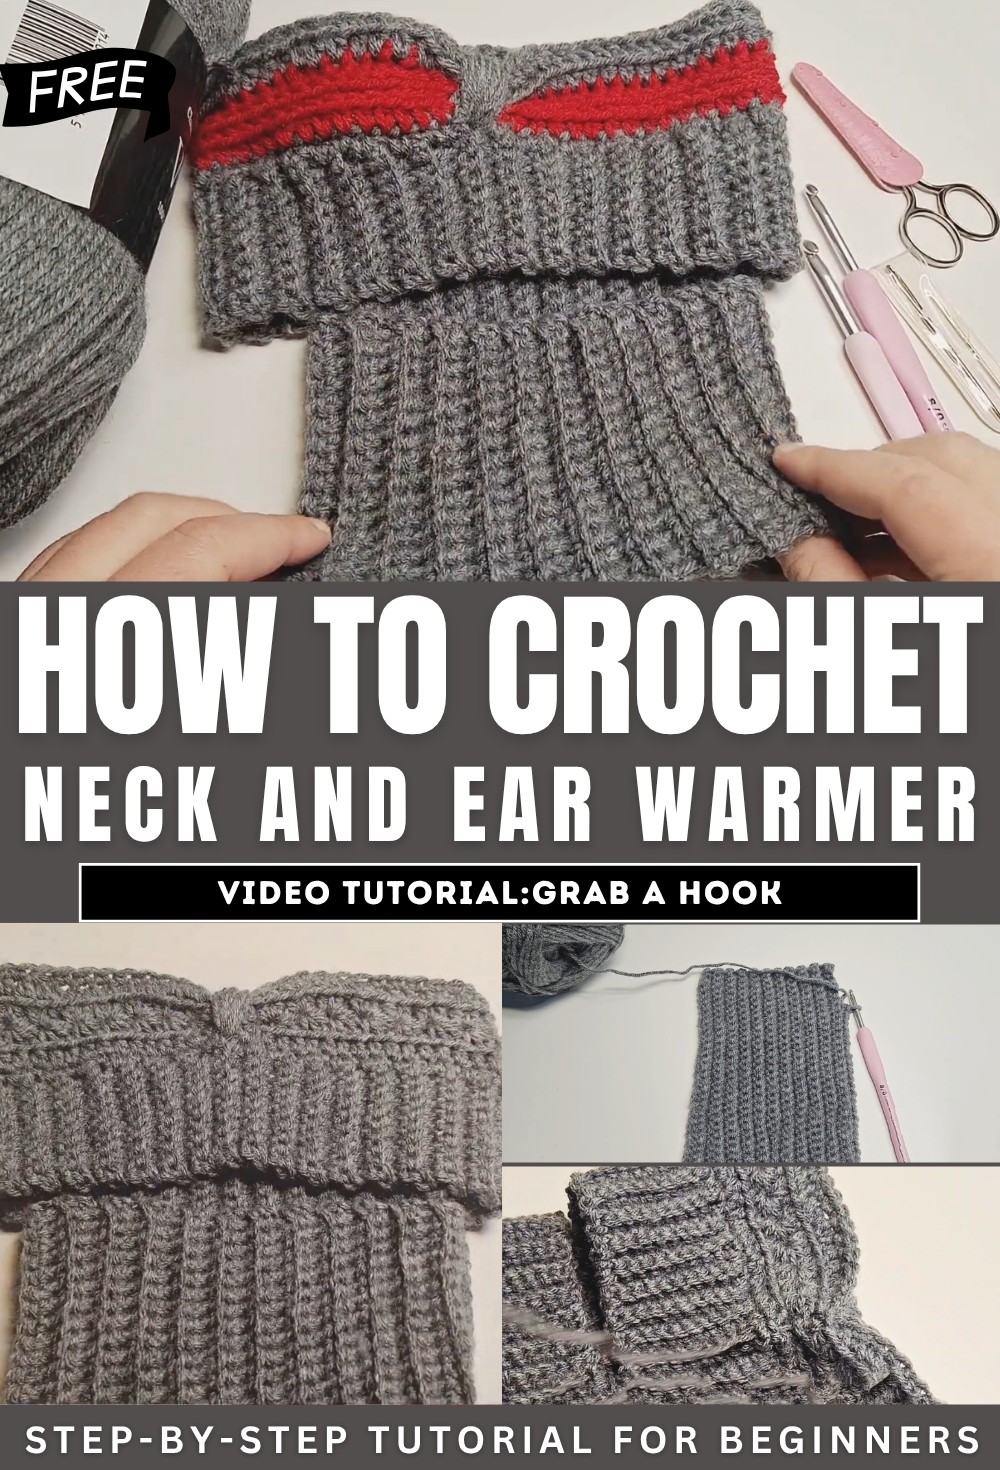
How to Crochet Neck and Ear Warmer for Beginners
Learn how to crochet a neck and ear warmer with a step-by-step tutorial for beginners and experts. Using Mega Ball Aran yarn and hooks of varying sizes (5mm and 6mm), the instructor guides through techniques like slip knot, foundation chain, single crochet, ribbing, star stitch, and finishing touches.
Ideal for both single- and two-colored designs, the project is customizable in length and style. The clear instructions ensure accessibility for everyone, with options to add unique details like buttons. So, follow through with is for the complete tutorial.
Crochet Neck and Ear Warmer Tutorial
This tutorial guides crocheters, especially beginners, to create a stylish and functional neck and ear warmer using simple steps and techniques. The instructor walks through each stage of the process, ensuring ease of understanding. Below is a structured summary of the tutorial:
Introduction
- The project involves creating a neck and ear warmer in one piece.
- The tutorial is beginner-friendly, with step-by-step explanations of stitches.
- Two versions are demonstrated: one with regular stitches and the other featuring a star stitch variation.
Materials Needed
- Yarn: Mega Ball Aran yarn (recommended for hook sizes 5.5 mm–6 mm).
- Hooks:
- Smaller hook for ribbing (5 mm).
- Larger hook for main body (6 mm).
- Additional Tools:
- Pair of scissors.
- Yarn needle.
Getting Started
- Slip Knot and Foundation Chain:
- Begin with a slip knot using the smaller hook to create the foundation chain.
- Chains are adjusted based on the desired length of the warmer.
- First Row:
- Perform single crochets into the foundation chain to establish the base.
- Subsequent Rows:
- Use single crochets in the back loop for ribbing texture.
- Continue until ribbing reaches the desired length (approximately 13 cm).
Creating the Neck Warmer
-
Split Sections:
- Extend the ribbing only partially (adjust chain length for the neck section based on size preferences).
- Continue ribbing for the neck section until the piece is long enough to fit comfortably around the neck.
-
Joining Edges:
- Slip stitch shorter edges together.
- Ensure the ribbing’s direction aligns correctly for a seamless appearance.

Transitioning to the Ear Warmer
- Ribbing for Ear Warmer:
- Begin ribbing for the ear warmer section using the same method as before.
- Check fit around the head and adjust size as necessary.
- Slip stitch edges to join, preparing for the decorative top layer.
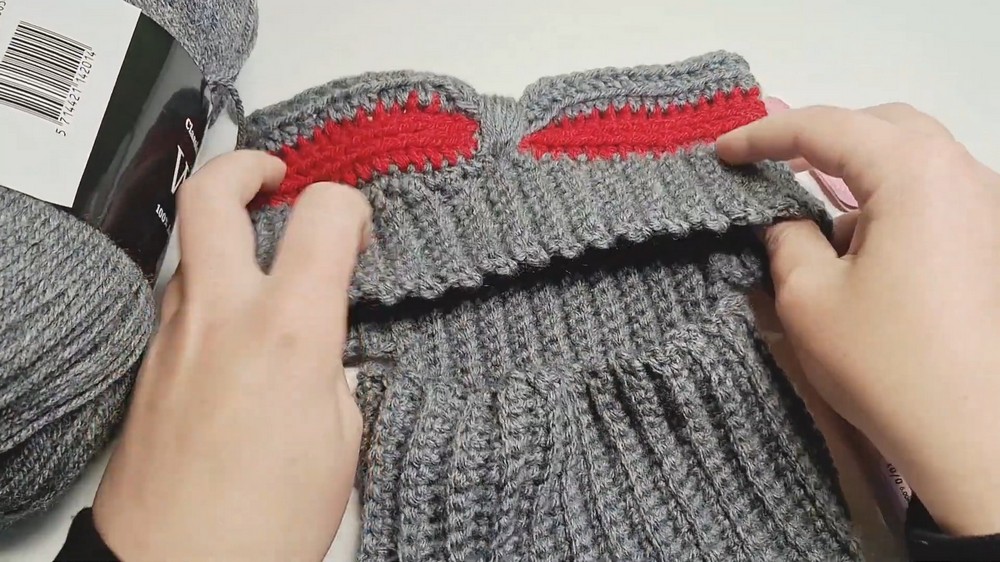
Ear Warmer Top Layer
-
Option 1: Half Double Crochet Rows:
- Add rows of half double crochets for a clean finish.
- Alternate stitch placement for texture, such as back loops or third loops.
-
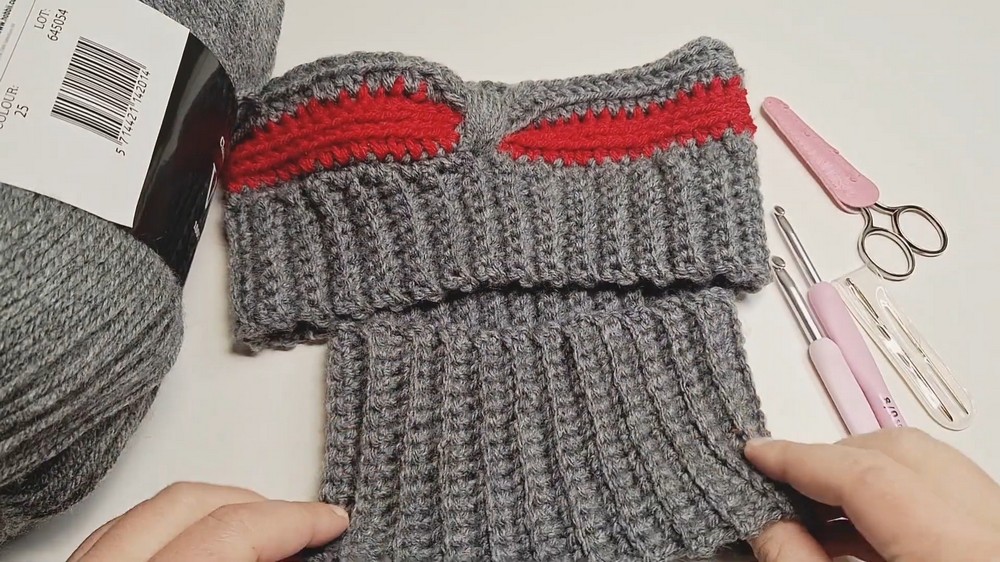
Option 2: Star Stitch Variation:
- Create star-shaped designs using a structured six-leg pattern.
- Alternate rows to refine the star pattern’s appearance.
- Slip stitch rows together for a smooth edge.

Final Touches
-
Decrease Rows:
- Reduce stitches strategically to ensure a snug fit.
- Smoothly decrease stitches across both the neck and ear warmer sections.
-
Edging Rows:
- Finish with single crochet rows.
- Incorporate decreases for shaping and aesthetic refinement.

Finishing Up
- Fasten Off and Hide Ends:
- Use a yarn needle to cleanly hide ends and cover holes.
- Optional: Attach decorative elements like buttons.

Customization Options
- Experiment with different stitches.
- Vary colors and ribbing styles for unique designs.
- Adjust dimensions based on personal preferences.
Conclusion
This tutorial provides a detailed walkthrough to help crocheters create versatile and customizable neck and ear warmers. Beginners will find the instructions approachable, while more experienced crocheters can tailor the design to suit their style.