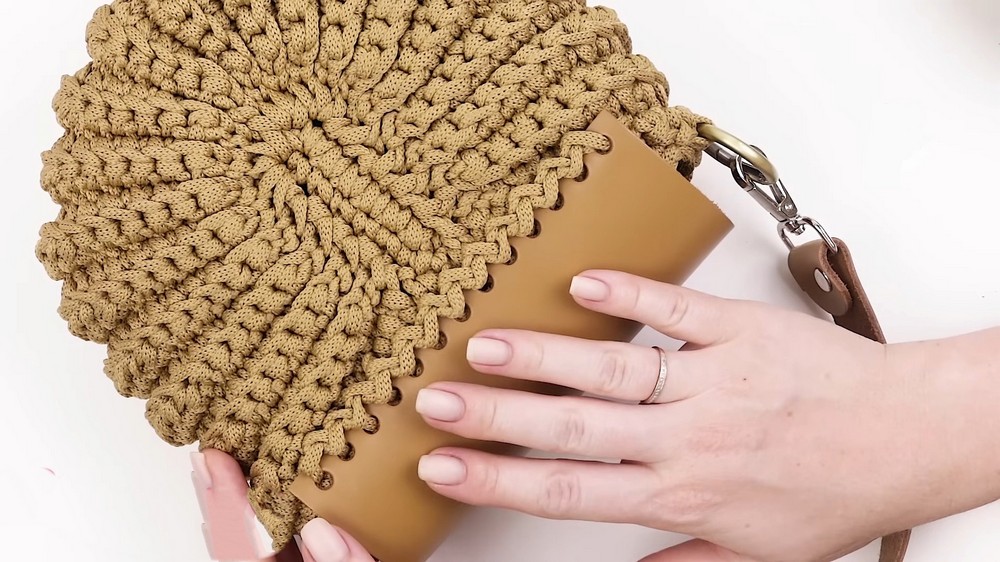
How to Crochet Textured Shell Bag for Ladies

Learn how to crochet a stylish clutch Shell bag using polyester cord, which helps the bag maintain its shape, following a step-by-step tutorial for beginners. It details the necessary materials, including cord, a crochet hook, a leather flap, an adjustable strap, and bronze hardware.
The tutorial covers creating two oval bases, attaching the side walls, and finishing the top edge. Finally, it demonstrates how to attach the leather flap and hardware. So, follow through with us for the complete tutorial.

Materials Needed
Anna begins by discussing the materials required for the project. The bag is made using two skeins of polyester cord (she specifically recommends the “Caramel” cord, color “Cookie”), which has excellent elasticity and is gentle on the hands while crocheting.
Here are additional materials noted:
- A 4.5mm crochet hook
- A leather flap (dimensions: 19.5cm x 15.5cm) or an optional crocheted flap
- Adjustable shoulder strap matching the leather flap
- Bronze rings, carabiner loops, and a lock with bolts for securing the flap
- Scissors and a lighter/match to secure the polyester cord ends
Anna mentions that these materials, along with high-quality leather and metal fittings, are conveniently available at her online store, Lentomania.ru.
Step-by-Step Instructions
1. Creating the Oval Base
Anna starts by explaining how to crochet two identical ovals, which serve as the base of the bag. The ovals are crocheted using a special method to ensure there are no holes in their centers.
- She demonstrates how to create a chain of air loops, turn it over, and work single crochet stitches for a seamless and sturdy foundation.
- Proper thread tension is emphasized, and excess cord is trimmed and sealed to prevent fraying.
2. Joining the Ovals to Form the Bag Body
Once the two ovals are prepared, they are joined with a chain of air loops to shape the foundation of the bag’s walls.
- Walls are crocheted in multiple rows using single, half-double, and double crochet stitches.
- Anna explains how to create symmetrical edges on both sides of the bag for visual balance.

Customizing the Shape
As the bag takes shape, Anna shares techniques for making the bag more structured and voluminous.
- When crocheting the curved section of the ovals, loops are worked multiple times to expand the width.
- She advises using markers or mental notes to track specific loops for the curved areas.

Finishing Touches
After completing the crocheting process, Anna walks through how to:
- Trim, singe, and hide cord ends securely.
- Add a reinforced edge to the bag’s opening for a polished, professional finish. The edging involves transitioning between different stitches to create an even, straight top.

Adding Accessories
Anna provides a detailed demonstration on:
- Attaching the leather flap using a zigzag stitch for a decorative and durable look. For those interested, she refers to a separate video tutorial on sewing leather flaps.
- Securing the adjustable shoulder strap, carabiners, and bronze lock.

Conclusion
The finished bag is approximately 20cm high and 18cm wide. Anna emphasizes that the project is both functional and stylish, and urges viewers to experiment with colors and finishes to personalize their creation. She concludes the tutorial with an invitation to subscribe to her channel for more handbag tutorials and life hacks.