How to Crochet Strawberry Headband for Beginners

Learn how to crochet a cute strawberry-themed headband using Sakura Spotty yarn and milk cotton yarn with a step-by-step tutorial for beginners. The process involves creating a chainless foundation, crocheting strawberries with red and green yarn, and alternating patterns with white yarn.
Techniques like half-double crochet and single crochet are used to shape the design. The tutorial also includes making adjustable ropes for the headband. It’s detailed and easy to follow, encouraging personalized crafting with vibrant results.

Strawberry Headband Crochet Tutorial
This tutorial by Bounty provides a detailed guide to creating a strawberry-themed headband using crochet techniques. The headband is crafted with a combination of Sakura Spotty yarn and milk cotton yarn, and the entire process is thoroughly explained for both beginners and experienced crocheters.
Materials Needed:
- Yarn: Sakura Spotty and milk cotton yarn in white, red, and green.
- Hook: 4 mm crochet hook.
- Additional Tools: Tapestry needle and scissors.
Crochet Techniques Used:
- Chainless Foundation: A technique to start the base of the headband for a neat and flexible edge.
- Single Crochet: Used extensively to form the main structure of the headband.
- Half Double Crochet: Adds texture and dimension to the headband and is used before starting the strawberry pattern.
- Double Crochet: Used to form the berries in the strawberry pattern.
- Yarn Color Changes: Techniques for switching between colors smoothly to create patterns.
- Slip Stitch: Used for finishing touches and securing ends.
- Chain Stitch: Used to create ties at the ends of the headband.

Steps to Create the Headband:
-
Foundation Row:
- Start with a chainless foundation in white yarn to create the base of the headband. This provides a sturdy starting point for the pattern.
-
Building Up the Structure:
- Crochet a round of single crochet stitches to build up the base, marking the first stitch for neatness and continuity.

-
Establishing the Pattern:
- Continue for two rounds of single crochet stitches. This establishes a strong base for the detailed pattern that follows.
-
Creating the Strawberry Pattern:
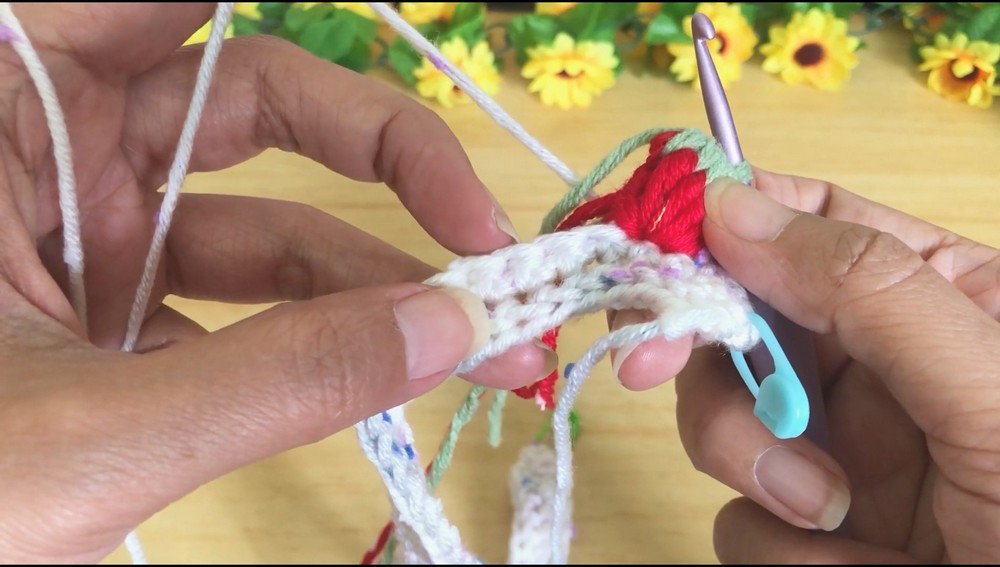
- Alternate between half double crochet stitches in white and rows of strawberries formed using red and green yarn.
- Use double crochet stitches for the berries, switching to red yarn, and incorporate green yarn for leaves. The transition between yarn colors is explained clearly.
-
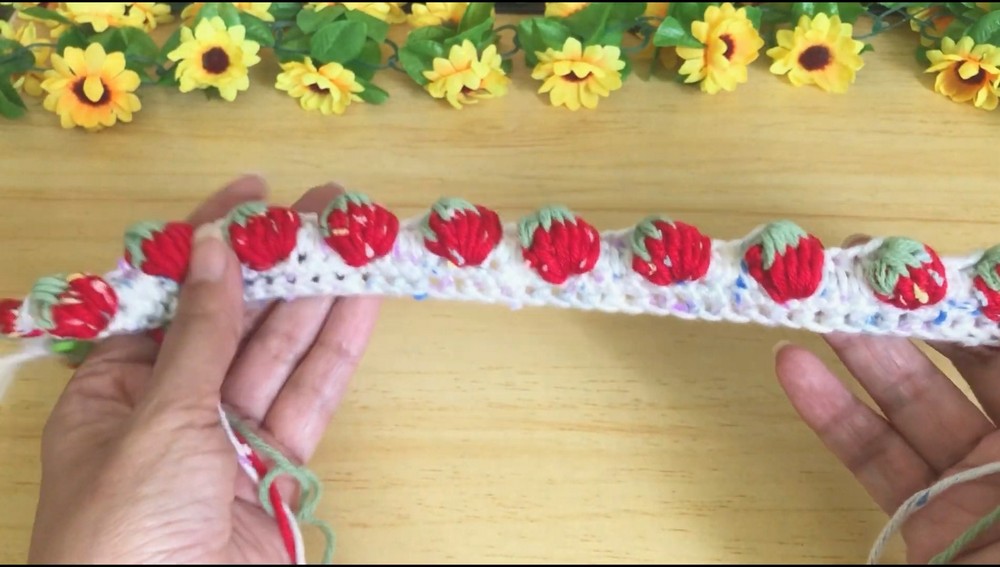
Repeat Strawberry Pattern:
- Continue the strawberry and solid stitch pattern across the headband. This creates a pleasing and evenly distributed decorative element.
-
Finishing the Body:
- Conclude with single crochet rows to match the base section, giving the headband symmetry and completing the repeating pattern.

-
Making the Ties:
- Form chains to create adjustable ties at each end of the headband, finishing with single crochet to ensure durability.
- The length of the chains can be customized according to personal preference.
-
Final Touches:
- Address any leftover yarn by cutting and tidying ends.
- Optional slip stitches can be used to secure any loose areas or provide additional structure.
-
Replicate for Consistency:
- Repeat the same sequence on the opposite edge of the headband for a uniform look.
Closing and Tips:
- Bounty finishes by summarizing key points, sharing tips for adjusting stitch counts or customizing color patterns.
- The importance of markers to keep track of stitches and yarn changes is emphasized for beginners.
- Viewers are encouraged to personalize the headband by varying the number of strawberries or adjusting the length of ties.