Free Crochet Pumpkin Pattern & Tutorial for Seasonal Decor

Bring autumn charm into your home using this free crochet pumpkin pattern and easily create soft decorative pumpkins ideal for centerpieces and mantel styling
There’s a warm, cozy feeling that comes with little handmade decorations during the fall season. One favorite item that really brings charm to any home is a small crochet pumpkin. On the Вязмастерия channel, Diana shares a wonderful design that shows how easy and fun it can be to create your own pumpkin using simple yarn and a crochet hook.
Easy Free Crochet Pumpkin Pattern for Halloween

This free crochet pumpkin pattern features a lovely round shape with a soft, textured surface. The pumpkin’s neat stitches form subtle ridges that mimic the natural grooves of a real pumpkin. Using orange yarn gives it a bright, cheerful look, perfect for autumn displays on tables, shelves, or mantelpieces. What’s great about this design is that you can make different sizes just by using various hook sizes, making it a flexible decoration for your space.
About Channel
Diana from Вязмастерия carefully explains every step in her video (Link is Below), making the project beginner-friendly and enjoyable. Her attention to how the stitches come together to form the pumpkin’s shape helps bring this charming decoration to life. If you like simple yet beautiful ideas to brighten your home, this free crochet pumpkin pattern is a great choice to try.

These crochet pumpkins are not just pretty, they’re also very useful! You can place them in bowls to create seasonal centerpieces or give them as sweet handmade gifts for friends and family. The stuffing inside gives the pumpkin a plump, three-dimensional feel, making it stand out among flat decorations.
Crocheted Pumpkin Pattern
A crocheted pumpkin makes a perfect seasonal decoration for autumn, Halloween, or Thanksgiving. Carefully shaped and worked in the round, this amigurumi-style pumpkin features a softly textured rib appearance achieved by working in back loops only. With simple increases, decreases, and subtle shaping, the finished pumpkin is completed with a sturdy, contrasting stem, resulting in a charming, dimensional piece suitable for decorating table settings or gifting.
Pattern Basic Points
- Created seamlessly in the round, avoiding visible joins for a professional finish
- Entire pumpkin body is worked in back loops only for a ribbed, realistic texture
- Carefully placed increases shape the pumpkin’s curves, while strategic stuffing and sewing define the segments
- A separate stem in brown yarn is crocheted and sewn on for a lively, finished look
- Easily customizable in size by adjusting yarn weight or number of rounds
Special Notes
- Always use back loops only (BLO) for all stitches in the pumpkin body unless otherwise specified
- Use a stitch marker to mark the first stitch of every round to keep track
- Stuffing should be firm but even; insufficient stuffing results in a floppy shape, while overstuffing may distort stitches
- For dramatic segment definition, make several passes with the yarn when shaping
- Adjust the hook size or tension for either a more compact or softer finished effect
- Embroider a face or add embellishments for a whimsical touch

Skill Level
Beginner/Advanced Beginner
This project requires understanding of working in the round, simple increases (INC), decreases (DEC), and making and closing amigurumi shapes. Suitable for crafters who have completed basic amigurumi or crochet rounds with stitch increases.
Materials
- Yarn: YarnArt Jeans or similar cotton/acrylic yarn in orange (main body) and brown (stem)
- Hook: 2.5 mm (beginner recommendation) or 2 mm
- Stuffing: Polyester fiberfill (holofiber)
- Needle: Blunt tapestry needle (for closing, segment shaping, and assembly)
- Scissors
- Stitch Marker
Measurements / Sizing
- Completed Pumpkin: Approximately 8–10 cm (3–4 in) diameter, size may vary with tension and yarn
- Adjustable: Add or subtract rounds for larger or smaller pumpkins
Gauge
- Gauge is not strictly critical for amigurumi, but stitches should be tight enough so stuffing does not show through
- Sample gauge: approx. 6–7 single crochets wide per 2 cm
Stitch Abbreviations
- ch – chain
- sc – single crochet
- inc – increase (2 sc in same st)
- dec – decrease (sc two together)
- BLO – back loop only
- st(s) – stitch(es)
- rnd – round
- mr – magic ring
Special Stitches
- Magic Ring (mr): Create a loop, crochet stitches into the loop, pull tail to tighten—forms a closed, neat center
- Single Crochet Increase (inc): 2 sc in the same stitch
- Single Crochet Decrease (dec): Insert hook in next st, yo and pull up loop, then in next st, yo and pull up loop (3 loops on hook), yo and pull through all 3 loops
Detailed Step-by-Step Pattern
Pumpkin Body
Foundation:
- Make a magic ring (mr).
Round 1:
- 8 sc in mr (8).
- (Use a stitch marker in the first st of each round.)
Round 2:
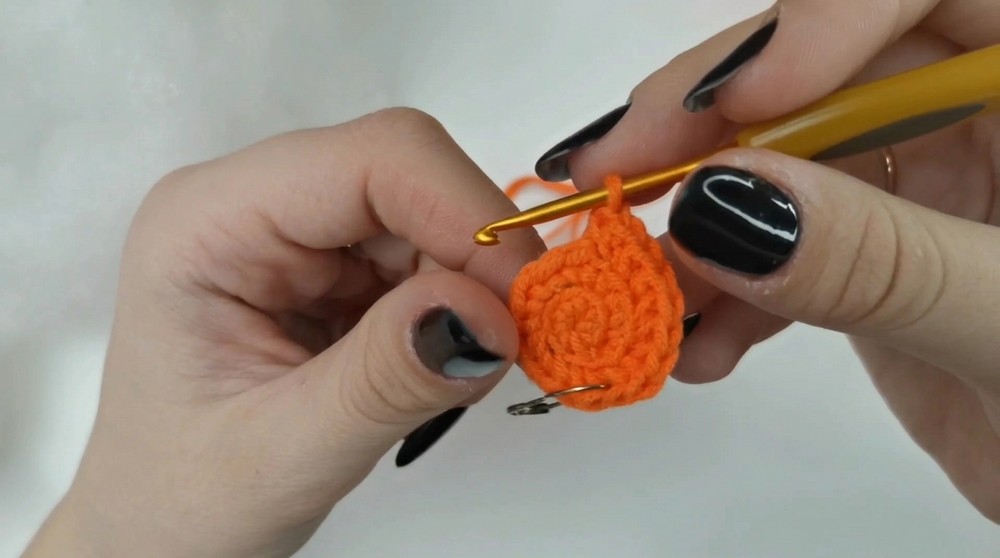
- 8 inc (work 2 sc in each st, BLO) around = 16 sc. (All following rounds for the body are worked BLO)
Round 3:
- (1 sc, inc) repeat 8 times around = 24 sc.
Round 4:
- (2 sc, inc) repeat 8 times around = 32 sc.
Round 5:
- (3 sc, inc) repeat 8 times around = 40 sc.
Round 6:
- (4 sc, inc) repeat 8 times around = 48 sc.
Round 7:
- (5 sc, inc) repeat 8 times around = 56 sc.
Round 8:
- 56 sc around.
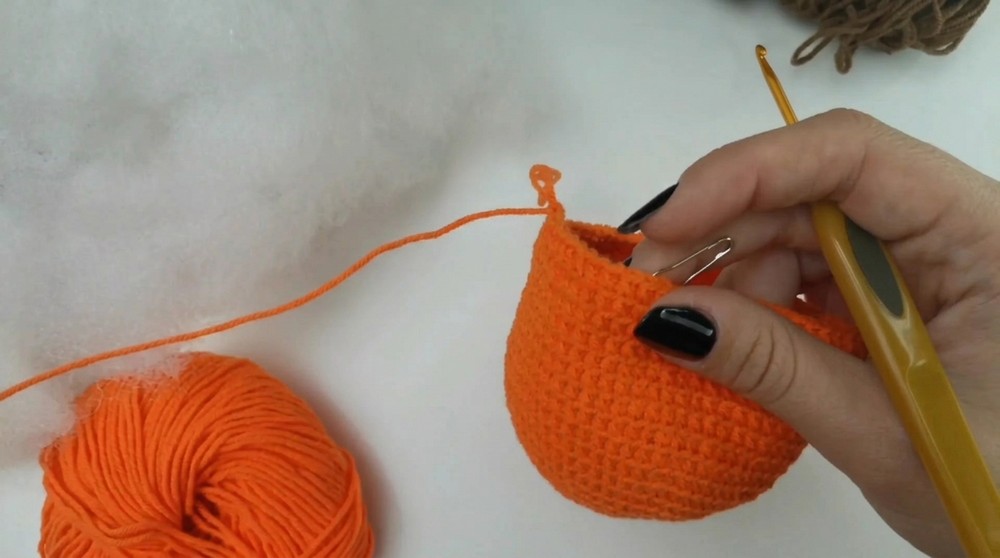
Round 9:
- (6 sc, inc) repeat 8 times = 64 sc.
Rounds 10–19:
- 64 sc per round. (Continue working BLO for every stitch.)
Round 20:
- (6 sc, dec) repeat 8 times = 56 sc.
Round 21:
- 56 sc around.
Round 22:
- (5 sc, dec) repeat 8 times = 48 sc.
Round 23:
- (4 sc, dec) repeat 8 times = 40 sc.
Filling:
- Pause here and firmly stuff pumpkin with fiberfill.
Round 24:
- (3 sc, dec) repeat 8 times = 32 sc.
Round 25:
- (2 sc, dec) repeat 8 times = 24 sc.
Round 26:
- (1 sc, dec) repeat 8 times = 16 sc.
Round 27:
- 8 dec (sc2tog around) = 8 sc.
Shaping (Creating Pumpkin Segments):
- Fasten off, leaving a very long tail.
- Close last 8 stitches tightly using the tapestry needle.
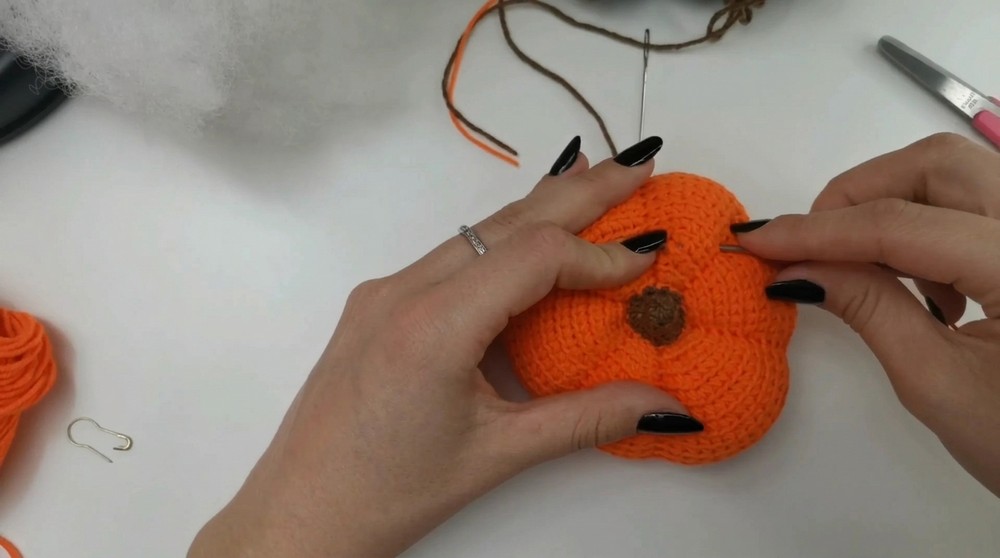
- To create segments: Thread tail on needle, insert up through the center top of the pumpkin to the bottom and back up several times, pulling snugly each pass to define ridges (usually 5–8 sections). Distribute tension evenly for a round, plush pumpkin.

Pumpkin Stem
Round 1:
- In brown yarn, make a magic ring, 6 sc in mr (6).
Rounds 2–3:
- 6 sc around each round (6).

Round 4:
- 6 inc (2 sc in each st) = 12 sc.
Round 5:
- 12 sc around.
- Fasten off, leaving a long tail for sewing.
Assembly
- Lightly stuff stem if a firm appearance is desired.
- Center stem on top of pumpkin, use tapestry needle to whipstitch or sew evenly around, catching both the base of the stem and several stitches of the pumpkin’s crown.
- Weave in and trim all remaining yarn tails securely.
- Gently shape and fluff pumpkin if necessary.
Conclusion
This plush, richly textured crocheted pumpkin is a delightful project for those seeking decorative autumn accents. Defined ridges are created effortlessly with simple round construction and back loop technique, while the separate stem offers realistic detail. The pattern’s accessible structure allows for easy resizing and customizing, making it suitable for seasonal displays, playful gifts, garlands, or even as a festive pin cushion. Quick to finish and easy to adapt, each pumpkin adds a personal, handmade warmth to any space.