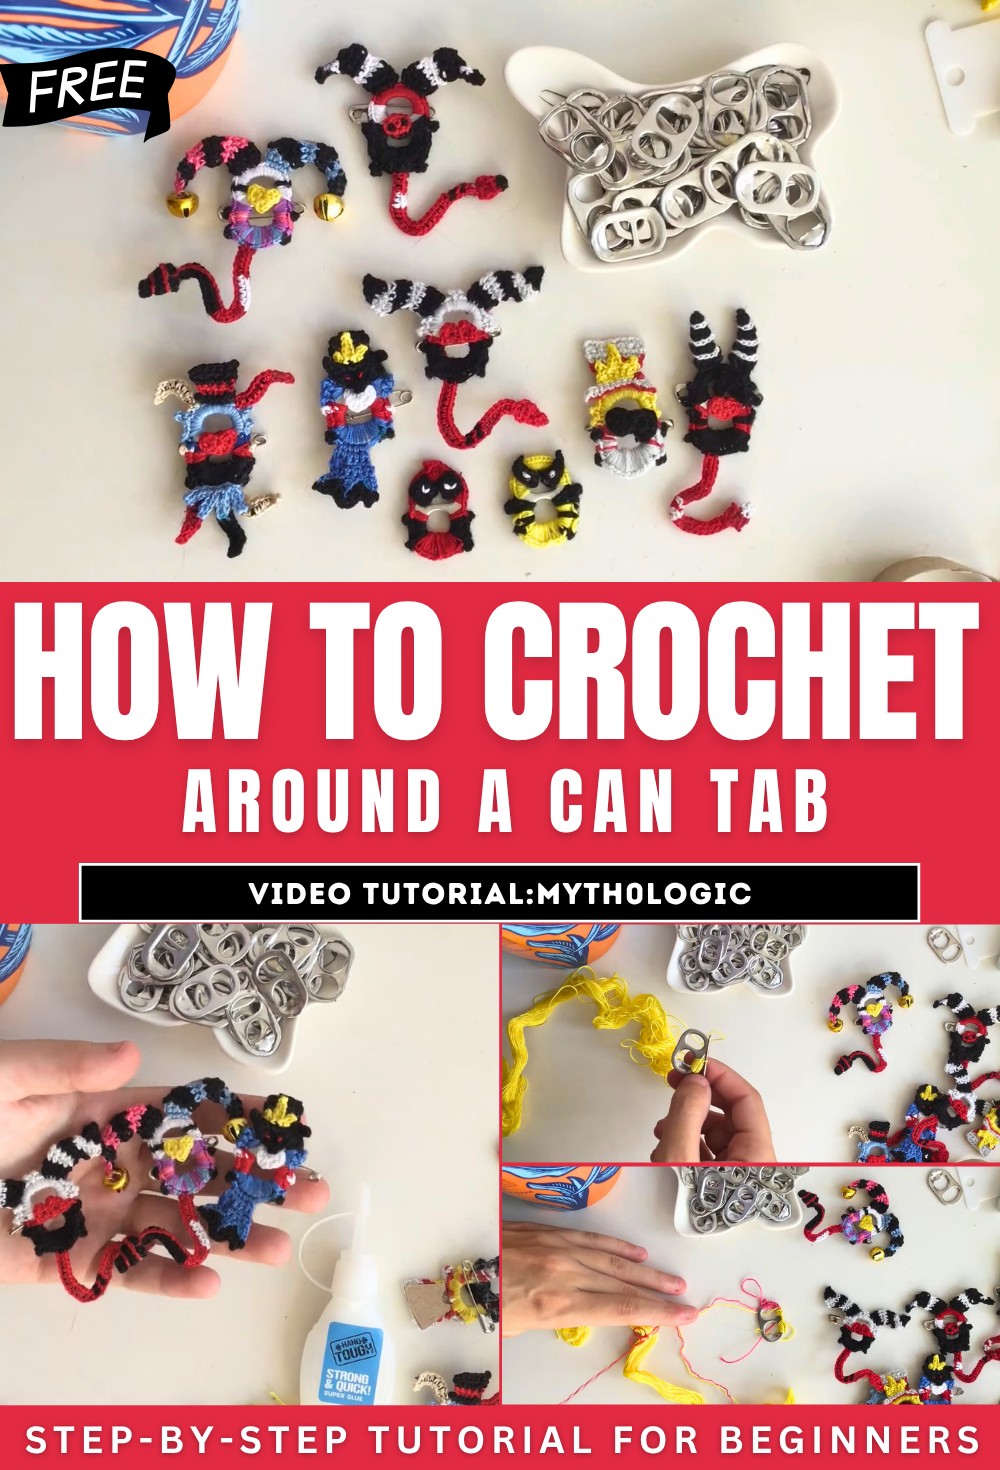
How To Crochet Around A Can Tab for Beginners
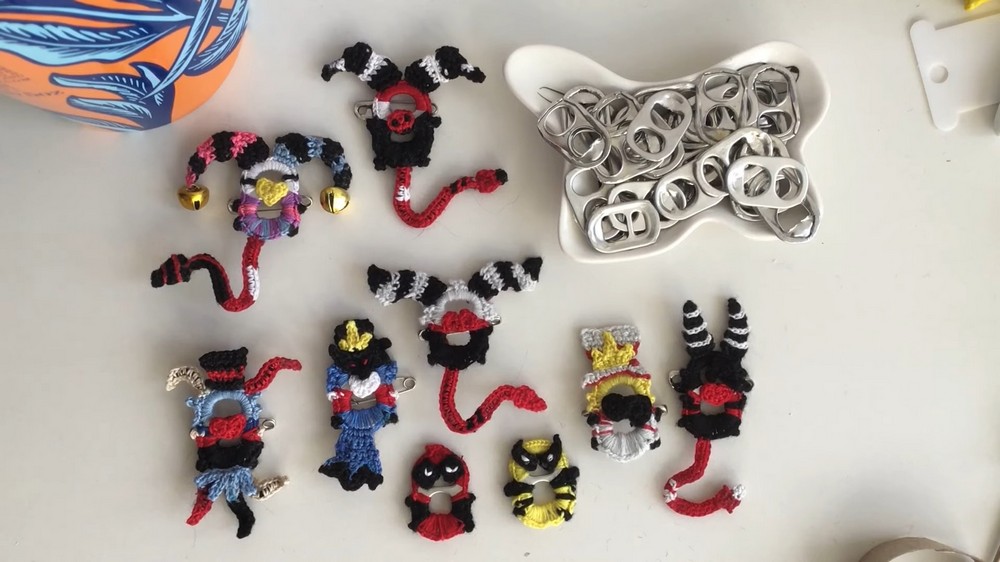
The video is a tutorial on creating unique character pins using recycled can tabs and crochet techniques. The creator demonstrates step-by-step how to crochet around the tabs, customize designs, add details like tails, arms, and horns, and finish by attaching a pin for wearable art.
The designs are versatile, allowing for characters, animals, or personalized shapes, with tips on using embroidery threads, safety pins, and super glue for durability. Perfect for eco-friendly crocheting enthusiasts. So, follow through with us for the complete tutorial.
Crochet Can Tab Pin Tutorial
This tutorial demonstrates how to transform soda can tabs into creative and eco-friendly crochet character pins. The step-by-step process allows for customization, encouraging viewers to design personalized decorations or wearable art for bags. Below is the organized walkthrough of the tutorial:
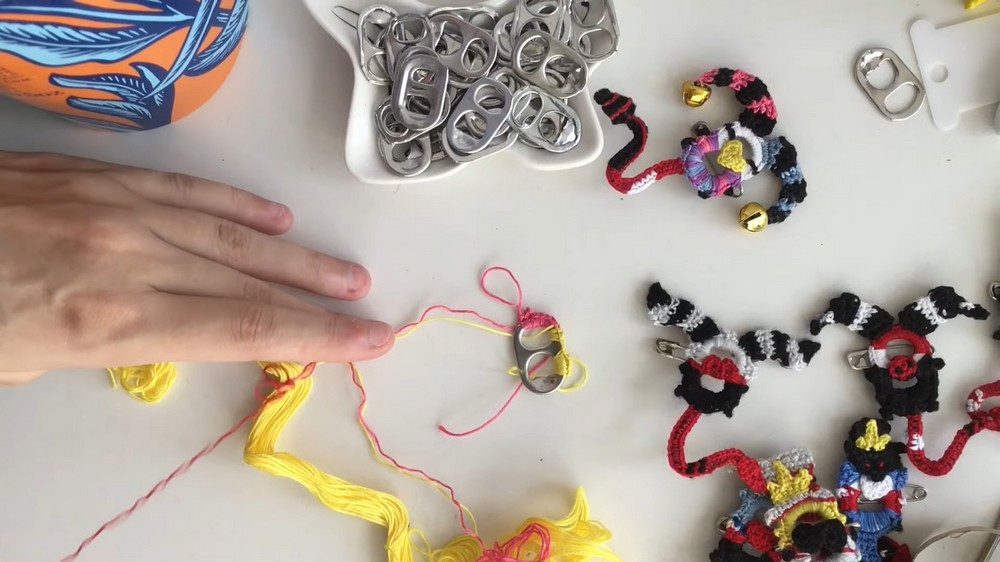
Materials Needed:
- Can Tabs: Standard soda can tabs are used, with options to choose between commonly available tabs or slightly wider ones, depending on preference.
- Thread/Yarn: The creator uses embroidery thread but mentions that any type of thread or yarn will work, including thicker alternatives.
- Crochet Hook: A 0.85 mm hook is used for small threads, but the tutorial allows flexibility depending on the yarn.
- Glue/Sewing Supplies: Super glue, a needle, or cardboard are suggested for securing edges or adding solid details.
- Pins: Safety pins or dedicated pin backs to convert the design into wearable art.
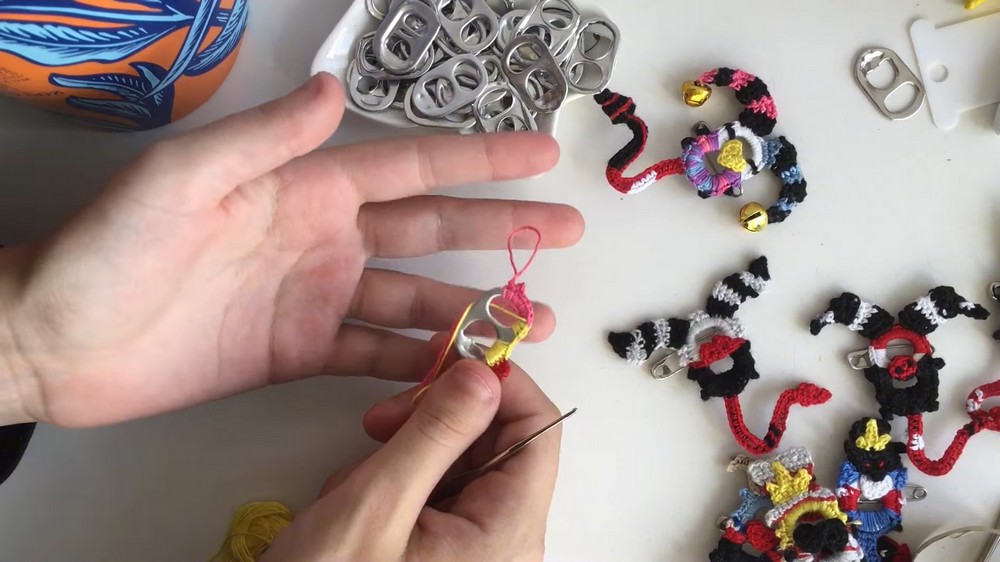
Steps to Crochet Around a Can Tab
-
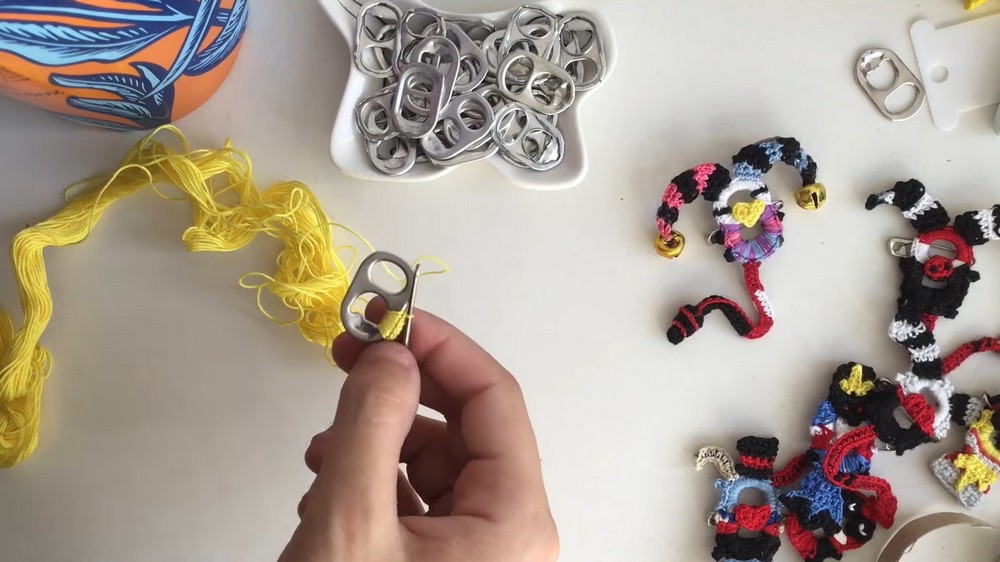
Begin Crocheting:
- Tie a slip knot onto the crochet hook, leaving a small tail to avoid unraveling.
- Insert the hook through a hole in the can tab and crochet around the tab’s edges.
- Adjust the number of stitches depending on thread size for even coverage.
-
Change Colors:
- A color change is demonstrated by incorporating a new thread before completing the last stitch of the current color.
-
Complete the Foundation:
- Crochet around the entire tab, resulting in a base design ready for further embellishment.
Adding Details:
-
Creating Arms and Legs:
- Use a small “bump” or decorative technique (e.g., a picot stitch) to mimic hands, feet, or smaller features. Chain stitches can be adjusted for different shapes like hair strands or other details.
-
Making Tails and Horns:
- Chain a desired length for tails or horns. Additional reinforcements like gluing cardboard or crocheting around wire can make them sturdier. Practice is encouraged for beginners using thicker materials.
-
Adding Structured Features:
- Accessories such as hats or larger elements can be designed by crocheting additional rows around the tab or freehanding new patterns.
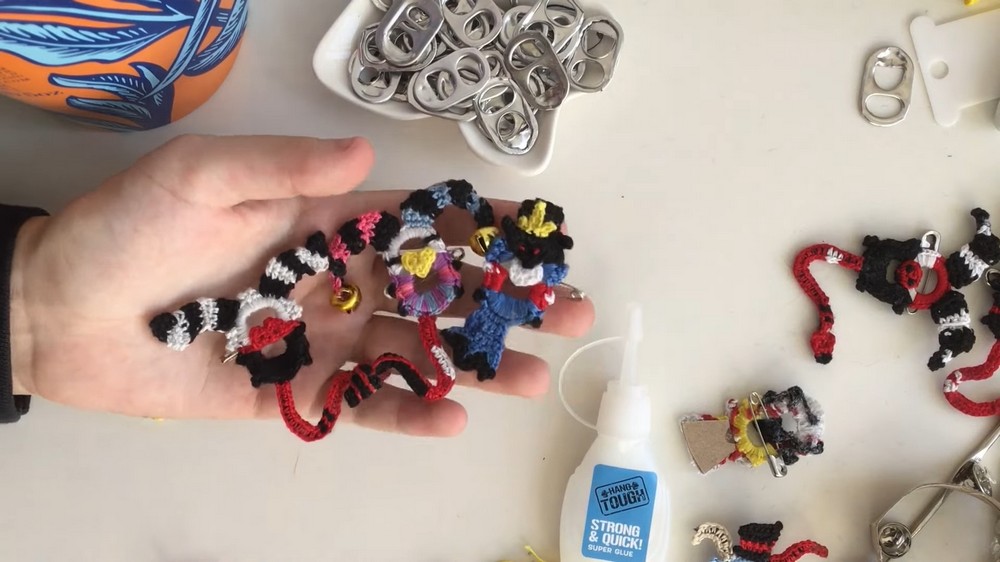
Final Assembly:
-
Finishing Details:
- Tie and secure loose threads after completing the piece. Knotting and trimming are used to tidy the design. Super glue is recommended for reinforcement.
-
Attaching the Pin:
- Option 1: Sew a safety pin onto the back of the can tab by wrapping thread around both the pin and the tab’s middle.
- Option 2: Use super glue to attach a safety pin or pin back directly to the tab.
-
Optional Decorations:
- Add small crocheted designs like hearts, circles, or stars to the pin base for a polished look. These can serve to cover glue marks.
Creative Inspiration:
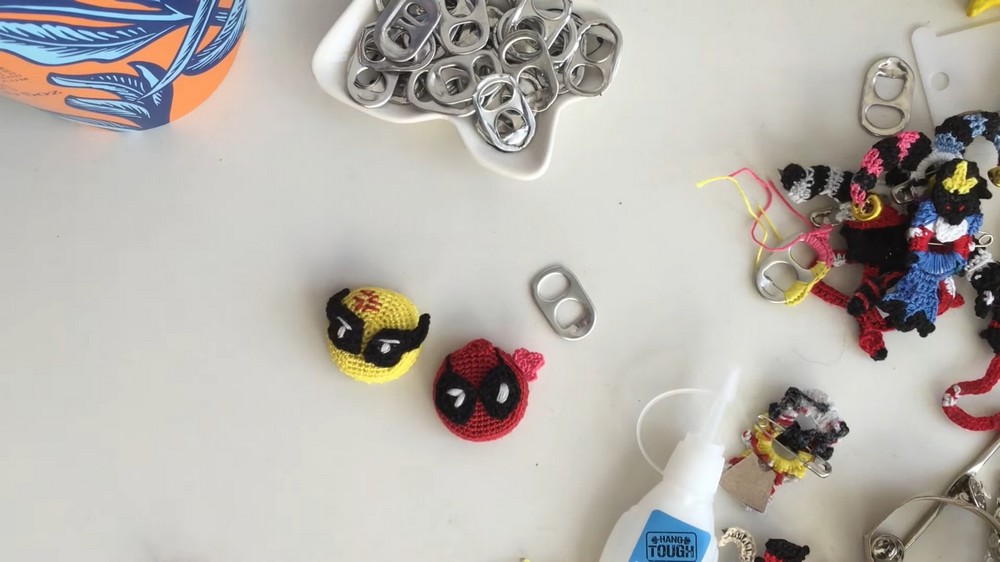
The creator highlights freedom in designing custom characters, animals, or patterns. Inspiration can be drawn from fandoms, personal interests, or other creative ideas. Examples like Deadpool, BL-inspired characters, and cats are included.
Additional Tips:
- Test stitches and practice on simpler materials if new to wire crochet.
- Consider using cardboard for structural support in floppy or detailed sections.
- For a clean finish, sketch or trace a design around the can tab to plan before crocheting.