How to Crochet Easy Jellyfish Keychain for Beginners
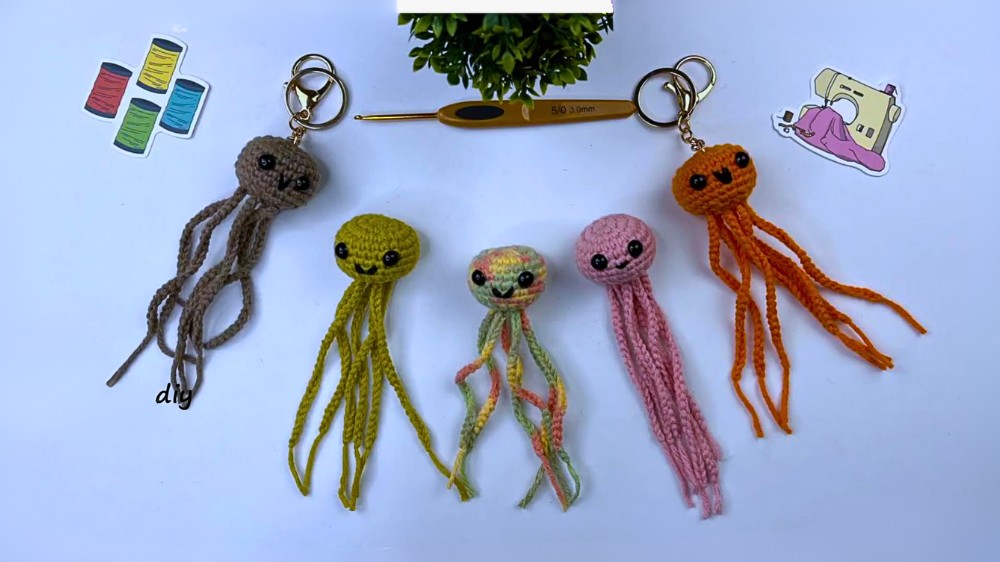
In this post, you’ll learn how to crochet an adorable jellyfish keychain that’s simple and beginner-friendly. Using milk cotton yarn, a 3mm hook, doll eyes, and some cotton stuffing, the project involves basic techniques such as the magic ring, single crochet, increase, and decrease stitches. The tutorial guides you step-by-step to create the jellyfish’s head, add eyes, and sew a smiley mouth.
Finish the design with fun, wavy tails using simple chains. This quick and easy craft results in a charming keychain perfect for gifting or personal use! So, follow through with is for the complete tutorial for beginners.
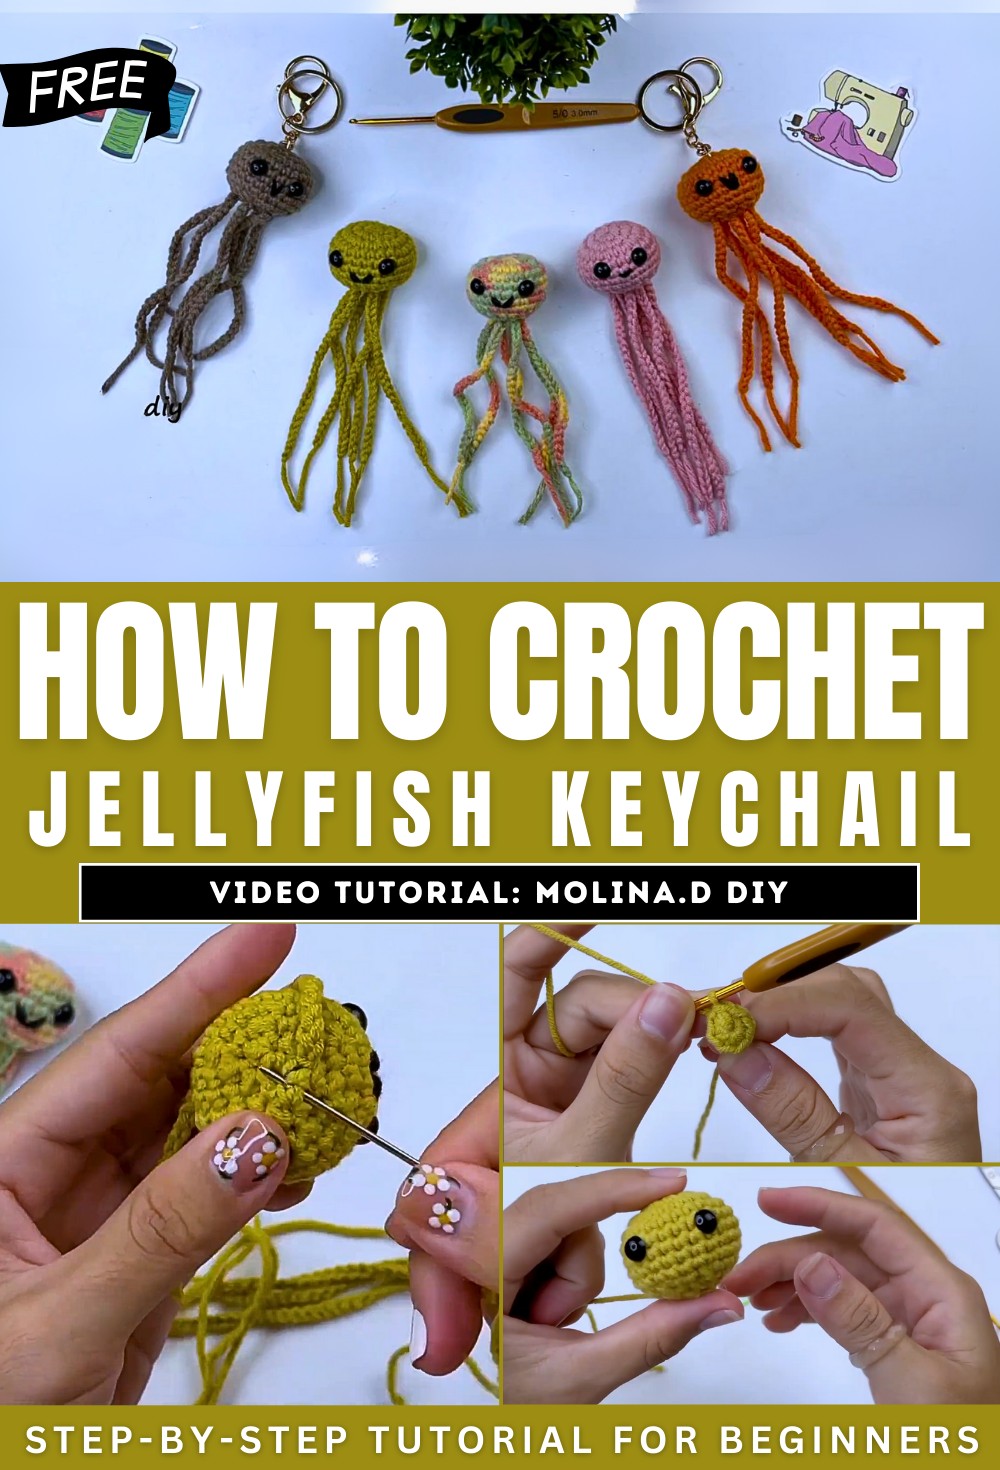
Cute Jellyfish Keychain Crochet
In this tutorial by Molina.D DIY, you’ll learn how to create an adorable crocheted jellyfish keychain. This project is beginner-friendly and uses basic crochet techniques such as the magic ring, single crochet, increase, decrease, slip stitch, and sewing. Following clear step-by-step instructions, the tutorial guides you through crafting this cute accessory, complete with whimsical tails and a smiley face. Below is a breakdown of the tutorial process.
Materials Needed
- 125g Milk Cotton Yarn (5ply)
- Cotton stuffing
- 3mm crochet hook
- Doll eyes
- Keychain
- Stitch marker
- Scissors
- Black yarn for sewing the mouth
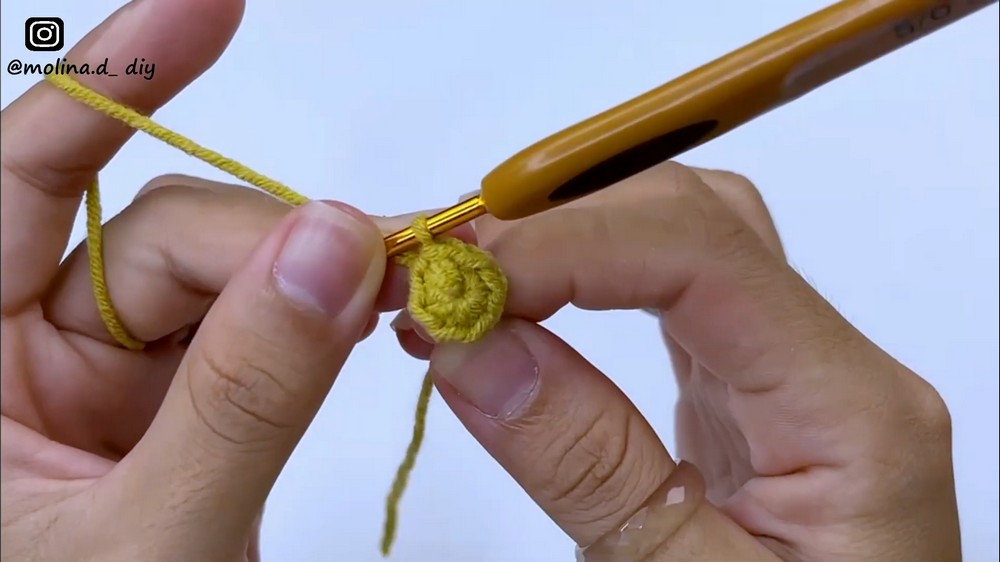
Step 1: Preparing the Head
- Begin by making the head of the jellyfish using the magic ring technique as a foundation.
- The tutorial emphasizes holding the yarn in whatever way feels comfortable.
- Successive rounds are crocheted, gradually increasing the size with simple single crochets and increases.
- After several rounds to form the body, the stitches are worked evenly to maintain the structure.
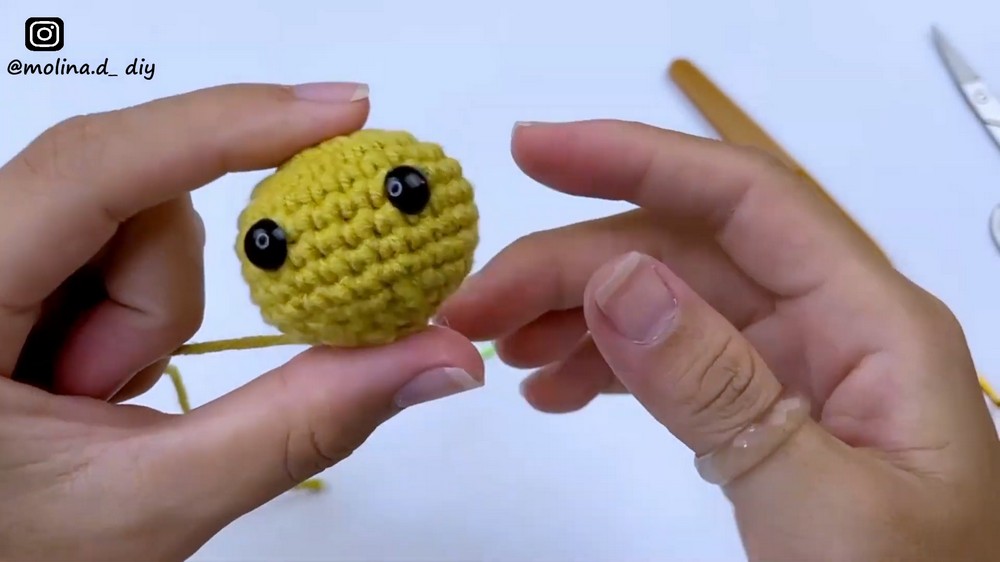
Step 2: Adding Eyes
- Once the head is near completion, doll eyes are added to give the jellyfish its playful look.
- The tutorial recommends placing the eyes along a specific backline to ensure symmetry.
- Careful positioning ensures the keychain looks neat and professional.
Step 3: Closing the Head
- Before fully closing the head, cotton stuffing is added to maintain the jellyfish’s shape.
- After stuffing, single crochet decreases are worked over several rounds to close off the head neatly.
- Slip stitches are used to secure the final round.
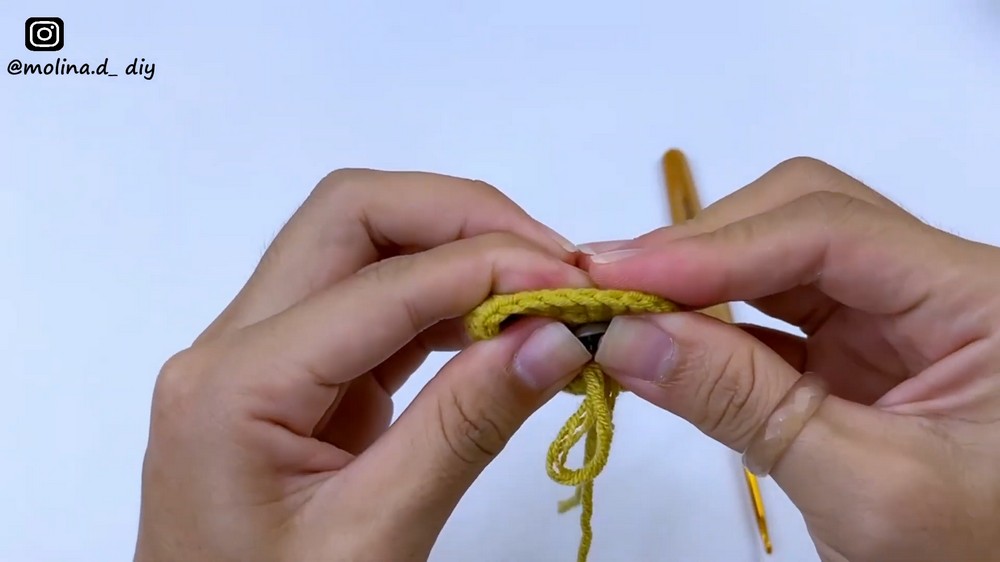
Step 4: Creating the Tails
- The jellyfish tails are crafted separately using simple chains.
- The tutorial suggests making multiple tails (at least six or more) for a fun and wavy appearance.
- Each chain is attached to the jellyfish head to create a whimsical underwater effect.
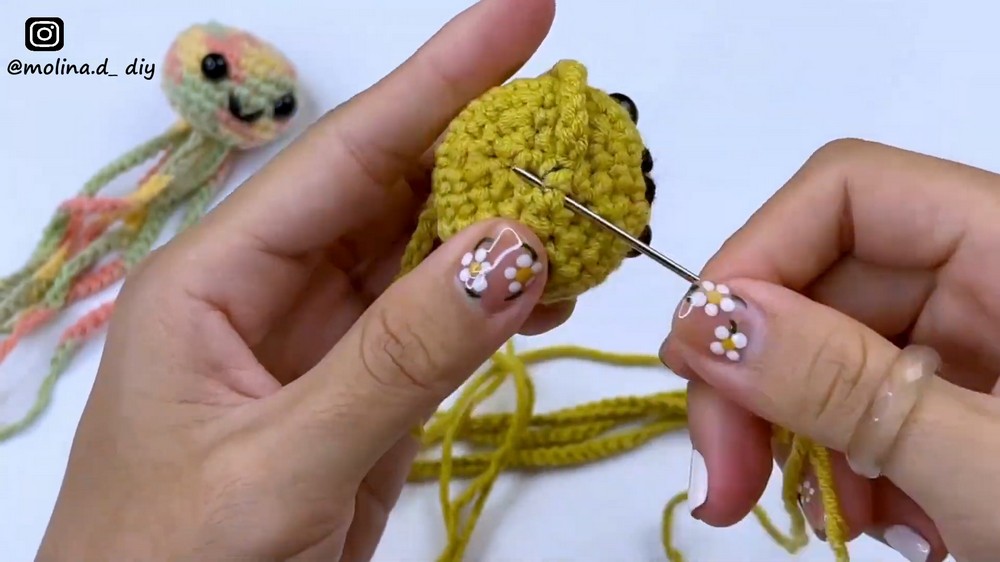
Step 5: Sewing the Mouth
- Using black yarn, the tutorial demonstrates how to sew a smiley mouth onto the jellyfish’s head.
- A simple sewing technique is used to create a cheerful expression.
- The mouth adds personality to the jellyfish and completes its adorable design.
Step 6: Final Touches
- The finished jellyfish is carefully examined for any loose ends, ensuring the final product looks polished.
- The keychain is attached to turn the jellyfish into a functional and decorative accessory.
Conclusion
- The completed jellyfish keychain is perfect for gifting or personal use. Its playful design makes it a delightful addition to bags, keys, or as a fun decoration.
- The creator encourages viewers to make their own jellyfish keychains and experiment with colors to customize the design.