How To Crochet Mini Storage Basket With T- Shirt Free Pattern & Tutorial
Tidy up your desk with the Free Crochet Mini Storage Basket Pattern and keep pens and hooks within reach in a chunky pink holder that takes up little space.
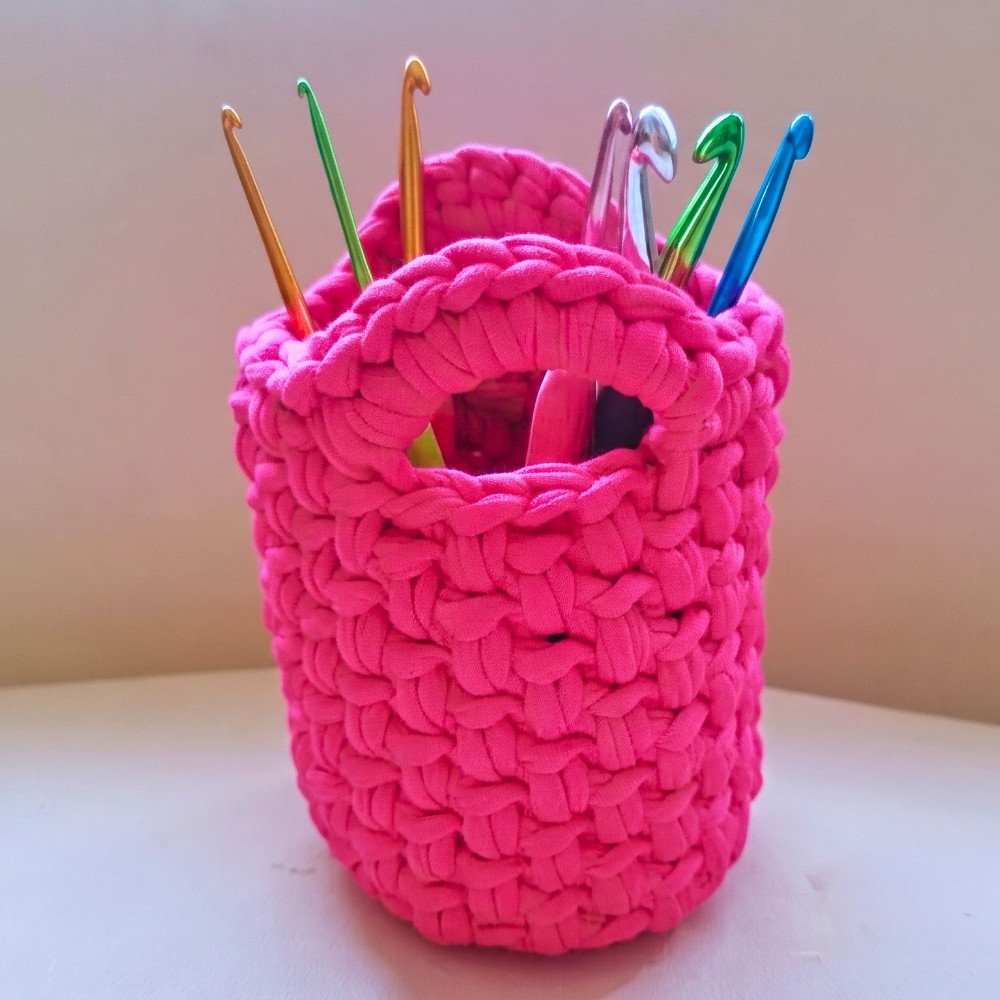
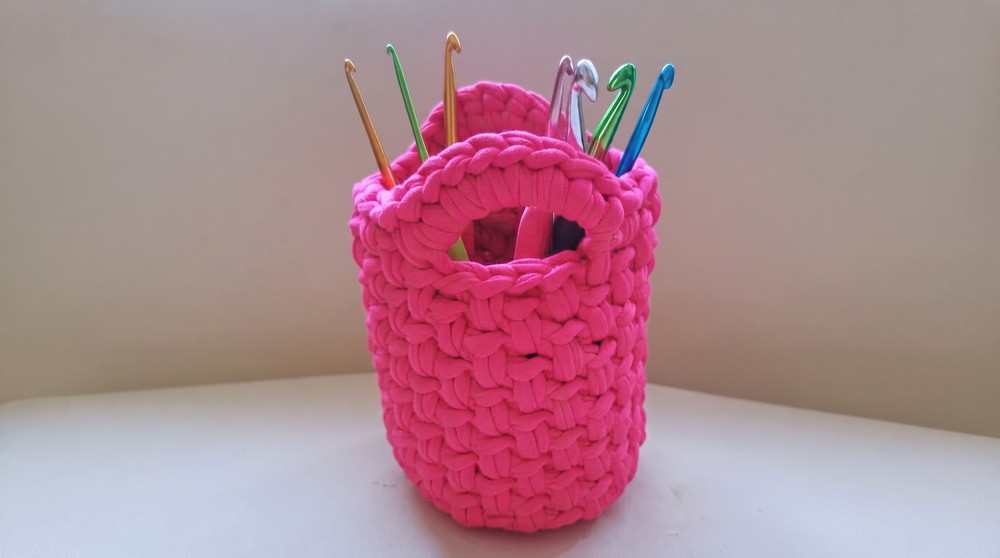
Pens have a way of rolling behind a notebook just when you need one. With the Free Crochet Mini Storage Basket Pattern, you can keep them upright in a small pink holder that fits beside a lamp or computer screen. The sample also holds crochet hooks, with their colorful tips showing above the rim so you can spot the one you want.
Handy Free Crochet Mini Storage Basket Pattern for Pens and Hooks
About the Basket’s Creator
Nozishandwork official shares small crochet projects for daily use, including this pen holder, along with pieces such as coasters and coin pouches. The basket project comes with English subtitles. Its sample holds crochet hooks, an example of how the finished project can keep several tools together on a crowded desk.
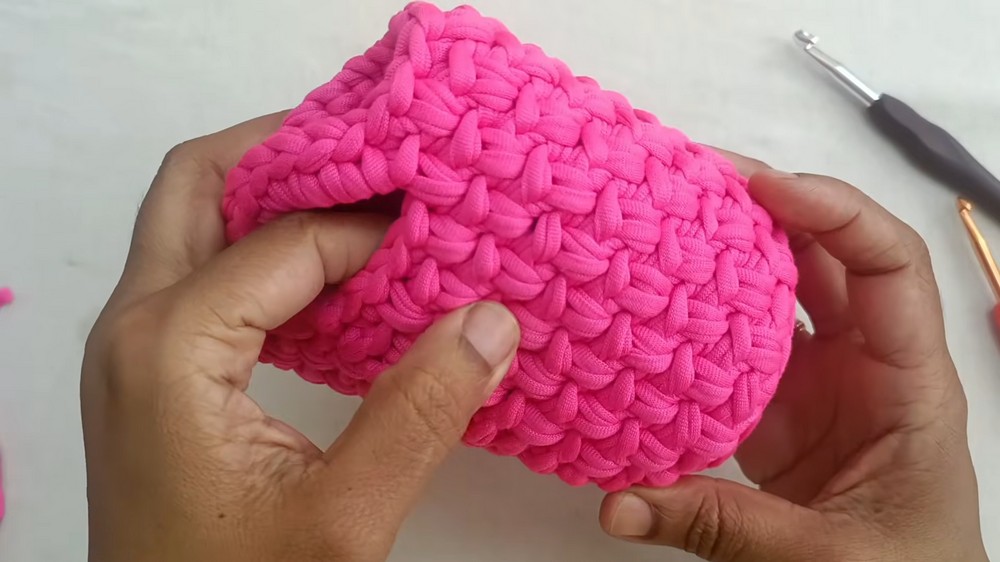
Look at the sides and you can see the wide loops of T-shirt yarn crossing over each other. They give the basket a chunky surface and highlight the neat rows circling its body. Small handles are worked into the upper edge, leaving openings you can slip a finger through to move it. The basket stands upright on a base that takes up very little desk space, which helps when the rest of the surface is covered with books or papers.
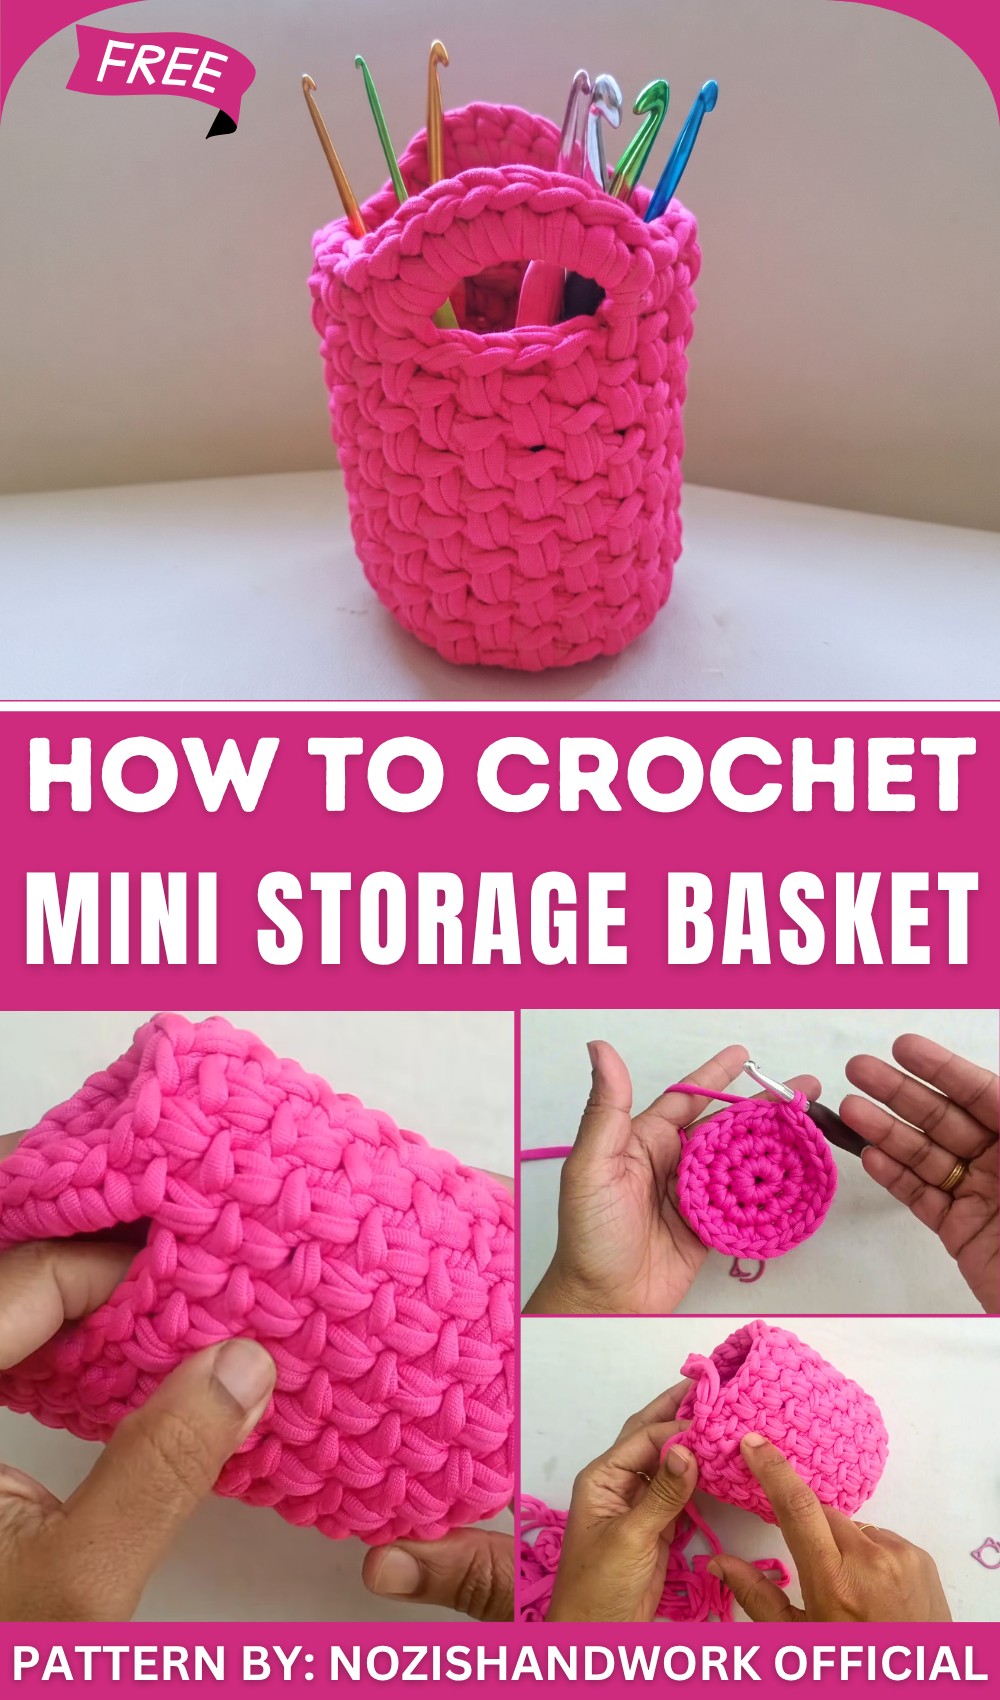
Use one for pencils at a homework table or set it near your crochet supplies to catch the hooks you use most. It could also hold a few short makeup brushes beside a mirror. For a small gift, tuck in a couple of colorful pens and a handwritten note. The vivid pink shows up well against pale wood, and the thick stitches give even a crowded desk one easy place to look for the things you often reach for.
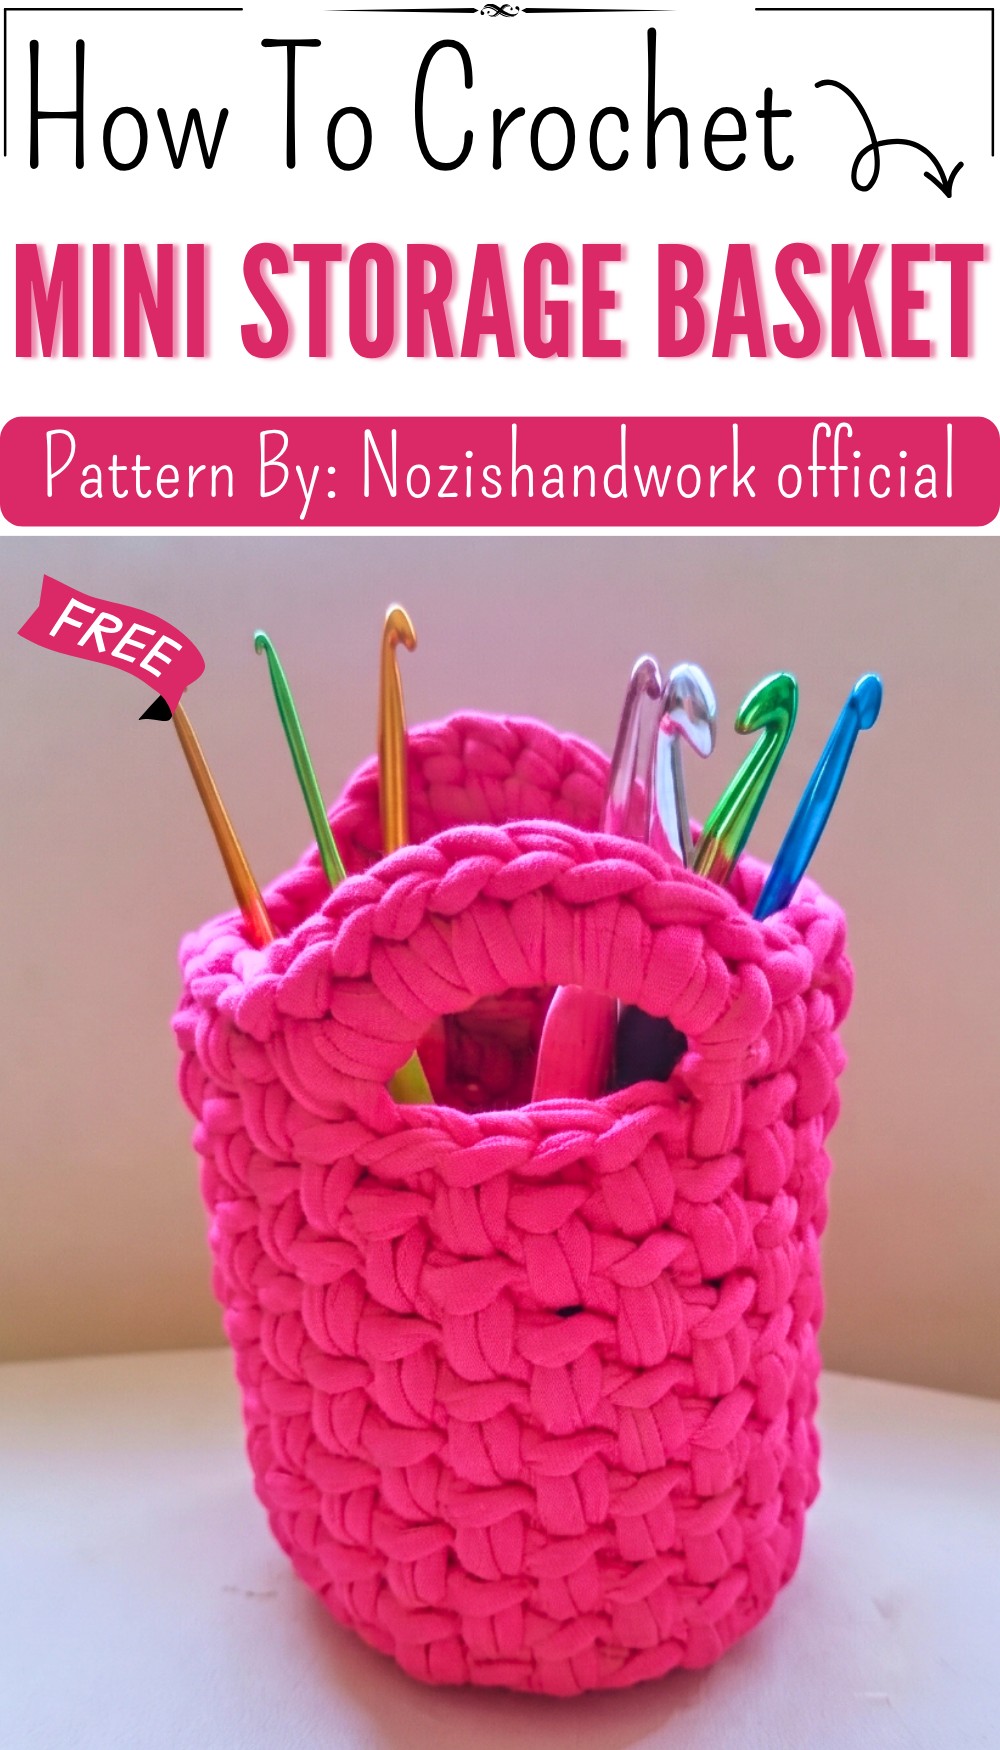
Basket Stitch Crochet Basket Pattern
This durable and stylish basket is designed using the basket stitch technique, creating a textured finish ideal for storing pencils, crochet hooks, or other small items. With its structured design and practical handle, this basket is a versatile piece that adds charm to your space.
Skill Level
Beginner-Friendly – This pattern is suitable for beginners who are comfortable with basic stitches like single crochet and slip stitch. The basket stitch method used here is easy to learn and creates a unique texture.
Materials
- Yarn:
- 100g t-shirt yarn (dark pink or lavender; you can use any color or mix colors for contrast).
- Hook:
- 6.0mm crochet hook.
- Notions:
- Scissors.
- Stitch markers.
- Yarn needle (for weaving in ends).
Stitch Abbreviations
- Ch: Chain
- SC: Single Crochet
- SL St (Slip Stitch): Slip Stitch
Useful Tips
- Marker Placement: Use a stitch marker to mark the beginning or end of each round. This ensures precision in counting stitches.
- Tightly Pulled Magic Ring: The magic circle must be secure and pulled tight to avoid gaps at the foundation of your basket.
- Front and Back Loops: Pay close attention to the front and back loops of the stitches when working the basket stitch technique.
- Adjust Size: You can increase base and height rounds to create larger baskets or bags.
Pattern Instructions
I. Basket Base
Round 1 – Magic Ring Foundation
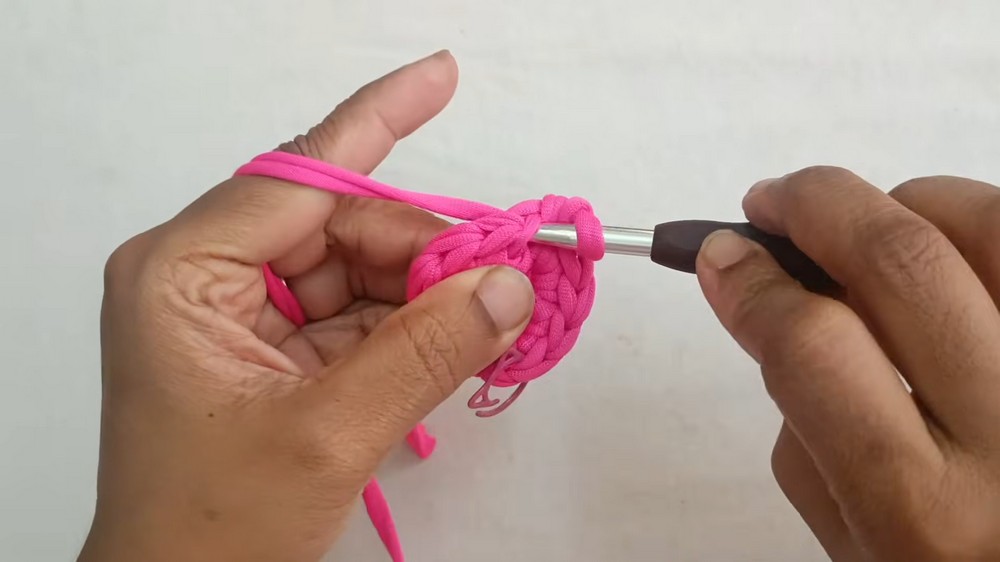
- Create a magic ring by wrapping the yarn around your fingers and pulling through. Chain 1 to secure.
- Work 8 SC stitches into the magic ring. Use a stitch marker to mark the first stitch.
- Pull the yarn tightly to close the magic ring.
- Insert the hook into the first SC from this round and make a SL St to close the round.
Round 2 – Increasing the Base
- Ch 1 (acts as the turning chain).
- Work 2 SC stitches into each stitch around. Place a stitch marker at the first SC.
- By the end of this round, you should have 16 SC stitches.
- Close the round with a SL St into the first SC.
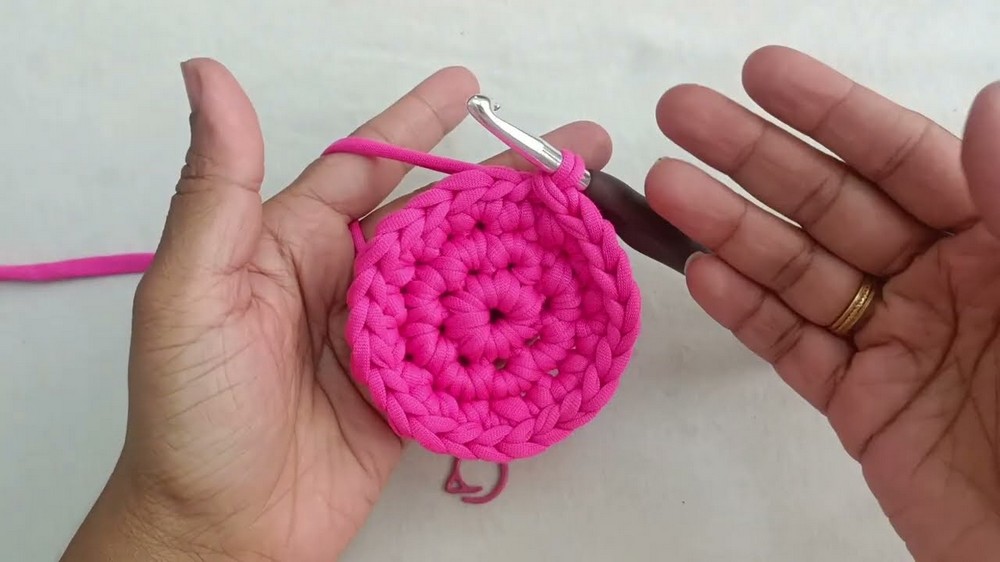
Round 3 – Continue Expanding
- Ch 1 to begin.
- Work alternating increases:
- Work 1 SC stitch into the first stitch.
- Work 2 SC stitches into the next stitch.
- Repeat this pattern, alternating between 1 SC and 2 SC around the circle.
- At the end of this round, you should have 24 SC stitches.
- Close the round with a SL St into the first SC.
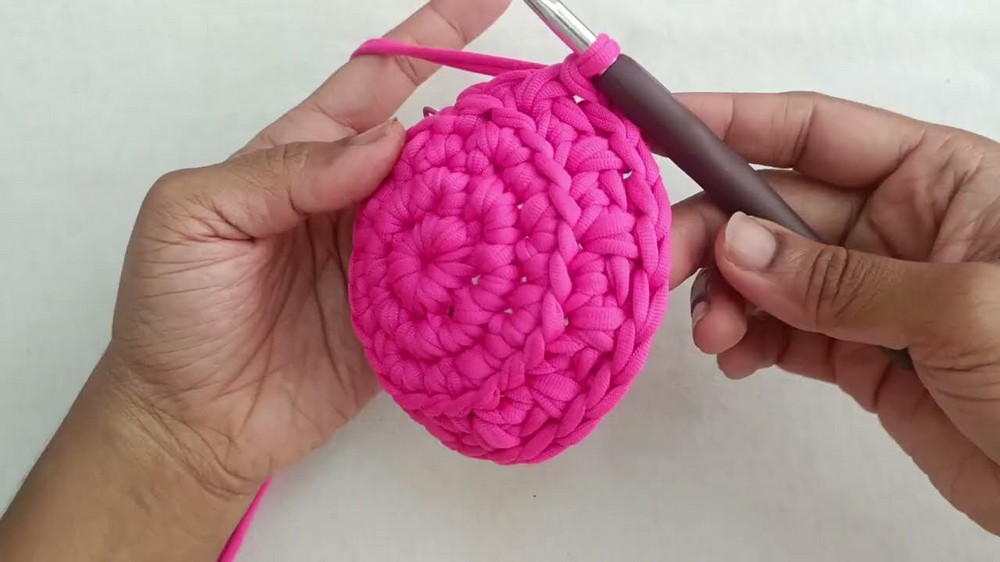
Optional Expansion
- You can increase the base size further by repeating the above method. For example:
- Round 4: 1 SC, 1 SC, 2 SC, repeat around (32 stitches).
- Round 5: 1 SC, 1 SC, 1 SC, 2 SC, repeat around (40 stitches).
- Adjust the number of rounds depending on how wide you want your basket’s base to be.
II. Basket Body – Creating Texture
Transition into the basket stitch technique for the basket body.
Round 4 – Back Loop Single Crochet
- Ch 1 to start.
- Work 1 SC in each back loop only around. Use markers for accuracy if needed.
- At the end of this round, close with a SL St into the first SC.
- The number of stitches should match your previous round count (e.g., 24 stitches).
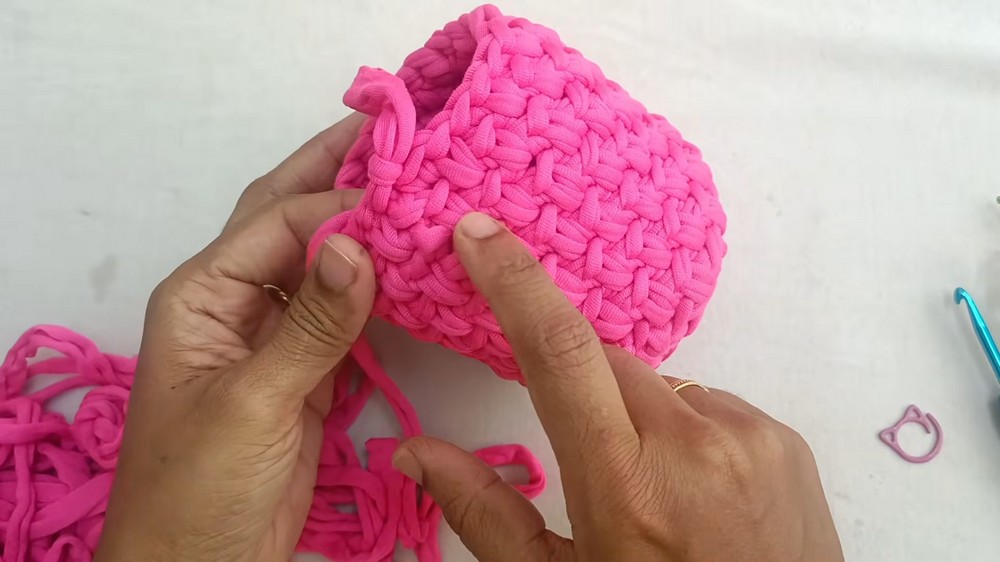
Round 5 – Basket Stitch Begins
- Ch 1 and begin working alternating stitches:
- Insert your hook into the back loop of the first stitch and work 1 SC.
- Insert your hook into the space below the next stitch (the long leg of the stitch) and work 1 SC.
- Continue alternating between a back loop SC and a long single crochet around.
- Close the round with a SL St into the first SC.
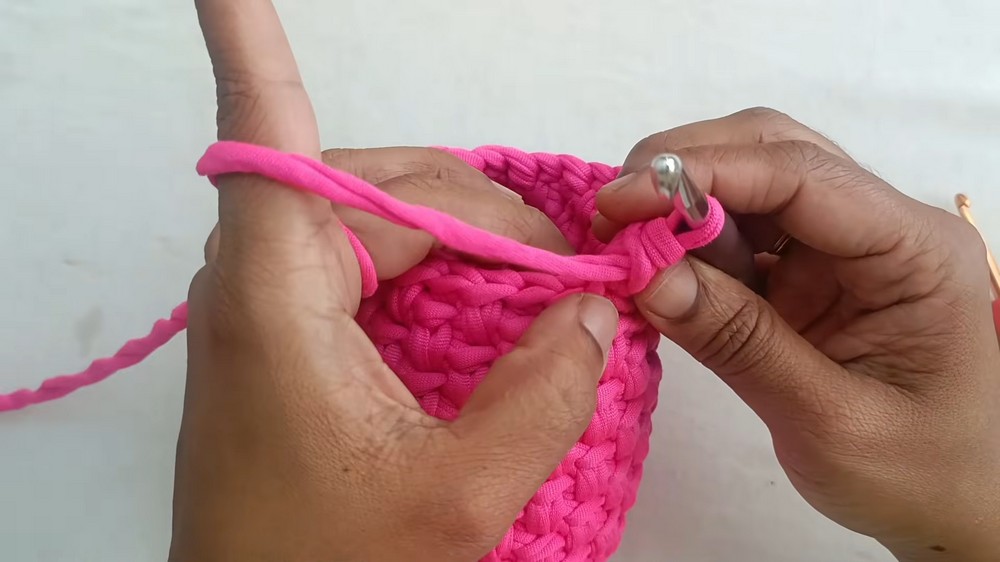
Rounds 6–11 – Continuing the Basket Stitch
- Round 6:
- Switch to work in the front loops (previously ignored front loops).
- Insert the hook into the front loop for the first stitch, working 1 SC.
- Work a long SC into the row below where indicated.
- Round 5: Work in the back loops.
- Alternate rounds (odd-numbered rounds back loops; even-numbered rounds front loops) until the basket reaches your desired height, which will generally be 11 rounds for a standard pencil stand.
III. Handles
Round 12 – Attaching Handles
- Ch 1 to begin. Work 8 SC stitches into consecutive spaces along the rim.
- Chain 6 and skip 4 stitches.
- Continue working 8 SC stitches into the next 8 spaces along the rim, then repeat Chain 6 and skip 4 stitches.
- Continue alternating SC stitches and chain loops until the round is complete.
- Close the round with a SL St into the first SC.
Round 13 – Reinforcing the Handles
- Ch 1 and work SC stitches into each chain from the handle loops. This should result in 8 SC stitches per handle loop.
- Work SC stitches around the basket, ensuring to alternate front and back loop stitches appropriately.
- Repeat until the round is complete, closing with a SL St.
- Weave in ends and hide them.
Measurements
- Basket Height: ~6 inches (adjustable by adding more rounds).
- Basket Diameter: ~5 inches (adjustable with additional base rounds).
- Handle Length: ~6 chains.
Conclusion
This basket stands out with its sturdy and beautiful basket stitch texture. Whether you use it as a pencil or hook stand, or modify it into a larger storage basket or handbag, the possibilities are endless. Adjust the size or height according to your needs. This project is practical, lightweight, and easy to complete, making it a fantastic addition to your handmade creations.