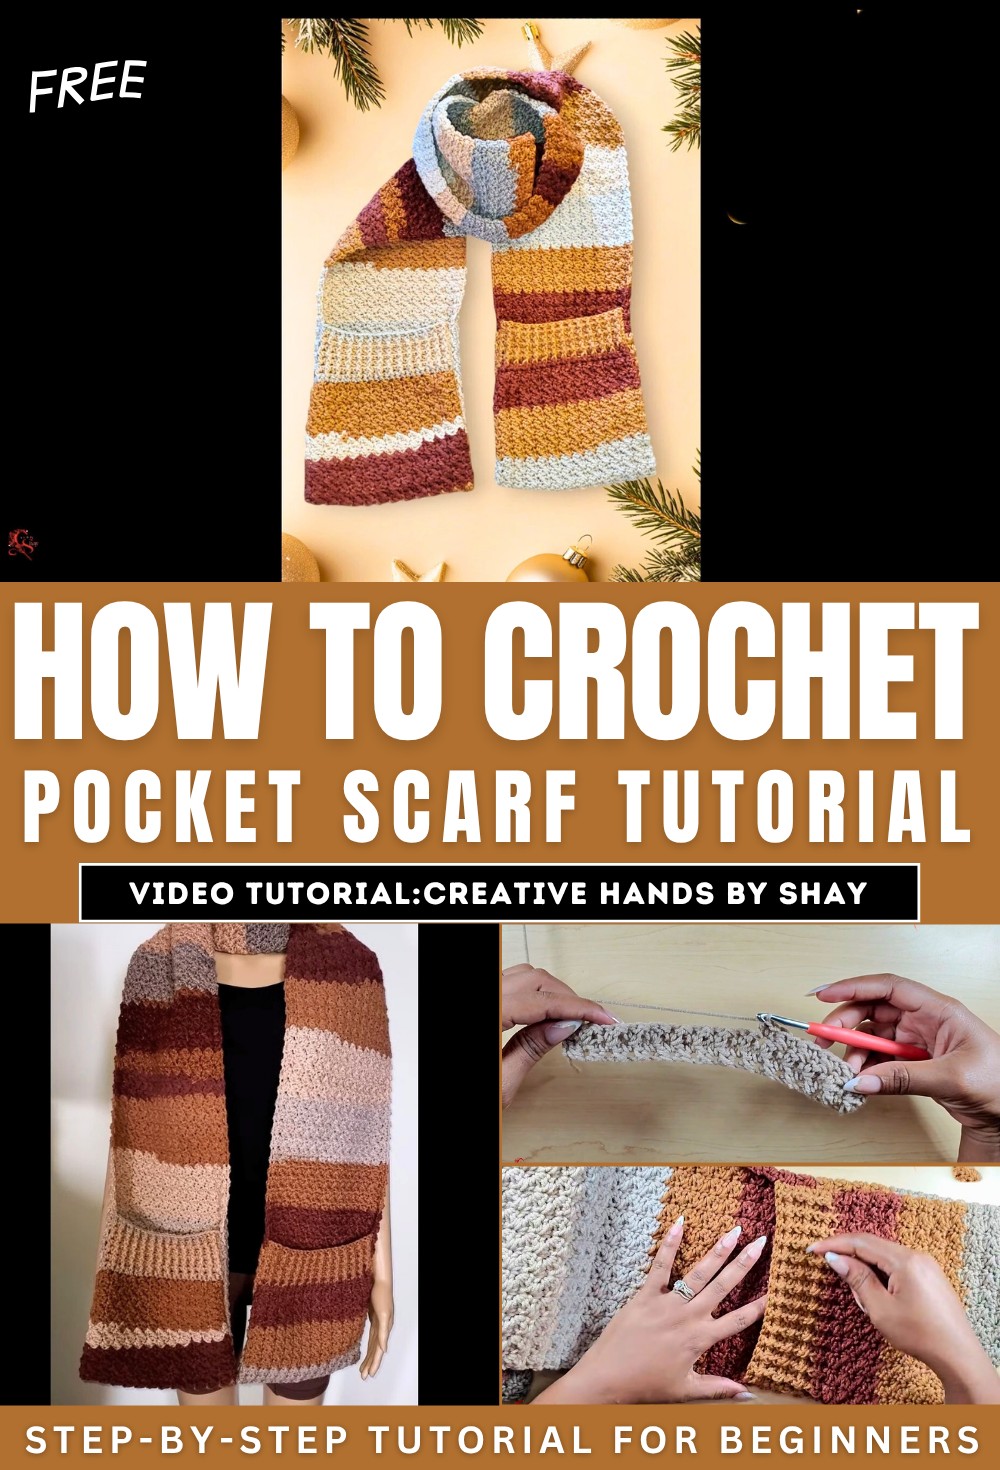
How To Make A Crochet Pocket Scarf Tutorial for Beginners
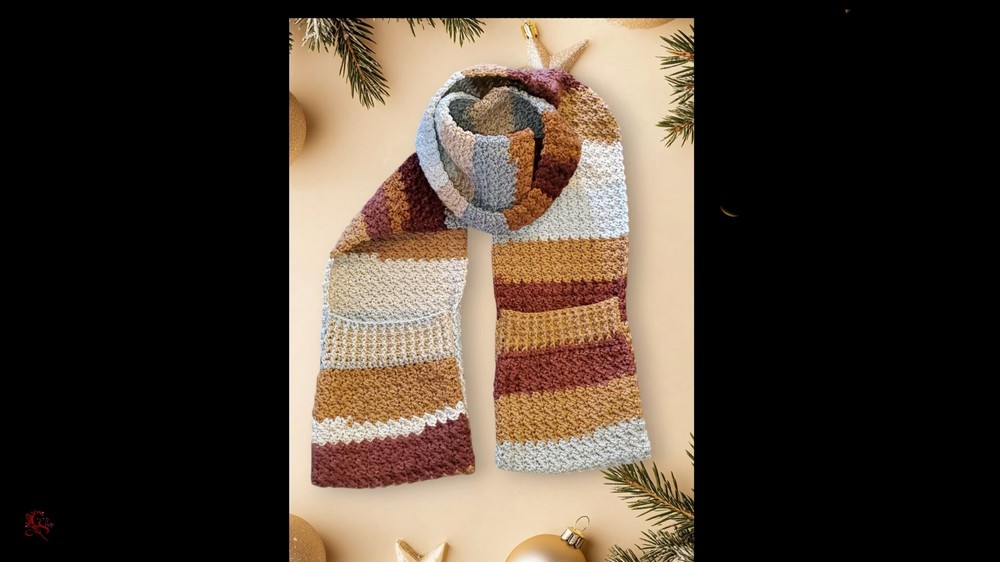
In this post, you will learn how to crochet a cozy pocket scarf. Using minimal materials like yarn, a crochet hook, scissors, and a darning needle, the tutorial covers the use of the suzet stitch to craft the scarf’s design.
Clear instructions on measurements, folding, and pocket creation ensure ease of completion, even for beginners. The creator also demonstrates ribbing and sewing techniques to finish the deep, functional pockets. Perfect for handmade gifts or cold-weather essentials! So, follow through with us for the complete tutorial.
Materials Needed
-
Yarn (the creator used Loops & Threads yarn from Michaels, 214 yards)
-
Crochet Hooks (specifically a 5.0 mm hook for certain parts)
-
Scissors
-
Darning needle
-
Measuring tape
-
Stitch markers
Scarf Construction – Main Body
-
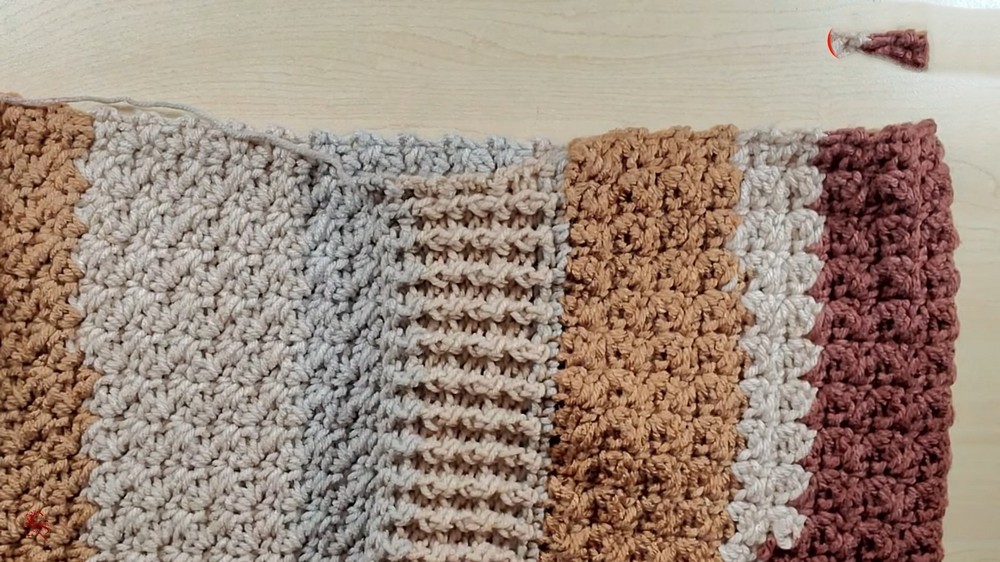
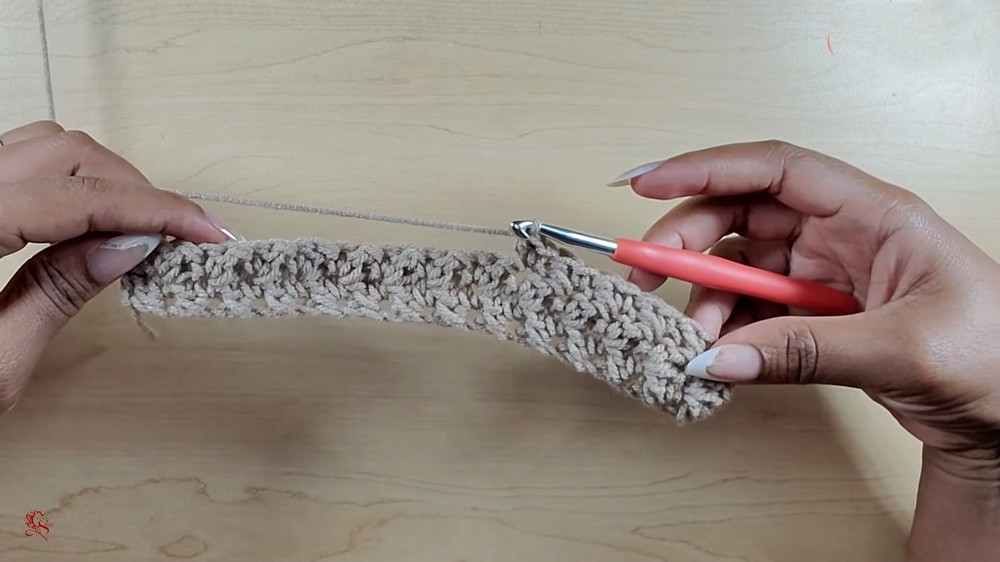
Starting the Scarf: The scarf is made using the Suzette Stitch. If unfamiliar with this stitch, the creator mentions having a separate tutorial available.
-
Initial Chain: Begin by making a slip knot and then chaining an odd number. The creator chained 29.
-
First Row:
-
Skip the first stitch (the one on the hook).
-
In the second stitch, make a single crochet, then a double crochet in the same stitch.
-
Repeat the pattern: Skip one stitch, then in the next stitch, make a single crochet followed by a double crochet in the same stitch.
-
The row ends with a single crochet in the last remaining stitch.
-
-
Subsequent Rows:
-
Chain one and turn your work.
-
Start the row with a single crochet in the first stitch.
-
Continue the Suzette Stitch pattern: Skip one stitch, then in the next, make a single crochet and a double crochet in the same stitch.
-
End each row with a single crochet in the last stitch.
-
-
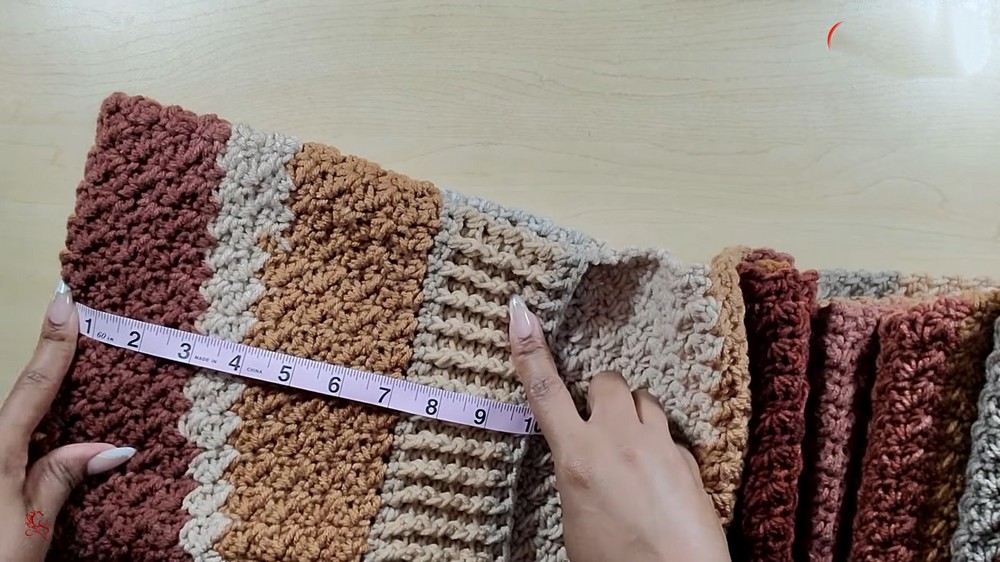
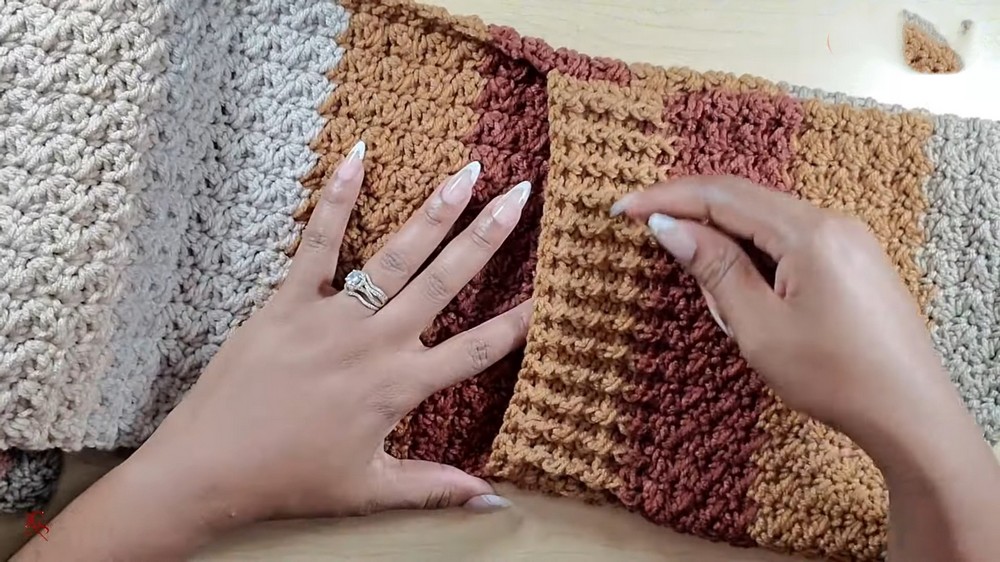
Desired Length: Continue repeating these steps until the scarf reaches the desired length. The creator made the scarf approximately 97 inches long, as a portion will be folded up to create the pockets.
Creating the Pockets
-
Folding for Pockets: Once the scarf reaches the desired length (e.g., 97 inches), fold up a section to form the pocket. The creator folded up about 7 inches for the pocket depth.
-
Marking: Use stitch markers to mark the bottom of the folded section on both sides.
-
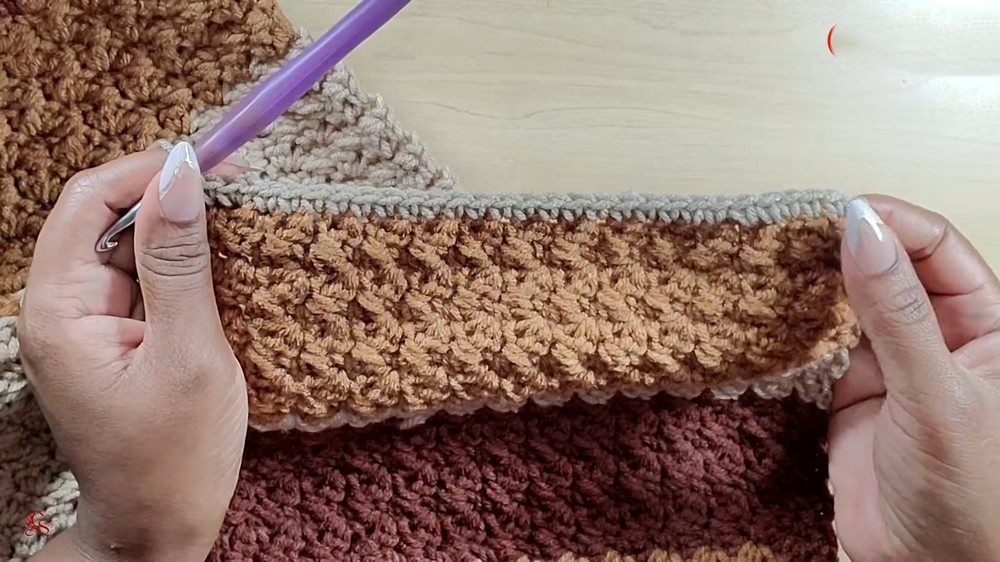
Attaching Yarn for Ribbing: Attach yarn to the first stitch of the folded section using a 5.0 mm crochet hook. Chain one and make a single crochet in the same space.
-
Single Crochet Row: Make a single crochet in each stitch across the folded edge.
-
Ribbing (Front Post/Back Post Double Crochet):
-
Chain three and turn your work.
-
Alternate between front post double crochet and back post double crochet across the row. The creator demonstrates how to execute these stitches.
-
Continue this pattern, making front post double crochet on front post double crochet and back post double crochet on back post double crochet in subsequent rows.
-
-
-
The creator made a total of seven rows for the ribbing, but more rows can be added for a higher ribbing.
-
Finish the last row with a regular double crochet on top of the chain of three.
-
-
Fasten Off: Chain one and fasten off, leaving a long tail for sewing.
Sewing the Pockets
-
Positioning: Ensure the scarf is flipped to the correct side so that when sewn, the pockets face the desired direction.
-
Sewing: Use the long tail end and a darning needle to sew down the sides of the folded pocket. The creator uses basic in-and-out stitches, mentioning that a whip stitch could also be used.
-
Finishing: Securely tie off and fasten the yarn once both sides of the pocket are sewn.
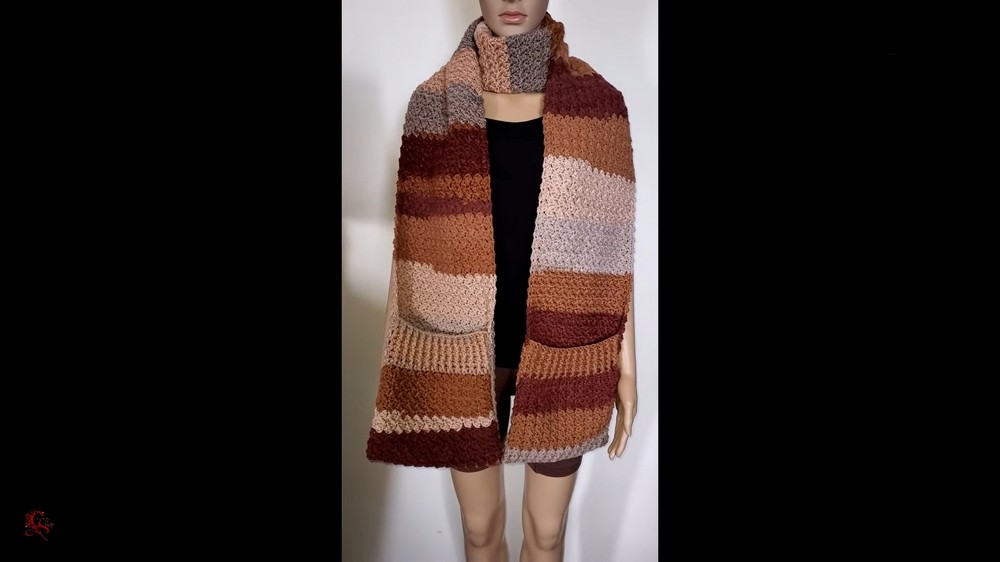
Final Product
-
-
The finished scarf has nice, deep pockets, measuring 10 inches long after the ribbing and sewing are complete.
-