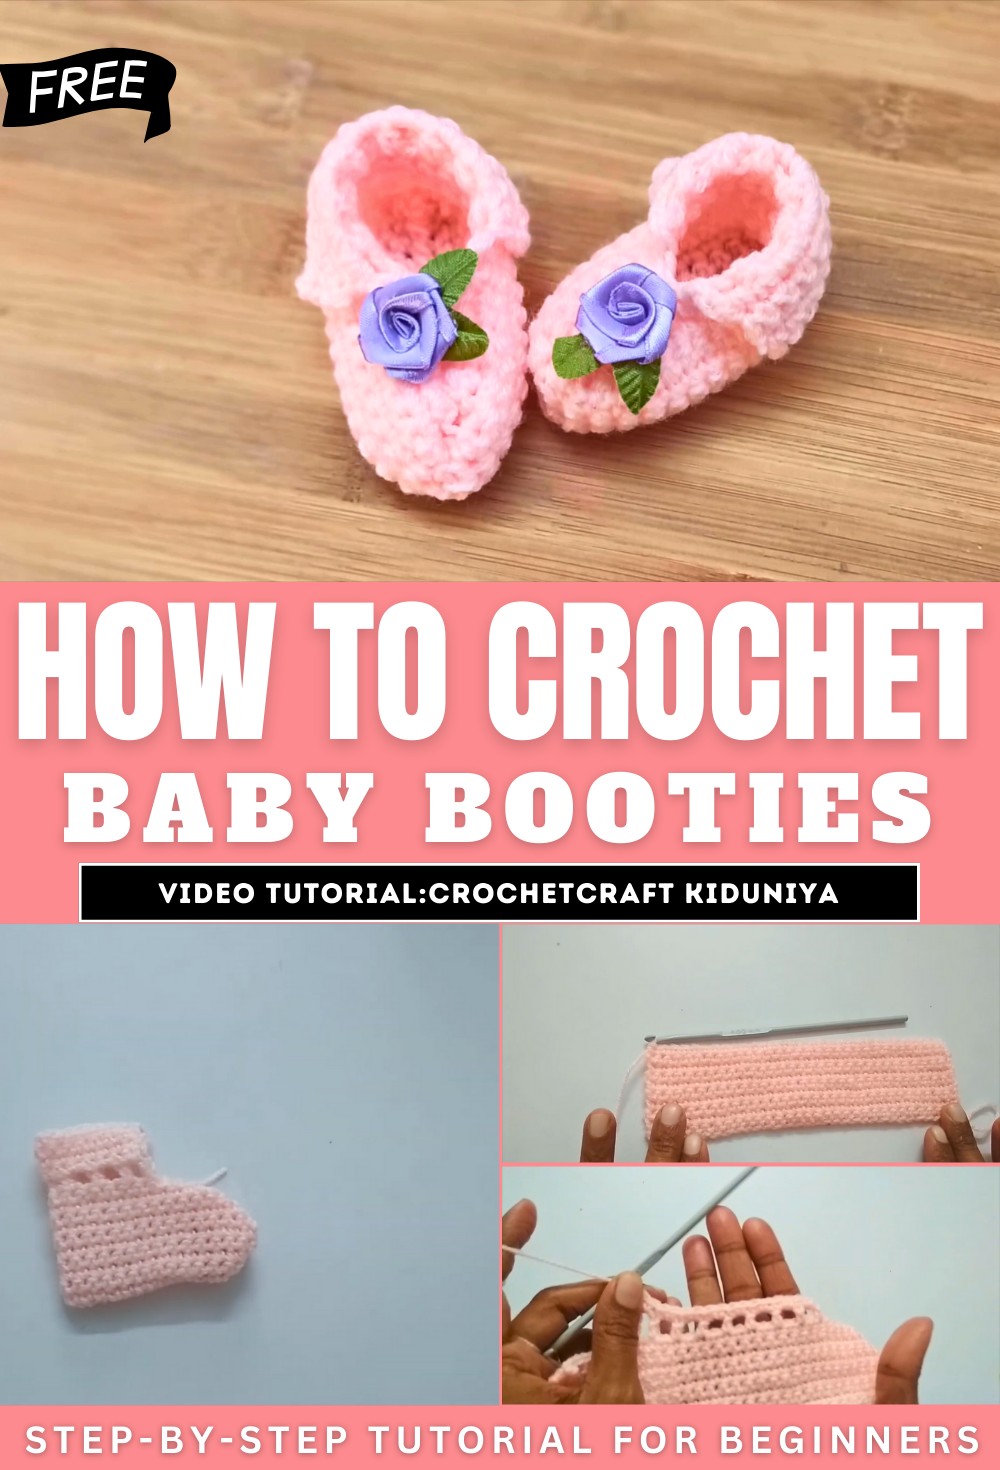
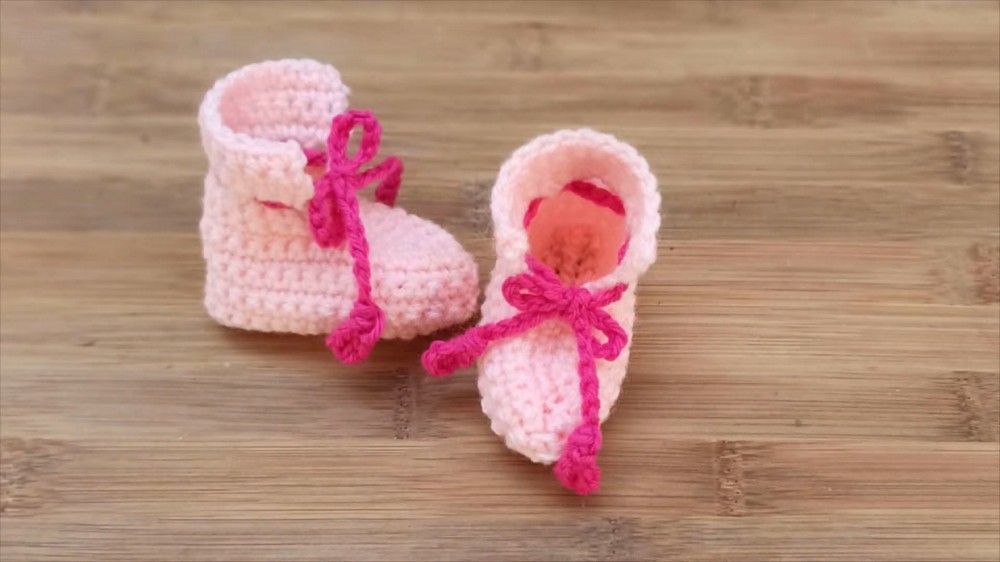
How To Make Crochet Baby Booties for Baby Showers
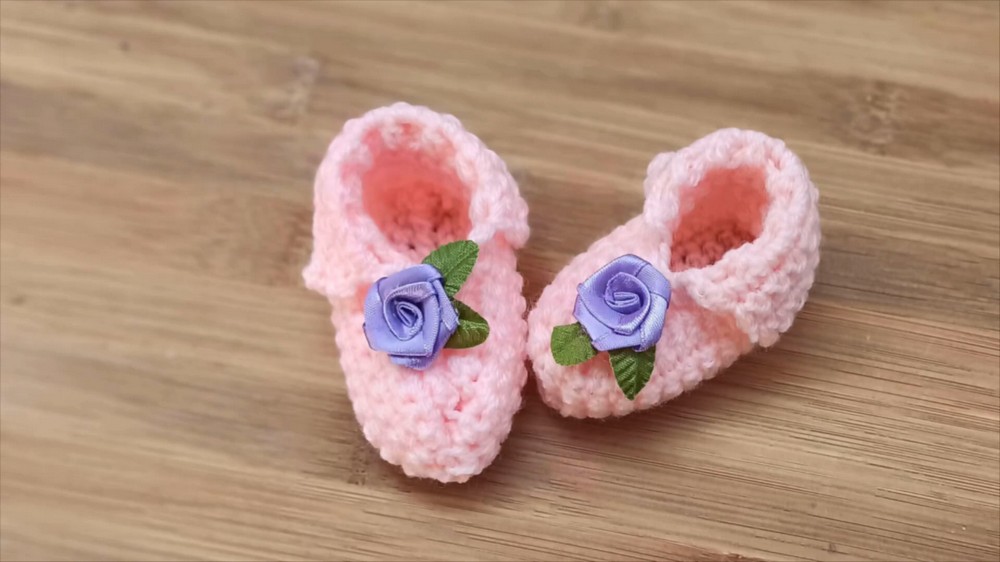
With a stitch-by-stitch tutorial, learn how to crochet bow tie baby booties for newborns. The video begins by showing the materials and tools required, which include yarn, a crochet hook, scissors, a needle, and an optional button. The instructions start with creating the sole by making a chain of 32 stitches and then single crocheting to form the base.
The video then explains how to stitch the crocheted pieces together to form the bootie shape. Finally, it demonstrates how to hide the loose yarn ends and tie a knot to secure the work. Follow through with us for the complete tutorial for beginners.
Materials and Preparation
The video begins by outlining the necessary materials for the project. The creator recommends using Chenille yarn for its softness, but notes that any 4-ply yarn will work. In addition to the yarn, you will need a 3.5 mm crochet hook, a pair of scissors, and a darning or tapestry needle for the final steps of the project.
Instructions
Creating the Sole
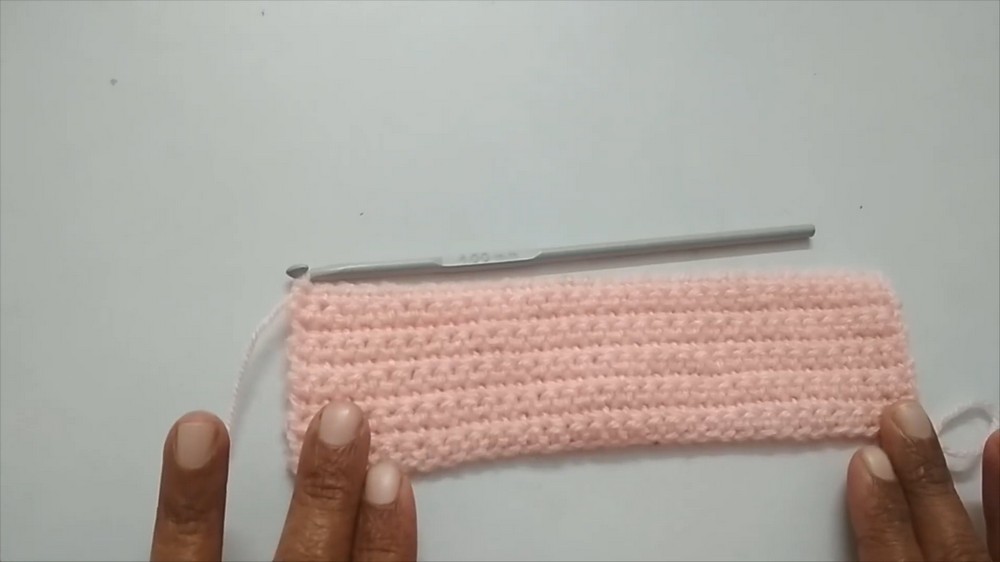
The first stage of the tutorial focuses on creating the flat, oval-shaped sole of the bootie. The process starts with a slip knot and a series of chains. You will then work a single crochet stitch into the second chain from the hook and continue this across the row. The final chain in the row will have an increase of stitches to begin the turn. After this, you will work single crochet stitches along the opposite side of the initial chain to complete the sole’s base.
Forming the Sides
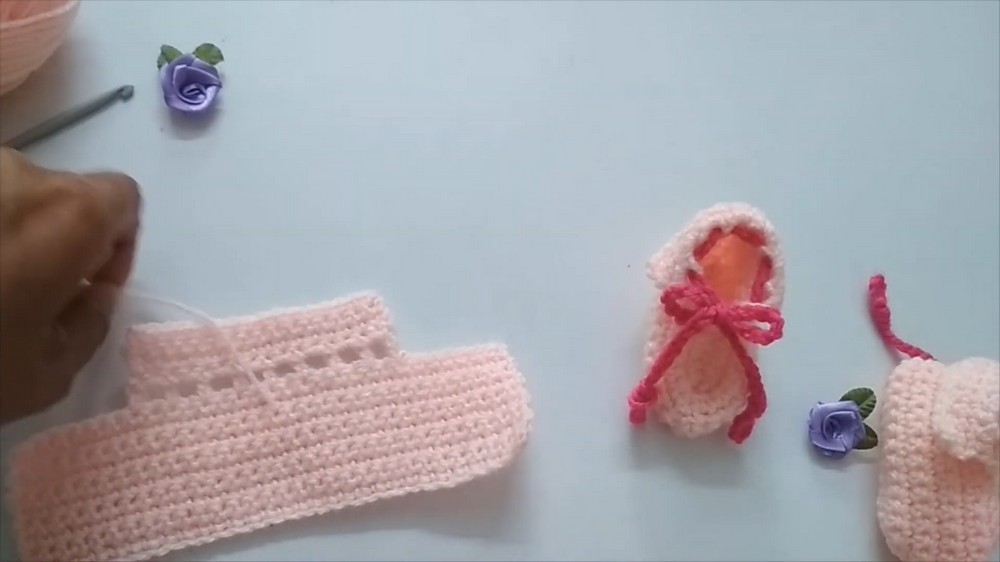
Once the sole is complete, you will create a new round of single crochet stitches. For this round, you will be working into the back loops only. This specific technique is what helps the work turn upwards, beginning to form the sides of the bootie. Unlike the sole, this round does not include any increases.
Shaping the Toe
The next step is to shape the toe of the bootie. You will connect the two sides by counting and marking a specific number of stitches on the front of the bootie. The creator then instructs you to work stitches on either side of this marked area, leaving a gap for the toe opening. Finally, you will work a series of single crochet stitches across the top of this opening to complete the toe section.
Finishing the Bootie
The final stage of the tutorial involves finishing the bootie and making it wearable. This is done by using the darning needle and the remaining yarn to sew the toe and heel sections together, bringing the entire bootie into its final shape. Once the bootie is stitched together, all loose ends are woven in to hide them. The tutorial concludes with an optional step of folding down the top of the bootie to create a cuff. The final result is a soft, handmade baby bootie.