Quick Free G-String Bookmark (Crochet Pattern)
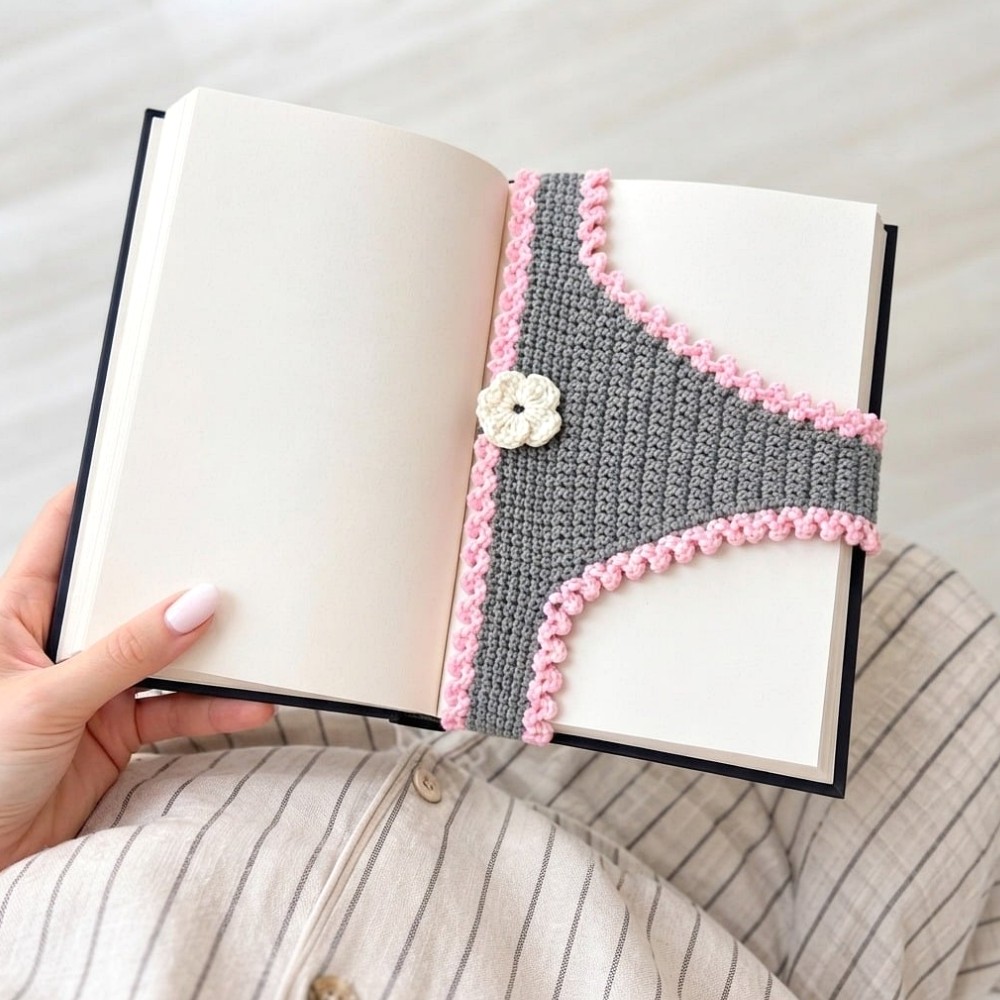
Mark your pages with style through this free crochet g-string bookmark pattern that adds a playful yet practical touch to your favorite reads.

G-String Bookmark Free Crochet Pattern For Bookworms

Crochet Bookmark Pattern – Easy Step-by-Step Guide for Beginners
This crochet tutorial shows you how to make a beautiful and adjustable bookmark, sometimes called “book panties,” designed to fit books of different sizes. You will learn to crochet in rounds and turning rows, work decreases and increases for shaping, add a decorative edging, and even create a small flower to embellish your bookmark. This project uses Jeans yarn with a 3 mm hook but can be adapted to your preferred yarn and hook size.
Materials Needed
- Jeans yarn (or similar), about half a skein for the main bookmark.
- A small amount of contrast yarn for the edging and flower.
- Crochet hook 3 mm (or size suitable for your yarn).
- Stitch markers or contrasting yarn to mark rows (optional but helpful).
- Tapestry needle for sewing and finishing.
- Measuring tape for sizing the bookmark to your book.
Important Notes
- Adjustable size: You can customize the width, length, and height to fit your book perfectly.
- Markers: Using stitch markers or contrasting loops helps keep track of row ends and shaping points.
- Yarn tension: Keep your stitches even for a nice finish.
- Optional flower: The flower accent adds charm, but you can skip it if you prefer a simpler design.

Stitch Abbreviations and Terms
| Abbreviation | Full Term | How to do it |
|---|---|---|
| ch | Chain | Yarn over, pull through loop. |
| sc | Single Crochet | Insert hook, yarn over, pull through two loops. |
| sl st | Slip Stitch | Insert hook, yarn over, pull through stitch and loop. |
| dec | Decrease | Single crochet two stitches together. |
Step 1: Starting the Base Loop
- Chain a length slightly longer than your book’s width (about 20 chains for ~20 cm).
- Join with a slip stitch (sl st) into the first chain to form a ring.
- Work single crochet (sc) stitches evenly into each chain, going all the way around the ring.
Tips:
- Work continuously in a spiral (no chaining at round starts) to avoid seams.
- Pull loops evenly to keep stitches consistent.

Step 2: Work the Circular Base
- Crochet 5 rounds of single crochet stitches around the circle, about 2 cm in height.
- This forms a sturdy ring that will fit around the pages.
- Find and mark the midpoint of the ring, folding it in half to identify middle stitches (e.g., 12 stitches on each side). This will help for shaping in the next steps.

Step 3: Shaping with Turning Rows – Front Side
- Work back-and-forth rows (turning rows) only between your markers (middle section of the ring).
- For each row:
- Start with a chain 1 (ch 1) for lifting.
- For alternate rows, perform decreases (dec) at the first and last stitch:
- Insert hook into the first stitch, pull yarn through, then into second stitch, pull through, yarn over, and pull through all loops on hook – that’s one decrease.
- In other rows, work one single crochet (sc) in each stitch without changes.
- Repeat this alternating pattern until the narrowing portion measures about 3 cm.

Step 4: Shaping with Turning Rows – Back Side
- This portion is worked similarly to the front but with increases instead of decreases to make it slightly smaller:
- Start each row with chain 1 (ch 1).
- At beginning and end of every other row, work 2 single crochets (sc) in the first and last stitch to increase.
- Crochet one single crochet (sc) in each stitch between increases.
- Continue until you reach your desired height (example: ~7 cm).

Step 5: Joining the Pieces
- Fold the bookmark evenly, matching front and back parts.
- Use a tapestry needle and yarn to whipstitch the edges together with a half loop seam:
- Insert the needle alternately through the loops on the edges of both pieces to create a flat, flexible seam.
- Make sure the seam is neat and durable without bulky stitches on the surface.
Step 6: Crocheting the Decorative Binding
- Attach your contrast color yarn at any edge.
- Create the binding by repeating this pattern around the edges:
- Chain 4 to begin lift.
- Slip stitch (sl st) into the first chain to form a small loop (picot).
- Slip stitch into the next loop on the main piece.
- Single crochet (sc) into the next loop on the main piece.
- Repeat chain 4, slip stitch to form picot, slip stitch, single crochet all around the edges including openings.
- This adds stability and a pretty finishing touch.

Step 7: Making the Crochet Flower (Optional)
- Start by making a small ring with leftover yarn:
- Wrap yarn around two fingers, insert hook, yarn over, and pull through both loops to form the ring.
- Chain 2.
- Into the ring, crochet 3 double crochets (dc) (yarn over once before inserting hook into ring).
- Chain 2 then single crochet (sc) into the ring to form one petal.
- Repeat this sequence until you have 5 petals:
- Chain 2, 3 double crochets, chain 2, single crochet.
- Pull the yarn tail to close the ring tightly and weave in ends.
- Sew the flower onto your bookmark at your desired position.

Final Notes and Tips
- Measure frequently: Try the bookmark on your book at various stages to ensure a snug but comfortable fit.
- Customize colors: Feel free to change yarn colors for variation.
- Tension: Keep your stitches consistent to avoid warping the shape.
- Seam options: If the half loop seam is unfamiliar, you can sew the seams with any preferred method ensuring sturdiness and neatness.
- Block if needed: Lightly steam or block your bookmark to reduce curling.

Conclusion
This beginner-friendly crochet bookmark pattern offers a practical and attractive way to mark your pages securely. By learning to work in rounds, turn rows with shaping, add decorative edges, and sew neat seams, you develop essential crochet skills. The optional flower embellishment adds a personal touch to your creation.