How to Crochet A Beanie Hat for Winter

Learn how to crochet a stylish beanie hat using a simple half-double crochet pattern with a step-by-step tutorial. The project involves creating vertical rows and tailoring the size to fit your head circumference. You’ll also learn joining edges, closing the top, and finishing touches for a seamless, professional look. The tutorial is clear, beginner-friendly, and ideal for creating personalized crochet designs.

Crochet A Beanie Hat Tutorial
Free Crochet Beanie Hat Pattern for Winter
Materials List
- Yarn: 6-ply worsted weight yarn (sample uses camouflage color; approximately 100g for one adult beanie)
- Hook: 5 mm crochet hook (H-8)
- Scissors
- Tapestry needle (for seaming and weaving in ends)
- Stitch markers (optional, to mark beginning and end of rows)
- Measuring tape
Key Abbreviations (US Terms)
| Abbreviation | Meaning |
|---|---|
| ch | chain |
| hdc | half double crochet |
| sl st | slip stitch |
| st(s) | stitch(es) |
| rep | repeat |
| RS | right side |
| WS | wrong side |
Special Notes
- The beanie is made flat in rows, joined at the side, then gathered at the crown.
- All stitches are half double crochet (hdc), but worked into the “body” (third loop/front post) for a subtle textured stripe.
- Beanie circumference: Make your fabric as long (number of rows) as your head circumference in inches or centimeters.
- Beanie height: The foundation chain determines hat height. Adjust this for more or less slouch.
- Check stitch count: Always ensure the stitch count per row stays the same for a balanced hat.
Pattern
1. Measure Your Head
- Use your measuring tape to measure snugly around your head (above ears).
- Note this measurement (e.g., 23 inches for average adult).
2. Foundation Chain
- Make a slip knot and ch 35 (for standard adult hat height; adjust for less/more slouch).
- (If you desire a taller/shorter hat, increase or decrease this number.)
- This chain sets the height of your beanie.
3. Row 1
- Ch 2 (counts as first hdc),
- hdc in the third ch from hook and in each ch across.
- You will have 35 hdc.
- Turn work.
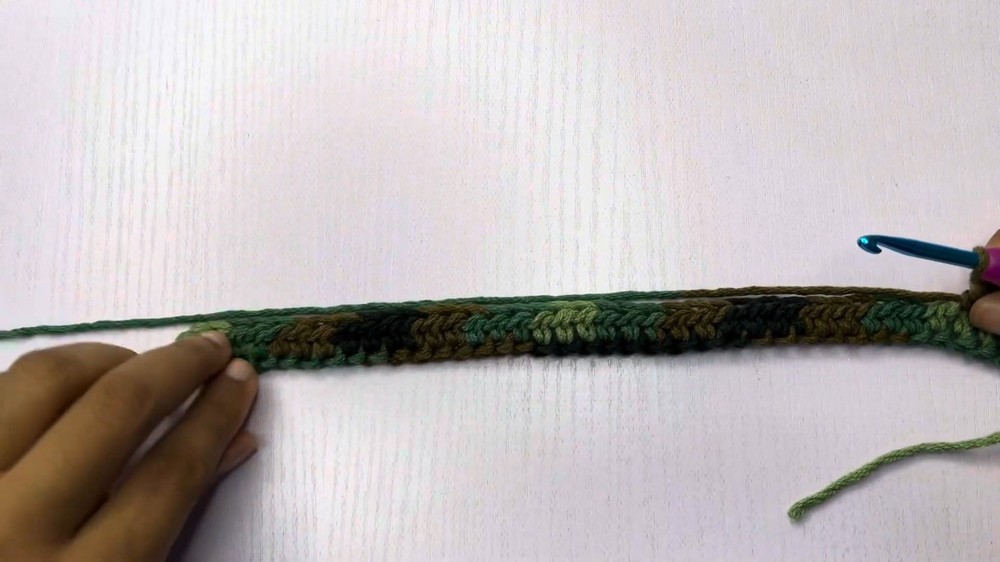
4. Row 2 (Begin Texture Pattern)
- Ch 2, turn.
- Instead of inserting your hook in the top ‘V’ of each hdc, work the hdc into the third loop (sometimes called the “deeper” or “body” loop) on the row below.
- This loop is just below the back loop and gives the stretch/texture.
- Hdc in each st across, always picking up the same loop in the body of the previous row.
- Check you still have 35 hdc.
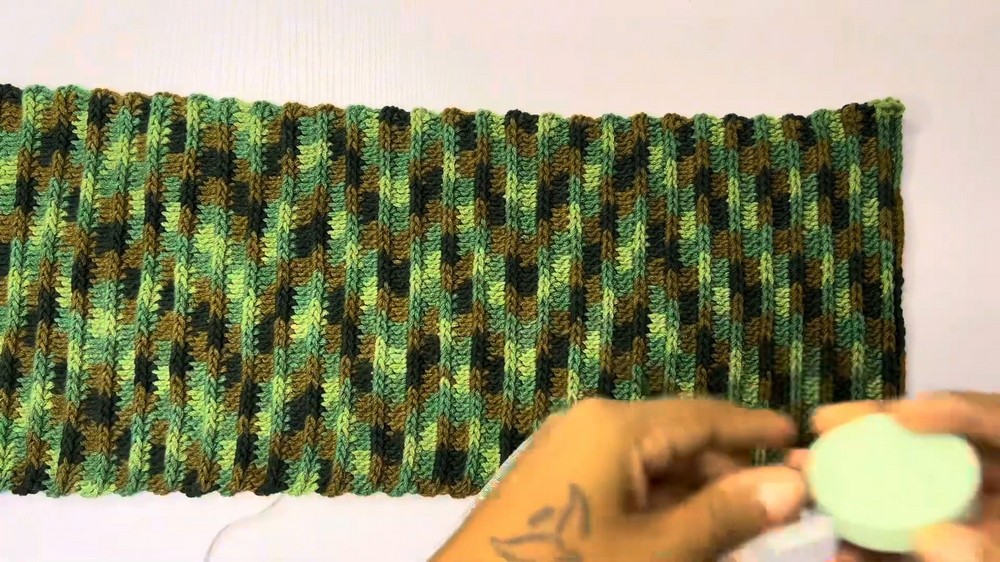
5. Remaining Rows
- Rep Row 2 for every subsequent row,
- Continue to work hdc in the third/front loop/body of previous row for consistent texture,
- Always ch 2 and turn at the beginning of a row,
- Continue until panel length equals your measured head circumference (e.g., for 23″, keep working until panel equals 23″ unstretched).
- In the sample, 23″ was reached at 60 rows, or 30 textured “ridges” (two rows make one ridge).
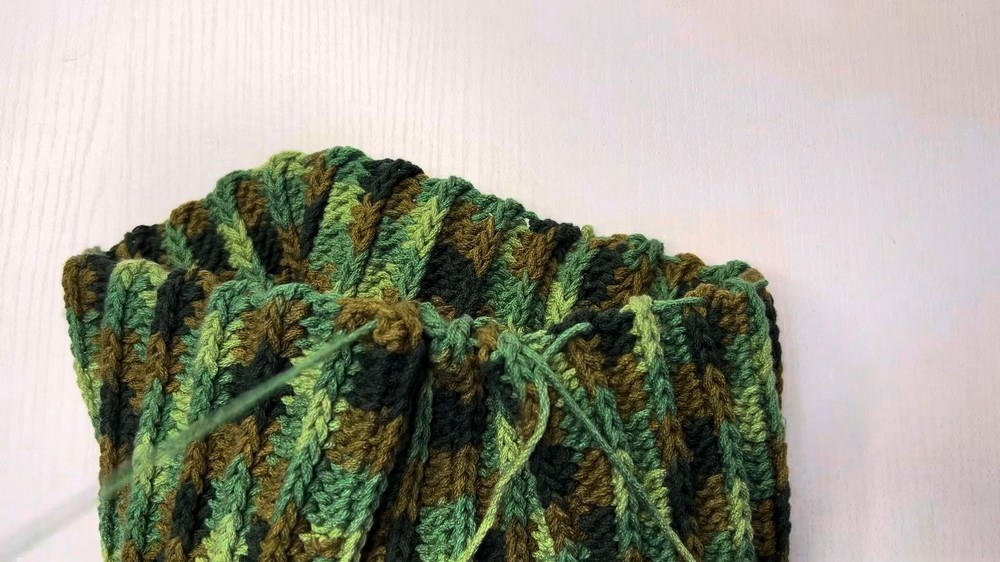
6. Join Side Seam (Create Tube)
- Fold your rectangle in half, RS together.
- Insert hook through first st on both sides.
- Sl st loosely through each pair of stitches across, joining the sides to form a tube.
- Fasten off.
- Tip: Your slip stitches will blend into the ridge pattern.

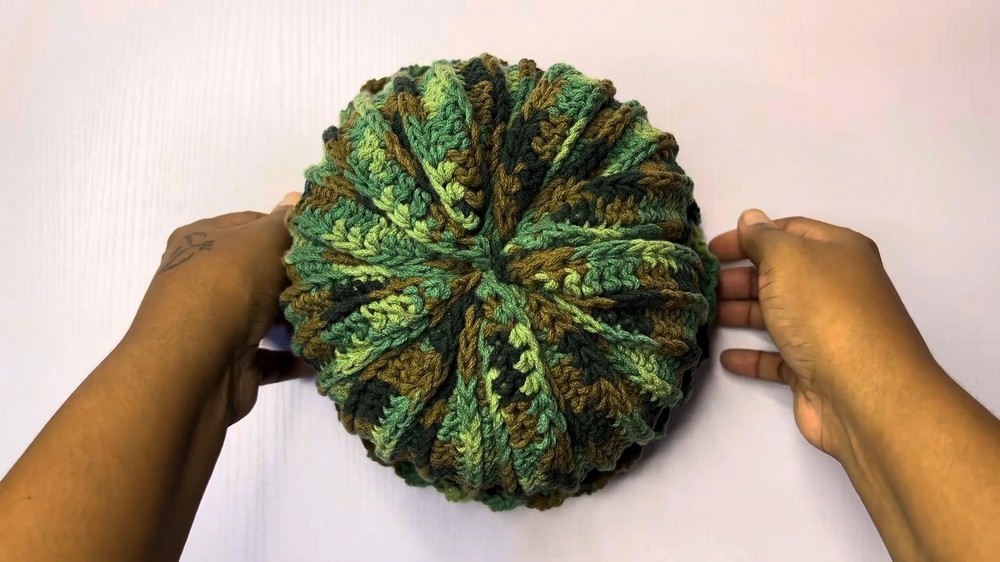
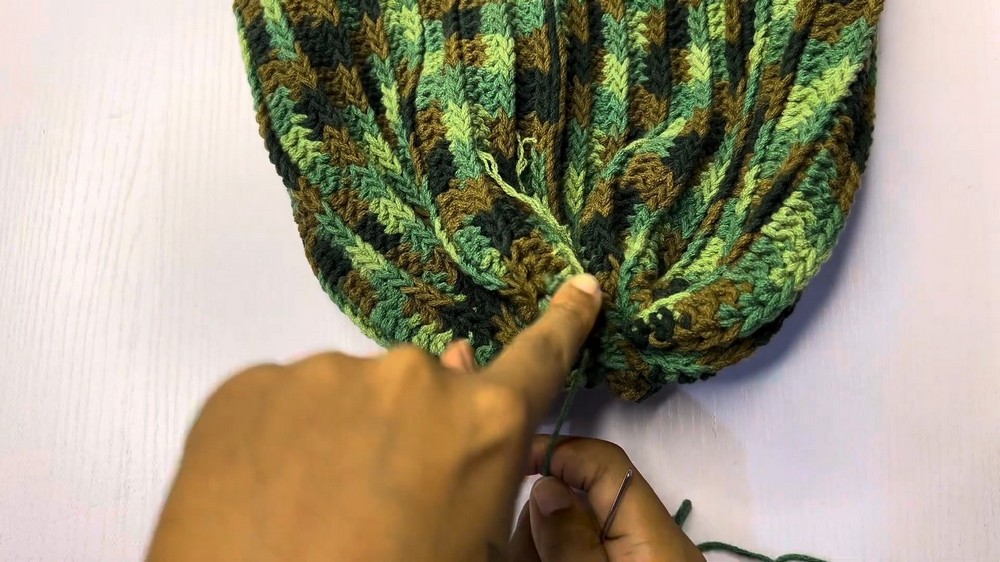
7. Gather Crown/Top
- With tapestry needle, thread a long tail of yarn.
- At one open end of the tube, weave through each stitch at the edge, alternating: in from RS, out from WS around circle.
- Pull tight to gather and cinch the crown closed.
- Tighten gently and sew back and forth across any remaining hole to secure.
- Knot yarn securely; weave in end.
8. Finishing
- Turn beanie RS out.
- Use tapestry needle to weave in any remaining yarn tails along seams or inside hat.
- Ensure no holes remain at top; close any small gaps with a few extra stitches.
Pattern Correction
- Foundation chain and row count: Always ensure your foundation chain gives a comfortable, not-too-tight fit for your head. Stitch count must be consistent in every row and when seaming—do not add or drop stitches at row ends.
- Height and fit: Adjust the starting chain for how slouchy or fitted you want your beanie.
- Gathering: Try not to pull too tightly or yarn may break; use gentle, even pressure.
Tips
- Place a stitch marker at the beginning of every row to easily keep track of stitch count.
- For a neat edge, count stitches occasionally as you work.
- If you want a color block or stripe, simply change color at the beginning of a new row.
- Work your slip stitch seam on the WS to keep the outside neat.
Conclusion
This simple and classic textured beanie is a fast and versatile project for beginners and experienced crocheters alike. By working in rows with just half double crochet into the body/third loop, you get a subtle ribbed effect and a stretchy, fit-friendly hat. Easily customize the height and circumference for different heads, styles, or yarns. The gathered crown and unobtrusive side seam guarantee a comfortable, professional-looking finish.
Video Guide