Charming Free Crochet Baby Blanket Pattern (No Holes)

Welcome little smiles with warmth and style by choosing this free crochet baby blanket pattern perfect for cozy naps and joyful playtimes.
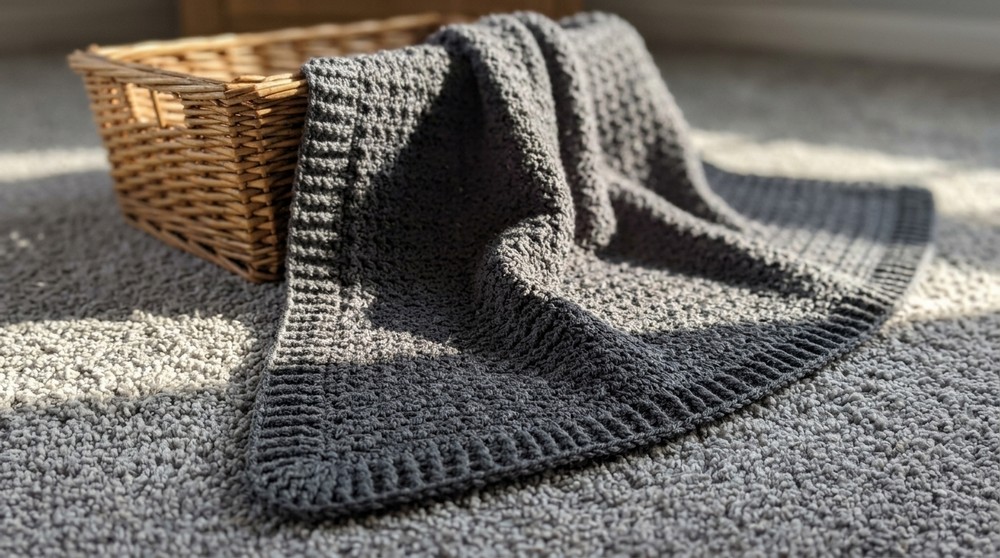
A beautiful little blanket sits quietly in the corner, catching everyone’s attention with its bright colors and cheerful design. This blanket is more than just a piece of fabric—it offers a gentle shield for a newborn, wrapping them in safety and peace. Loved by families, it becomes a soft mat for playtime and a cozy cover when resting. Its light weight is perfect for tiny hands and feet, without being overwhelming.
Beautiful Crochet Baby Blanket Pattern Free Step-by-Step guide

Using a crochet baby blanket pattern means every stitch can tell a story, bringing a special touch to a new arrival. Easy to wash and quick to dry, it stays clean and fresh for everyday moments. Over time, this blanket turns into a treasured keepsake, made to last and share warmth as your child grows. From first cuddles to happy memories, it delivers comfort and softness everyone can enjoy.
Charming Crochet Blanket Pattern
Materials List
- Yarn: Size 3 (DK/light worsted) recommended; sample uses 100 chains for a crib or baby blanket (see pattern for more info)
- Hook: Hook size as recommended on yarn (commonly 4.0mm or G-6), or size needed for preferred drape
- Notions:
- Yarn needle (tapestry needle) for weaving in ends and optional gap-closing
- Scissors
- Optional: Stitch marker
Key Abbreviations (US Terms)
| Abbreviation | Meaning |
|---|---|
| ch | chain |
| sc | single crochet |
| dc | double crochet |
| st(s) | stitch(es) |
| sk | skip |
| rep | repeat |
| sp | space |
| sl st | slip stitch |
| fpdc | front post double crochet |
| bpdc | back post double crochet |
Special Notes
- Blanket Size: Customizable; sample uses 100 chains (99 sc across); multiples of 2 + 2 for base chain.
- The v-stitch in THIS pattern means: (sc, ch 1, dc) in the same st/sp.
- The entire blanket is a no-holes (solid) design that’s beginner friendly.
- Gauge and exact yarn: Visit the Jo to the World Creations website for more details if desired.
Pattern
Foundation Chain
- Ch a multiple of 2 + 2.
(Ex: For a blanket approximately 30” wide, ch 100 for the full size as per sample.)

Row 1 (Set-up/Single Crochet Row)
- Sc in the back bump (ridge) of the 2nd ch from the hook.
- Sc in each ch’s back bump across.
- You should have (number of starting ch – 1) sts.
(Ex: 100 ch = 99 sc.) - Turn.

Row 2 (Establish V-Stitch Pattern)
- Ch 1, turn.
- V-stitch in first stitch: (sc, ch 1, dc) in first st.
- [Rep section begins]
- Sk 1 st, (sc, ch 1, dc) in next st.
- Rep from * to * across to the end of the row.
- Work final v-stitch in the last stitch of the row.
- You should have (half of foundation ch) v-stitches.
(Example: Starting with 100 ch = 99 sc = 50 v-stitches per row.) - Turn.
Row 3 (Main Pattern Row — Repeat for Blanket Body)
- Ch 1, turn.
- (sc, ch 1, dc) in the first ch-1 space (from previous row’s v-stitch).
- (sc, ch 1, dc) in each ch-1 space across the row.
- Make sure your last v-stitch is placed in the last ch-1 space.
- At the end of every row, verify you have the same number of v-stitches (ex: 50).
- Turn.

Repeat Row 3 until blanket reaches desired length (example: approx. 30” tall, or 96 rows for sample).
Blanket Border
After finishing the last row of your blanket body, do NOT turn. Proceed to border:
Border Round 1 (Single Crochet Border)
- Ch 1 (no turn).
- Side edges: Sc evenly along the first side edge (one sc at the top and at the bottom of each dc; one sc in each single crochet end).
- Tip: Work into stitches, not into spaces.
- Example: For every dc end at the edge, place a sc at top and bottom; for every sc, one sc at the end.
- In the corner stitch, work 3 sc in the same st to form the corner.
- Bottom edge: Sc in each foundation chain across.
- Second side: Sc evenly up the side as per first.
- At top edge (final “row”):
- Sc only into the TOPS of dc and sc sts; skip ch-1 spaces entirely.
- Place 3 sc in each corner, except the fourth (top right) – see correction below.
- Join with sl st to first sc of border round.
Pattern Correction
- Do not make a fourth corner at the top right. This prevents corner bulking and aligns your join/start for next rounds.
- If you encounter unsightly side gaps after the border, see “Tip” below for optional gap-closing.
Border Round 2 (Double Crochet with Large Corners)
- Ch 2 (does not count as st), do not turn.
- In same st (first corner st), work 9 dc.
- Dc in each st around, except at corners:
- In each corner st (the middle sc of each 3-sc corner from previous round), work 9 dc.
- If after finishing round you count your sts and have an even number, add 1 dc to get an odd total (ignore starting ch 2, do not count as st).
- Sl st to first dc (not the ch-2).

Border Rounds 3–5 (Ribbed Post-Stitch Edging)
- Ch 2, do not turn. (Ch 2 does not count as a st.)
- Around the first dc from previous round, work fpdc.
- Alternate around:
- Next dc: bpdc
- Next dc: fpdc
- Continue alternating (front post, back post, front post, etc.) around.
- Corners: Continue the established fpdc/bpdc sequence right through the group of 9 dc in each corner. No special increases needed.
- At end of each round, sl st to the first fpdc (not the ch-2).
- Repeat for a total of 3 border rounds (rounds 3–5).
Finishing
- Fasten off and weave in all ends with a yarn needle.
- If any gaps exist between the border and blanket body, use a long strand of yarn and the yarn needle to weave and close the gaps inconspicuously. Do not pull too tightly.

Pattern Correction
- The v-stitch definition here is (sc, ch 1, dc) in the same space or stitch; do not confuse with other v-stitch patterns.
- Sk ch-1 spaces in top border (do not work sc into them).
- Corner placement: Only three corners are made; do not create a fourth corner at the final join.
- Ribbed border needs an odd number of sts: Add an extra dc if necessary at end of round 2.
Tips
- Finding ch-1 spaces: The easiest way is to locate the double crochet from the previous row and work immediately to its left, under the chain.
- Keep edges even: Always start your row with a v-stitch in the first ch-1 space, and finish with a v-stitch in the last.
- Even Border: Insert hook into actual stitches (not spaces) when working around the sides for a tidy, professional finish.
- Close Gaps: Weave through edge stitches if border gaps show after finishing.
- Customizing Size: Use any multiple of 2 + 2 chains to adjust the width.
Conclusion
The Charming No-Holes Baby Blanket offers a solid texture with no gaps, making it warm and practical for babies. The unique v-stitch gives subtle elegance, while the ribbed border adds a modern, tailored finish. This pattern is straightforward, beginner-friendly, and highly adaptable to size or color changes.