Classy Crochet Prada bag Pattern perfect for Elegant Daily Wear
Amp up your daily styling using this Free Crochet Prada bag Pattern to add a posh vibe and iconic flair to your fashion rotation today.
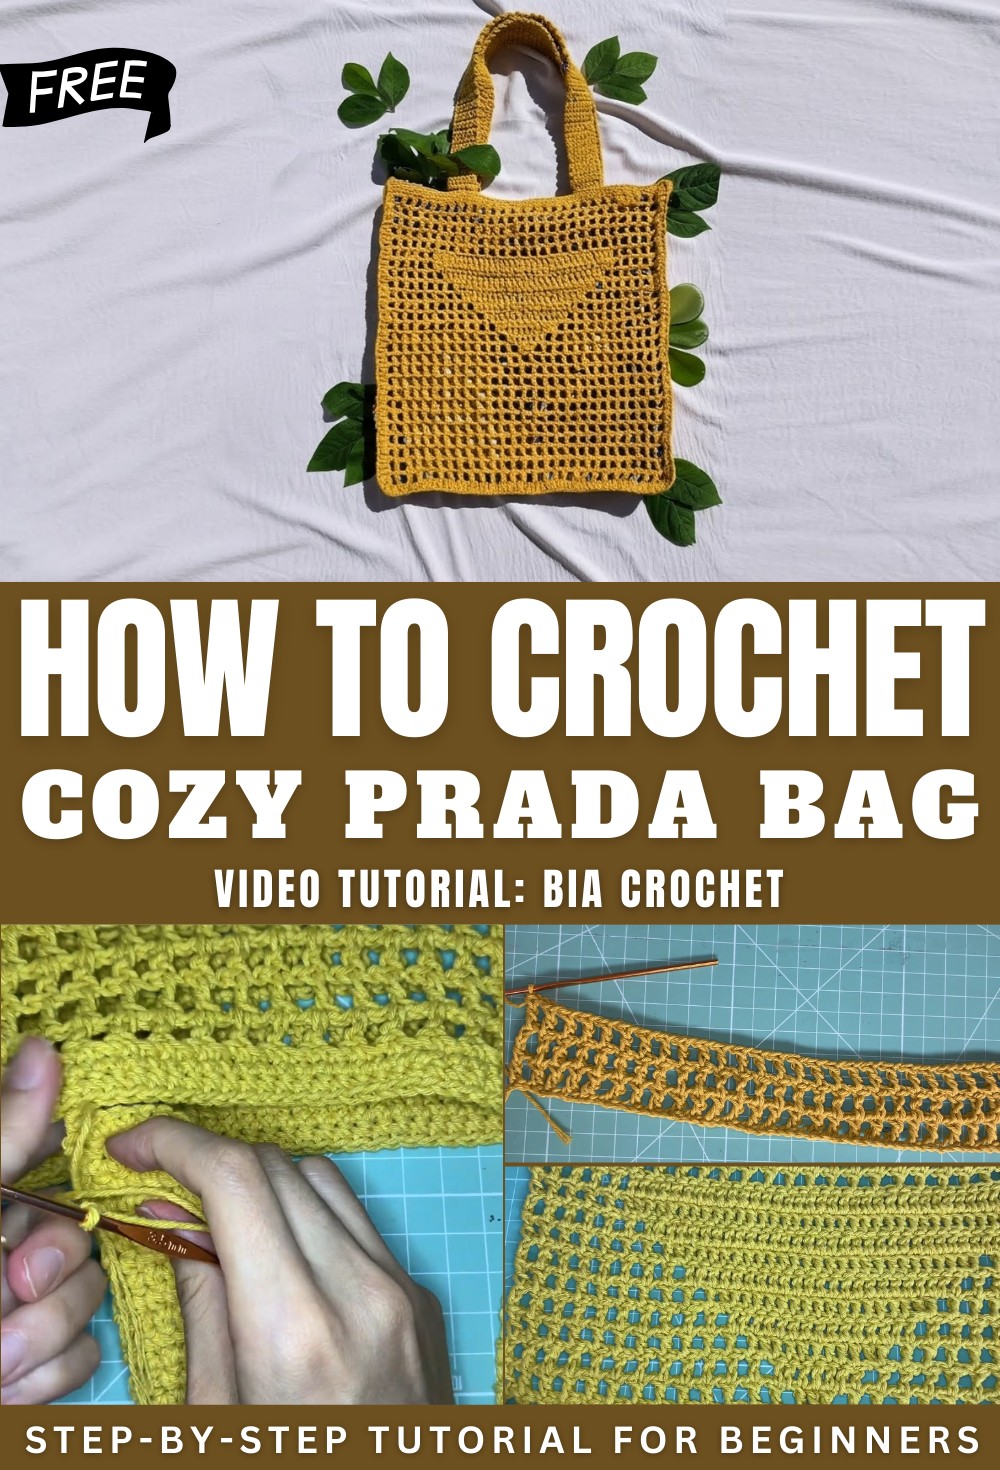
Elite Crochet Prada bag Pattern for High Fashion Vibe
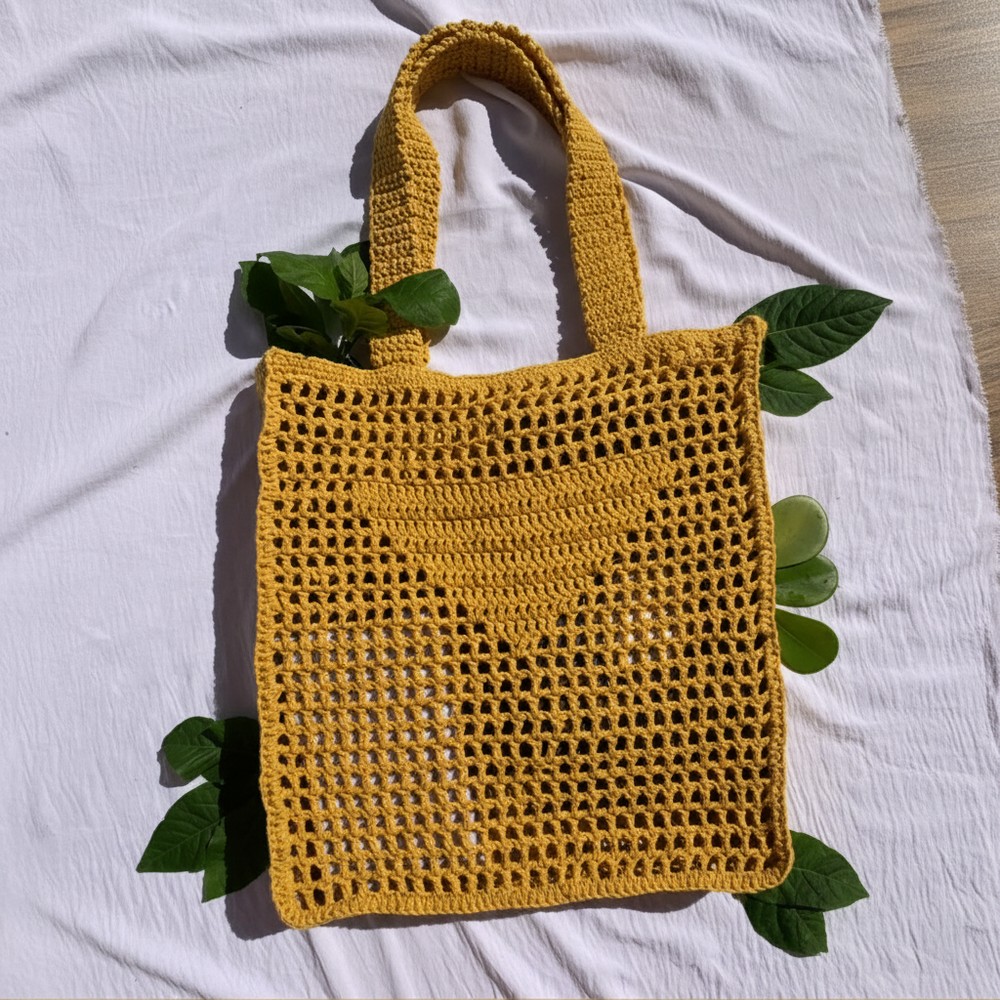
Constructing a stylish woven carrier inspired by high-end labels brings a cool vibe to your personal collection. A solid Crochet Prada bag Pattern acts as the best map for this task, helping you produce a trendy sack that looks just like the real thing. This net-like purse feels light yet strong, often using tough grass or cotton strings that hold their shape well. It fits right in for beach days, market trips, or office hours, adding a fancy touch to your daily look.
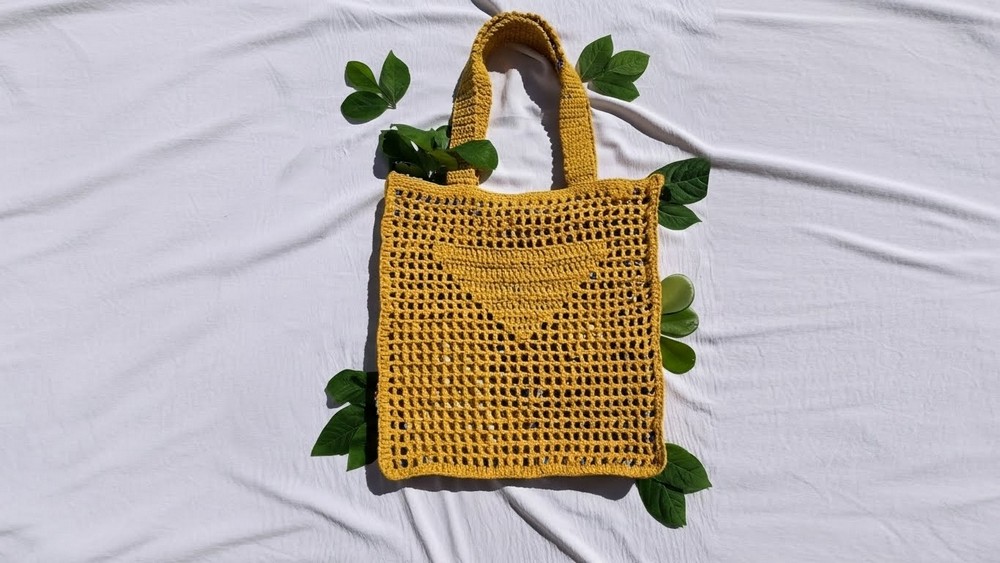
The open grid style is easy to spot and gives a smart boost to plain clothes. The big plus involves having a high-class appearance without the high cost. You can choose bright dyes or calm sand tones to match what you like best. Following a Crochet Prada bag Pattern lets you form a sturdy item that people notice. Each knot builds a lasting piece that feels posh, making you walk tall with a bit of glam.
Materials
-
Yarn: Number 6 twine (barbante) in strong yellow. For a version closer to the original designer piece, you could use raffia [00:28].
-
Crochet Hook: 3.5 mm [00:21].
-
Basic Tools: Scissors, tapestry needle, and measuring tape.
Pattern Instructions
1. Main Panels (Make 2)
-
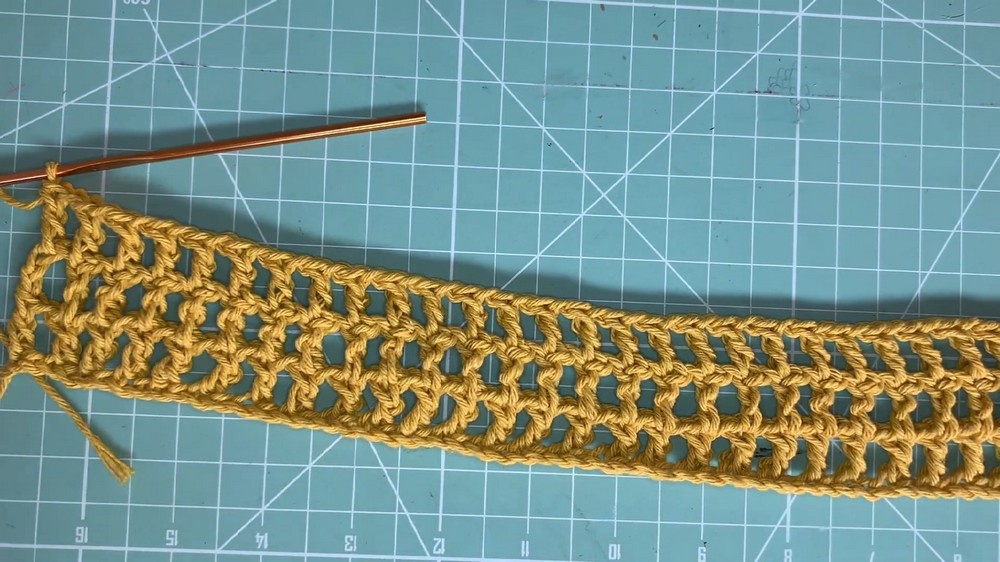
Foundation: Chain 55 [00:44].
-
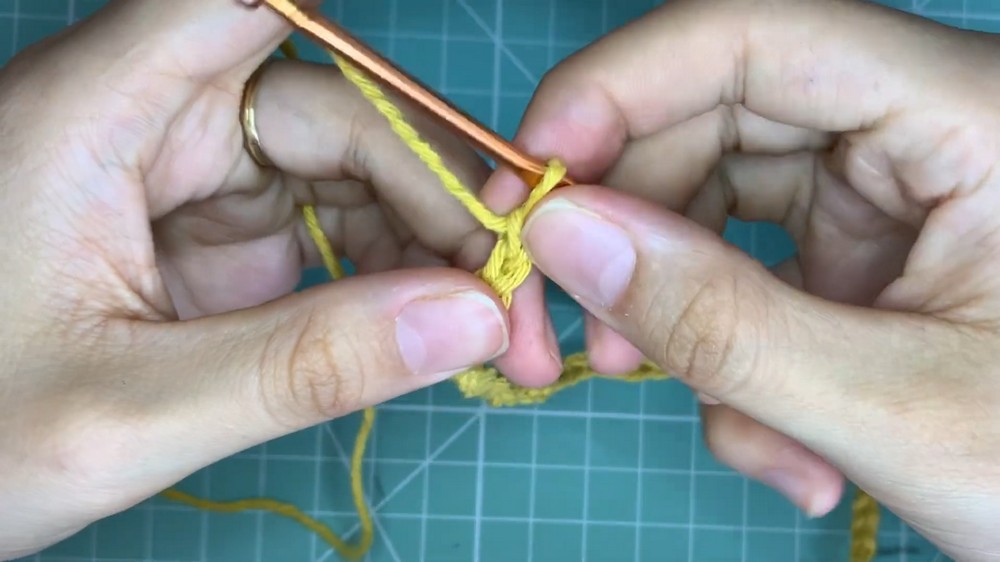
Grid Base: Chain 4 (counts as 1 dc + 1 ch). Skip 6 chains and work a double crochet (dc) in the 7th chain. Chain 1, skip 1 base chain, 1 dc. Repeat across to create 27 grid “houses” [01:28].
-
Rows 2-11: Repeat the grid pattern (dc on dc, ch 1 between) for 11 total rows [06:42].
-
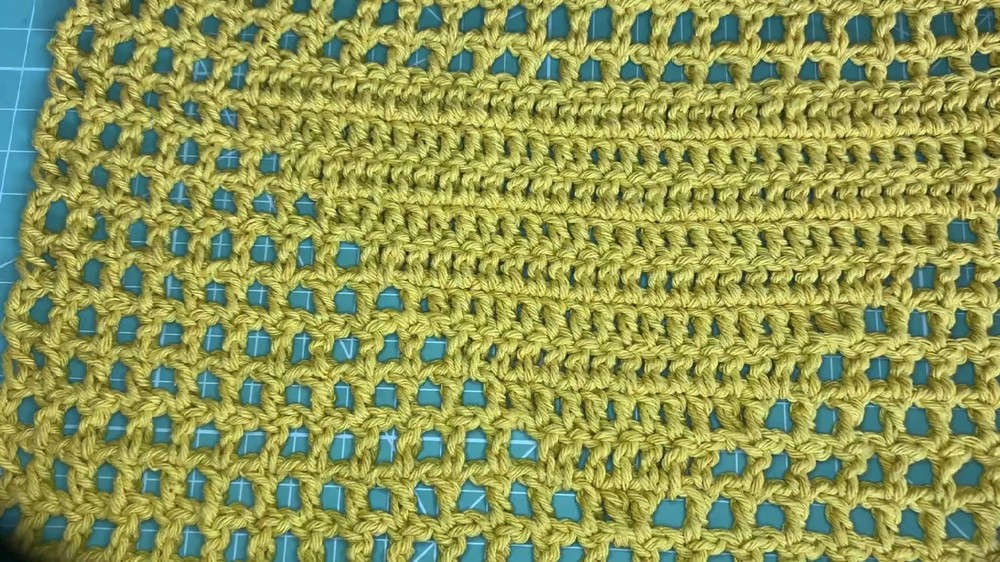
The Triangle Motif: In row 12, work 13 grid houses. Fill the 14th house with a dc inside the ch-1 space. Work a dc on the next dc to start the triangle [08:11].
-
Expansion: In each subsequent row, fill one additional grid house on each side of the triangle (one before and one after the solid block) until you complete 9 rows of the solid triangle [10:52].
-
Row 10 of Motif: Work one row over the triangle without increasing the width for a cleaner finish [15:09].
-
Finishing Panel: Work 5 more rows of the standard grid pattern above the triangle [18:14].
-
Top Border: Finish the panel with 3 rows of single crochet (sc) across the top [19:48].
2. Lateral and Bottom Structure
-
Chain 8 and work rows of sc to create a long, narrow strip [21:06].
-
Continue for 169 rows. This length allows the strip to wrap around both sides and the bottom of the main panels [23:01].

3. Assembly
-
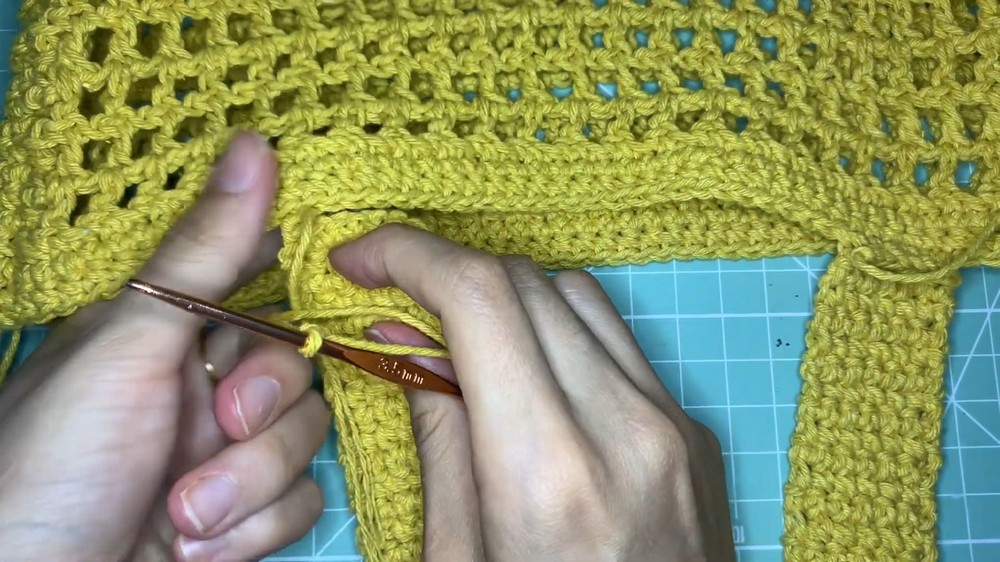
Place the main panels against the lateral strip. Use single crochet to join the edges together, working from the top down, across the bottom, and up the other side [25:24].
-
Corner Tip: Work 2 sc into the same base stitch at the bottom corners to help the bag turn smoothly [28:32].
4. Handles (Make 2)
-
Chain 7 and work sc rows until the handle reaches approximately 55 cm [31:03].
-
Turn the bag inside out. Position the handles symmetrically (about 7 grid houses from each edge) and join them using single crochet for a hidden seam [32:33].
Special Features
The central solid triangle contrasts beautifully against the airy grid pattern, mimicking the iconic designer logo. The structured lateral strip gives the bag depth and ensures it holds more items compared to a flat envelope-style bag [24:31].
Level of Difficulty
Intermediate. While the stitches (dc, sc, ch) are basic, the project requires careful counting to ensure the triangle is centered and the lateral strip matches the panel perimeter exactly.
Tutor’s Suggestions
-
Material Alternative: If you want a more authentic “luxury” feel, use raffia instead of cotton twine [00:35].
-
Symmetry Check: Count your grid houses frequently. You must have 27 across for the triangle to center perfectly at the 14th house [03:32].
Uses
This versatile bag works perfectly as a beach tote for towels and sunscreen, an eco-friendly grocery bag, or a statement accessory for casual summer outfits.
Pro Tip
When joining the handles, work on the “wrong side” (inside) of the bag. This creates a clean, professional finish where the attachment point is invisible from the outside.
Combining simple geometric shapes with a high-contrast stitch pattern results in a professional-looking accessory. This bag offers a rewarding challenge that results in a durable, trendy piece you can use all season long.