How to Cozy Baby Blanket With Plush Yarn

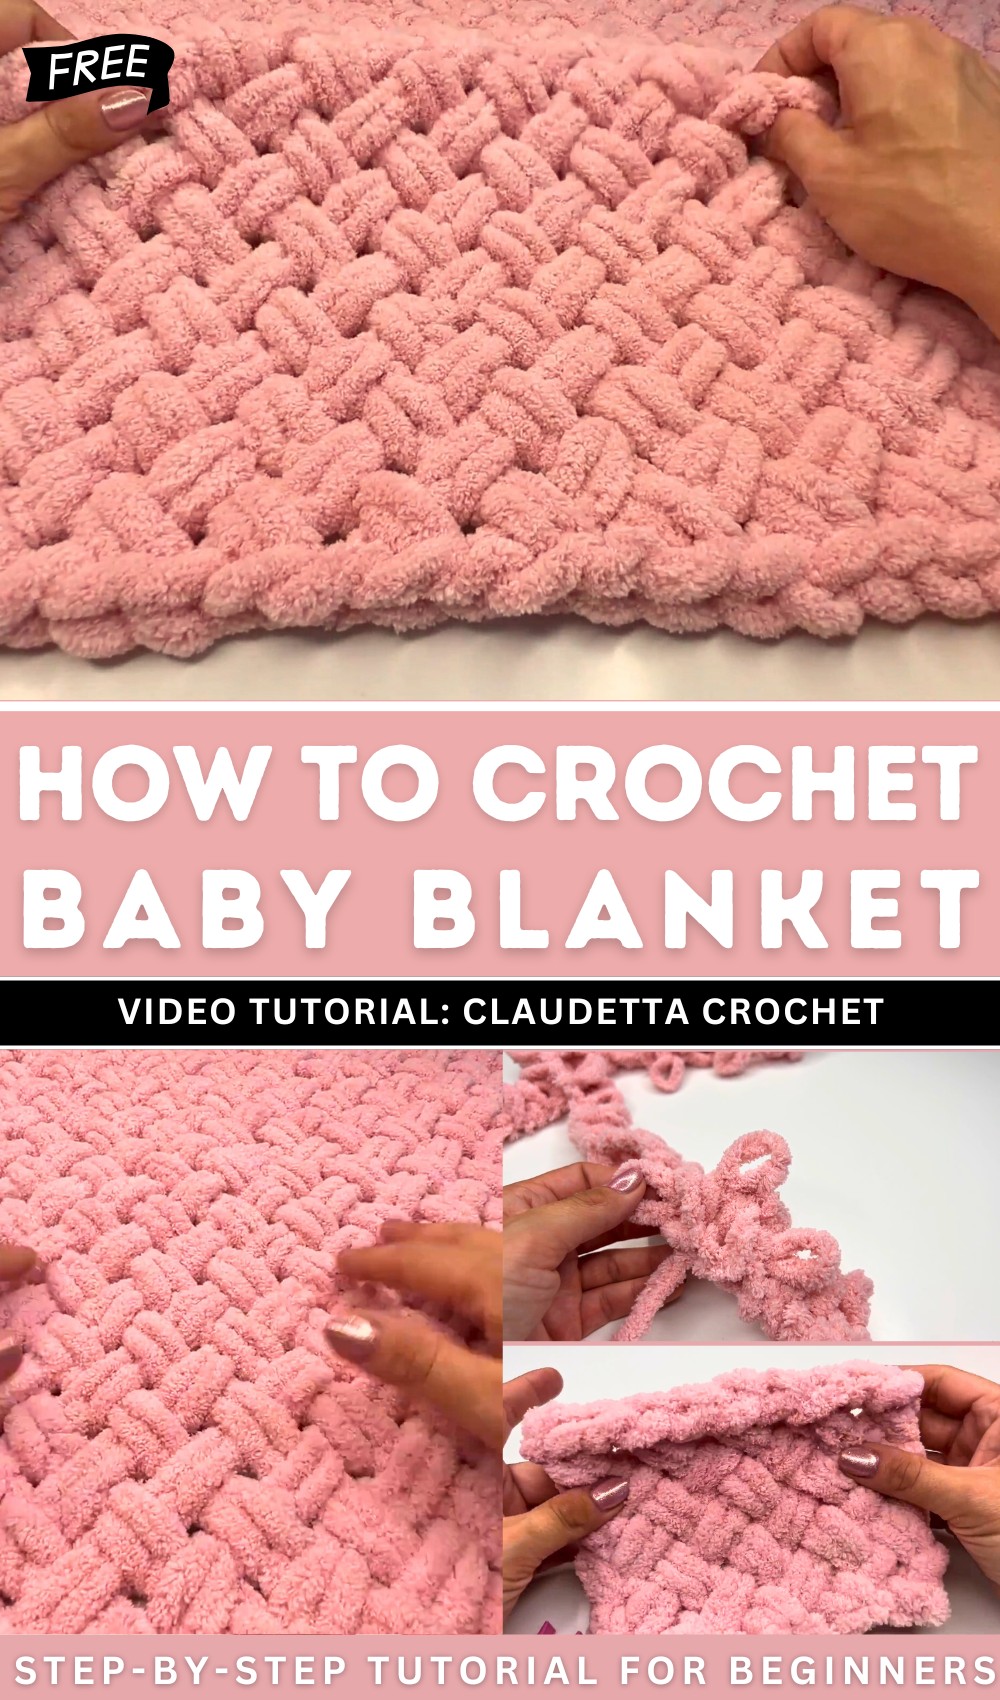
With a step-by-step tutorial, learn how to crochet a soft and chunky baby blanket without a crochet hook following a step-by-step tutorial for beginners. The blanket measures 85×80 cm, ideal for a baby. The pattern involves repeating only two rows, making it a quick and enjoyable project.
The video also demonstrates how to join new yarn skeins and how to finish the blanket with a clean edge. Follow through with us for the complete tutorial!
Cozy Baby Blanket Tutorial
- The video demonstrates how to finger crochet a soft, fluffy blanket without a crochet hook, using only hands and loop yarn.
- The finished blanket has a size of 85×80 cm, which is ideal for a baby.
- The project is described as fast and enjoyable, repeating only two rows.
- The video shows both the front and back of the blanket, highlighting the distinct patterns.
Materials Needed
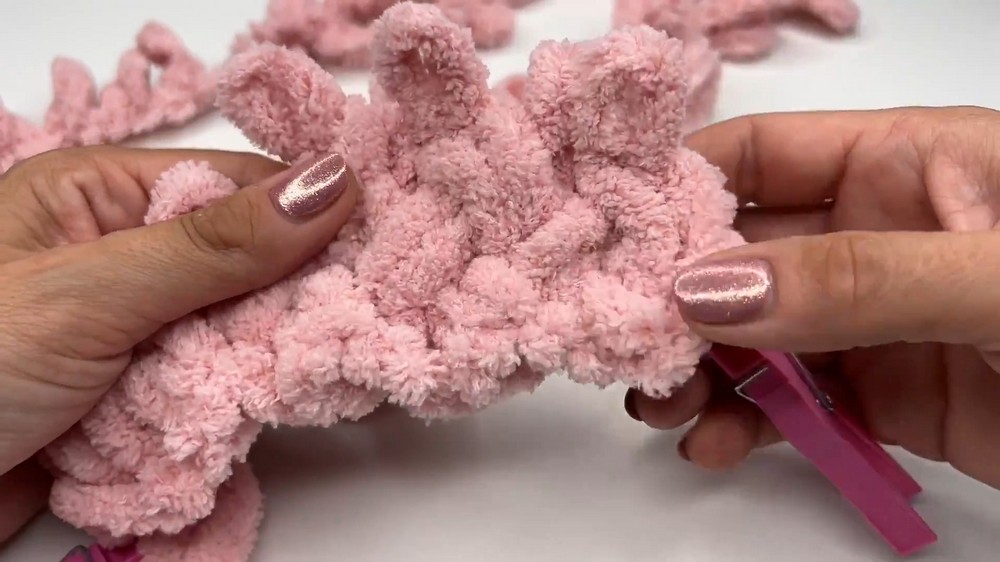
- Scissors: For cutting the yarn.
- Stitch Markers (or hair clips): To mark loops, making it easier to keep track of stitches.
- Alize Puffy Loop Yarn: This specific brand of soft loop yarn is recommended for finger crocheting. Five skeins were used for the baby blanket shown.
Getting Started
- Begin by opening a new skein of yarn.
- Cut two loops at the end of the yarn to create a straight piece for weaving in later.
- The pattern requires an even number of loops. For the baby blanket shown, 48 loops were used. The demonstration uses 10 loops.
- Mark the last loop of your starting chain (e.g., the 10th loop) to easily identify it.
Crocheting the Blanket
- Row 1 (Right to Left):
- Lay the yarn flat.
- Take the last two loops (e.g., 10th and 9th if starting with 10).
- Place the right loop over the left loop.
- Take the next available working loop (the 11th loop in the starting yarn) and pull it through the first created loop from behind.
- Pull another working loop through the second created loop from behind.

-
- Mark the first completed loop in this row.
- Repeat this process for the entire row, always taking the next two unworked loops, placing the right over the left, and pulling two new working loops through from behind.
- Mark the last completed loop of the row.
- Row 2 (Left to Right):
- When working from left to right, the first and last loops of the previous row are skipped.
- Take the next two unworked loops.
- Place the left loop over the right loop.
- Pull a working loop through the left loop from behind, then another working loop through the right loop from behind.
- Continue this pattern, always laying the left loop over the right and pulling new working loops through from behind.

-
- The marked end loops are only worked when crocheting from right to left.
- Repeating Rows: The two rows (right to left and left to right) are simply repeated to build the blanket.
Attaching a New Skein
- When a skein is nearly finished, cut the last two loops.
- Cut the first two loops of the new skein.
- Tie the cut ends of the old and new skeins together with two secure knots, as close as possible to the main yarn.
- Trim any excess yarn from the knots.
- Continue crocheting in the established pattern.

Finishing the Blanket
- To create a clean edge, remove all markers.
- Starting on the side with the loops, take the left loop and pull it through the right loop.
- Continue pulling the left loop through the right loop until the end of the row. This creates a braided edge.
- When the row is complete, cut the last few loops of the working yarn (the demonstrator cuts about three loops) to create a longer tail for weaving in.
- Thread the tail through the last remaining loop on your work and pull tight to secure.
- Weaving in Ends:
- Turn the work to the back side.
- Use a crochet hook (e.g., 6mm) or fingers to weave the yarn tail through the stitches on the back of the blanket.
- Pull the yarn through several stitches to secure it.

-
- Trim any excess yarn.
- Repeat for the starting tail of the blanket.
Video Guide