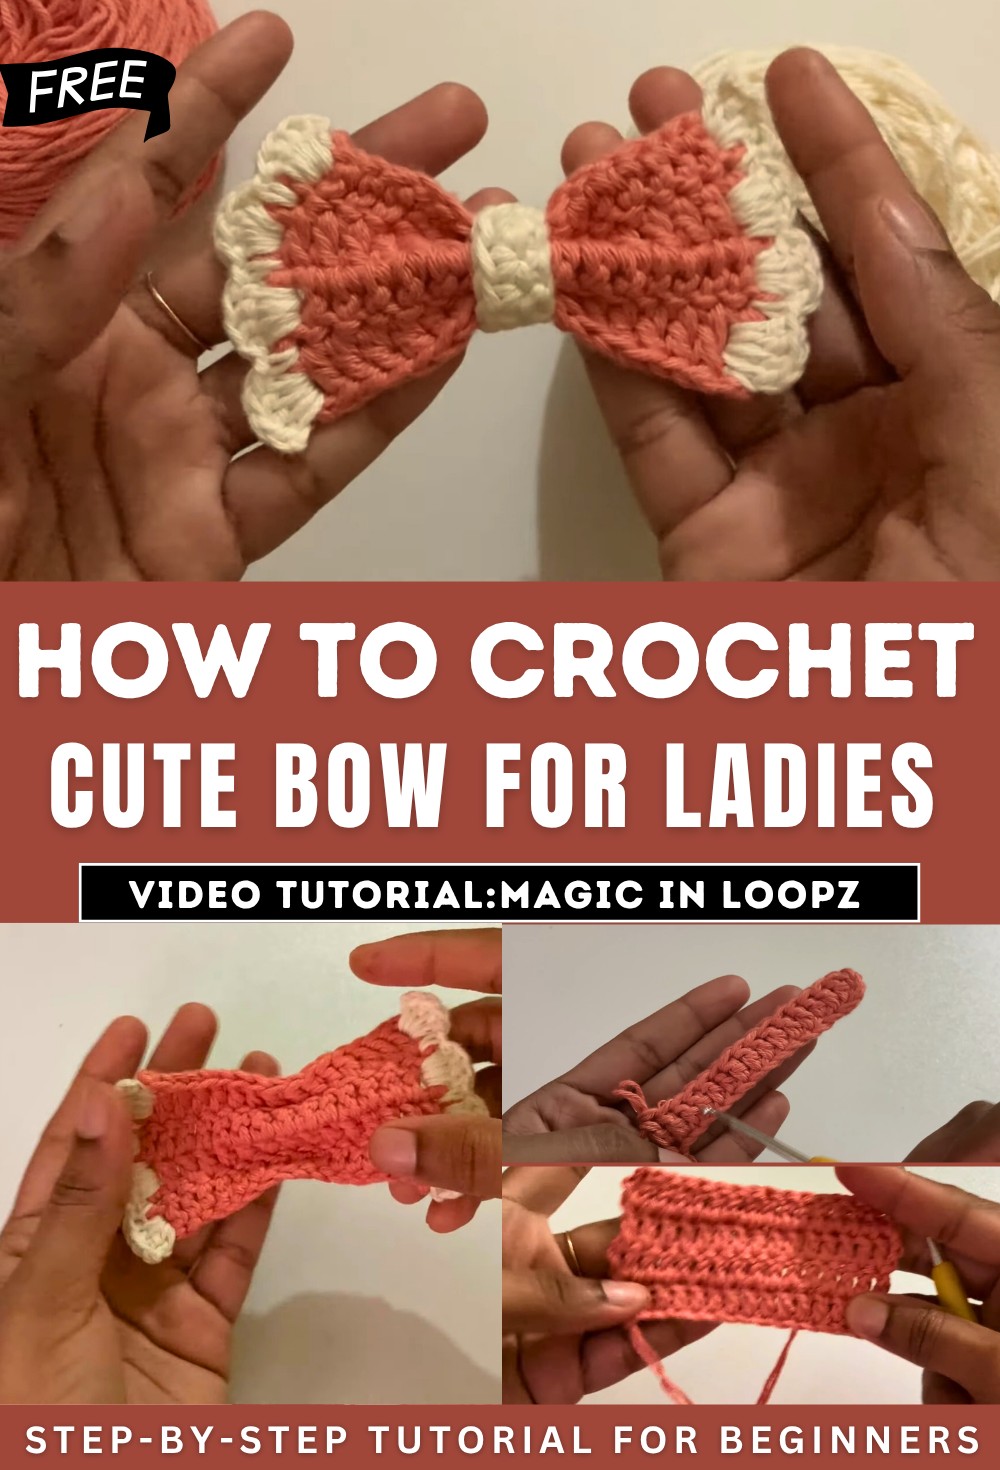
How to Crochet a Cute Bow for Ladies
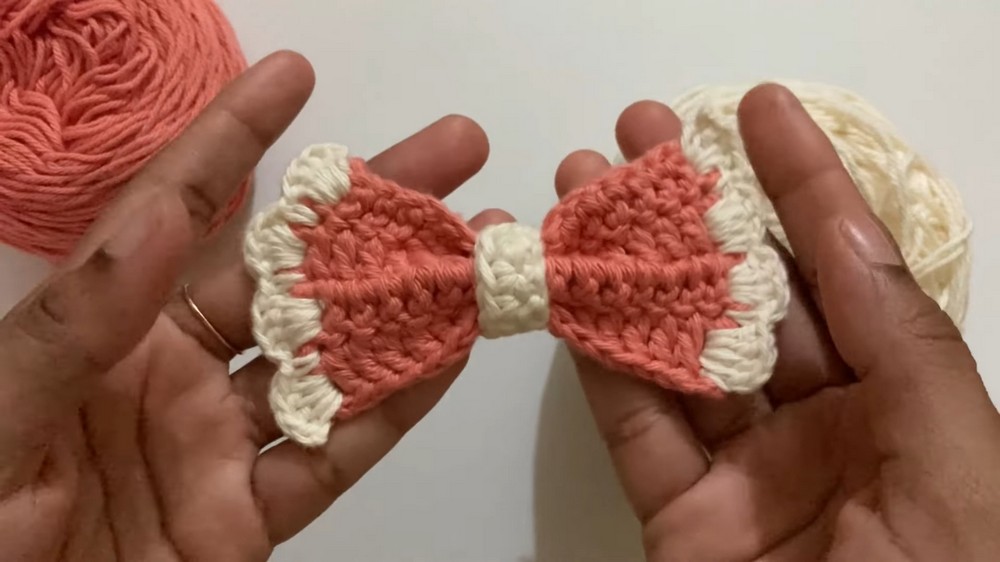
With a step-by-step tutorial, learn how to crochet a beautiful bow using basic stitches like single crochet and double crochet. Ideal for beginners, the project is crafted with peach and off-white cotton yarn, paired with a 3.5mm hook. The tutorial thoroughly explains creating the bow’s structure, shaping the wings, and adding a center tie for the finishing touch. With clear guidance and practical tips, it’s a simple yet elegant for crochet enthusiasts of all skill levels.
Crochet Cute Bow Tie
Introduction
- The tutorial is presented by the channel Magic in Loops.
- The project focuses on crocheting a beautiful bow using basic stitches, aimed especially at beginners.
- Stitches used include double crochet (DC) and single crochet (SC) for simplicity and versatility.
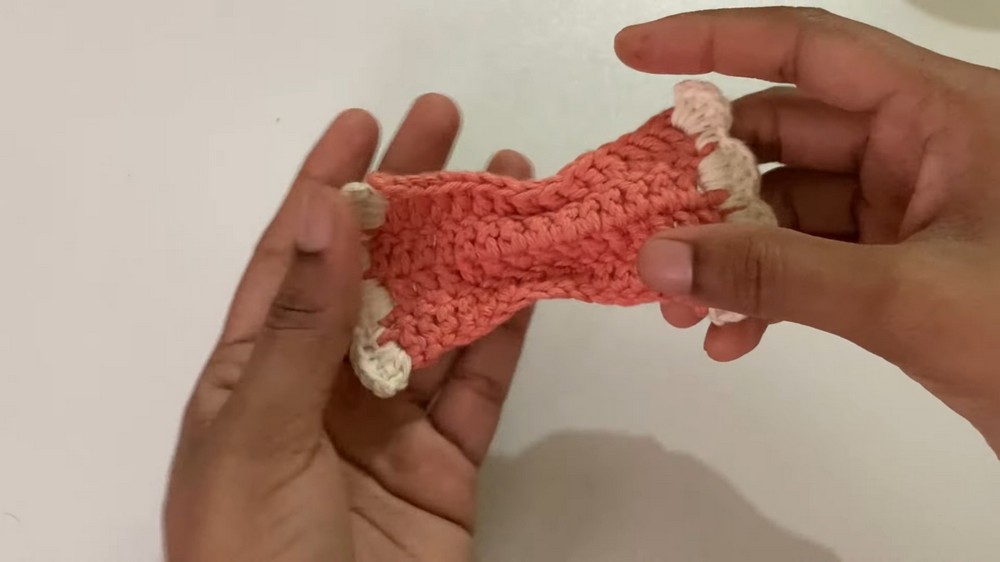
- The bow is crafted using peach and off-white cotton yarn with a 3.5mm crochet hook and double-thickness yarn to give it structure.
Part 1: Setting Up and Beginning the Bow
-
Materials and Starting the Bow:
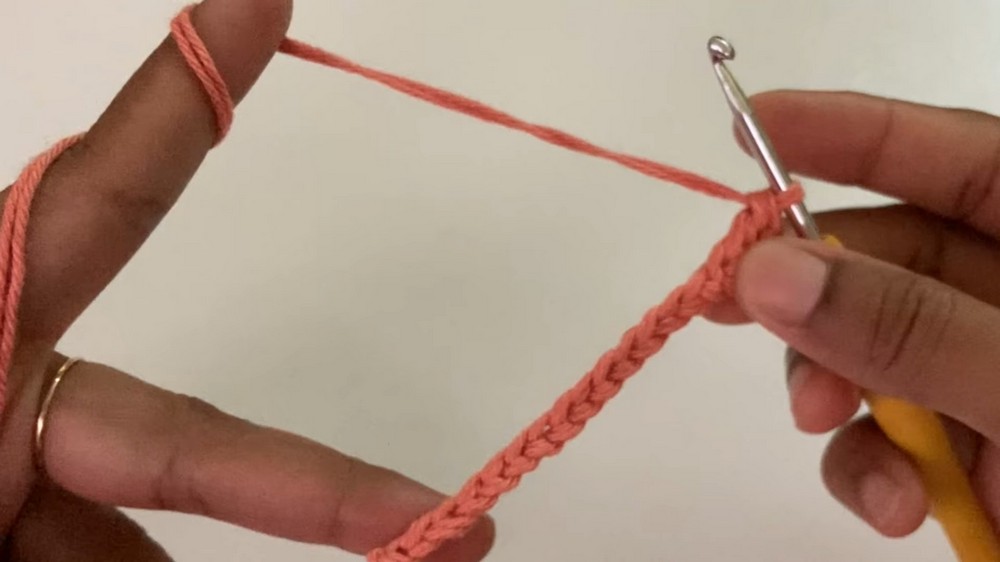
- The project begins with preparing a slip knot and attaching the peach yarn (in double thickness) to the hook.
- A foundation chain is created as the starting point for the crochet bow.
-
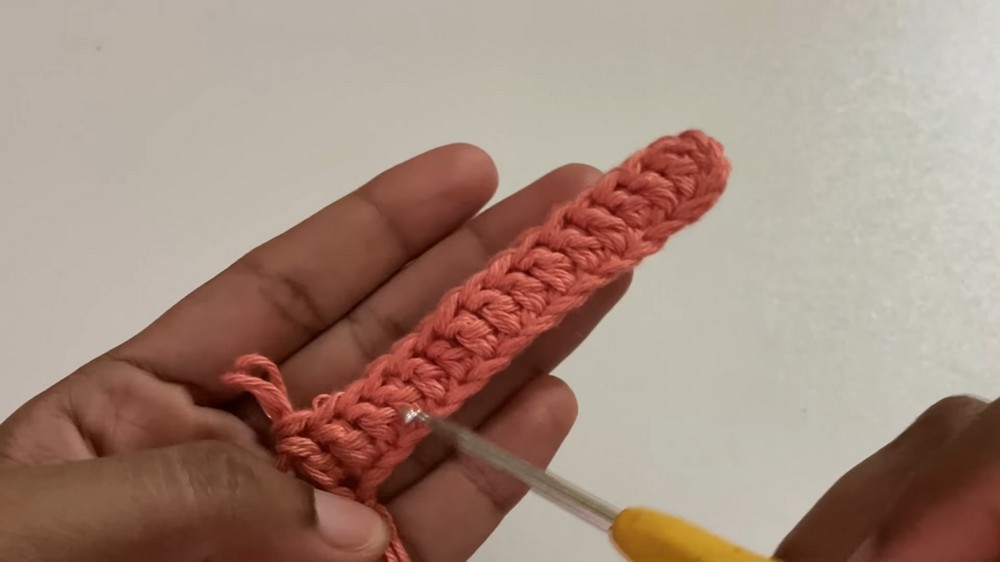
First Row (Double Crochet Stitches):
- Double crochet stitches are worked into the foundation chains across the row.
- The importance of counting stitches is emphasized to ensure even and accurate work.
-
Subsequent Rows:
- Second, third, and fourth rows follow the same pattern, using double crochet stitches.
- Each row starts with chain stitches to turn the work and continues working in a straightforward, consistent manner.
- By the end of the fourth row, the rectangular shape of the bow’s wing structure is complete.

Part 2: Shaping the Bow’s Wings
-
Finishing the First Wing:
- Once the last row is complete, the yarn is fastened off and tightened to secure the stitches.
- Loose yarn ends are hidden using a needle, creating a clean and neat finish for one side of the bow.
-
Creating the Second Wing:
- The process is repeated for the second wing to form a matching pair.
- Again, care is taken to work consistently, hide ends, and maintain the overall neatness.
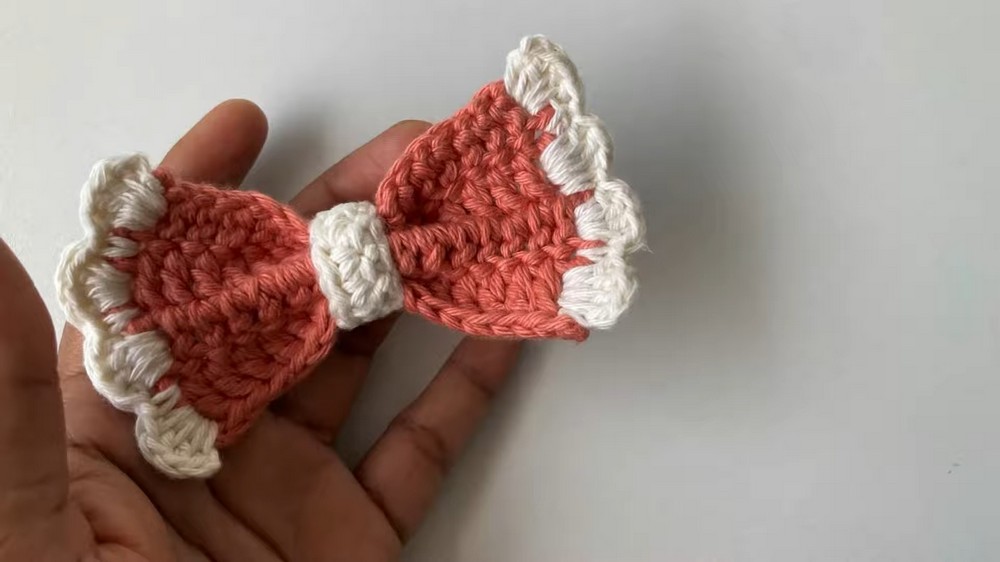
- The two rectangular wings are placed together, folded, and shaped to form the bow.
Part 3: Adding the Center Tie
-
Creating the Tie:
- Using the off-white yarn, a narrow band is crocheted for the center tie.
- The tie is worked with single crochet stitches across a small number of chains to form a strip.
- Once finished, the yarn is fastened off and tightened.
-
Attaching the Tie:
- The tie is wrapped tightly around the center of the bow to give it its final shape.
- The ends are secured at the back, ensuring no loose yarn is visible.
Part 4: Final Touches
- Once the bow is assembled, the presenter adjusts and shapes the bow for a polished look.
- Loose ends are trimmed, and the bow is inspected for perfection.
- The finished product is a simple, elegant bow made using basic crochet techniques.
Conclusion
- The tutorial emphasizes beginner accessibility while demonstrating important skills like working with basic stitches, counting stitches, and finishing neatly.