How To Crochet A Granny Square Top for Gifting
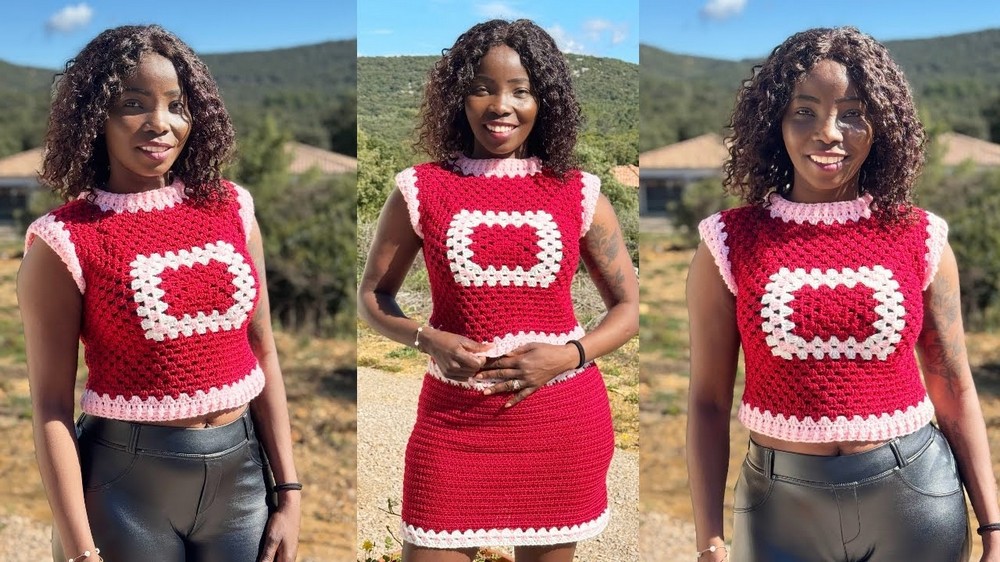
In this tutorial, learn how to create a matching red and pink top and skirt using the granny square stitch designed for beginners. The top features a granny square pattern, combining elegance with a quick design process. Angel provides clear steps on color changes, stitching, and assembling panels, creating a stylish and festive outfit.
With helpful tips on materials, sizing, and finishing touches, this project is perfect for beginners and crochet enthusiasts alike.
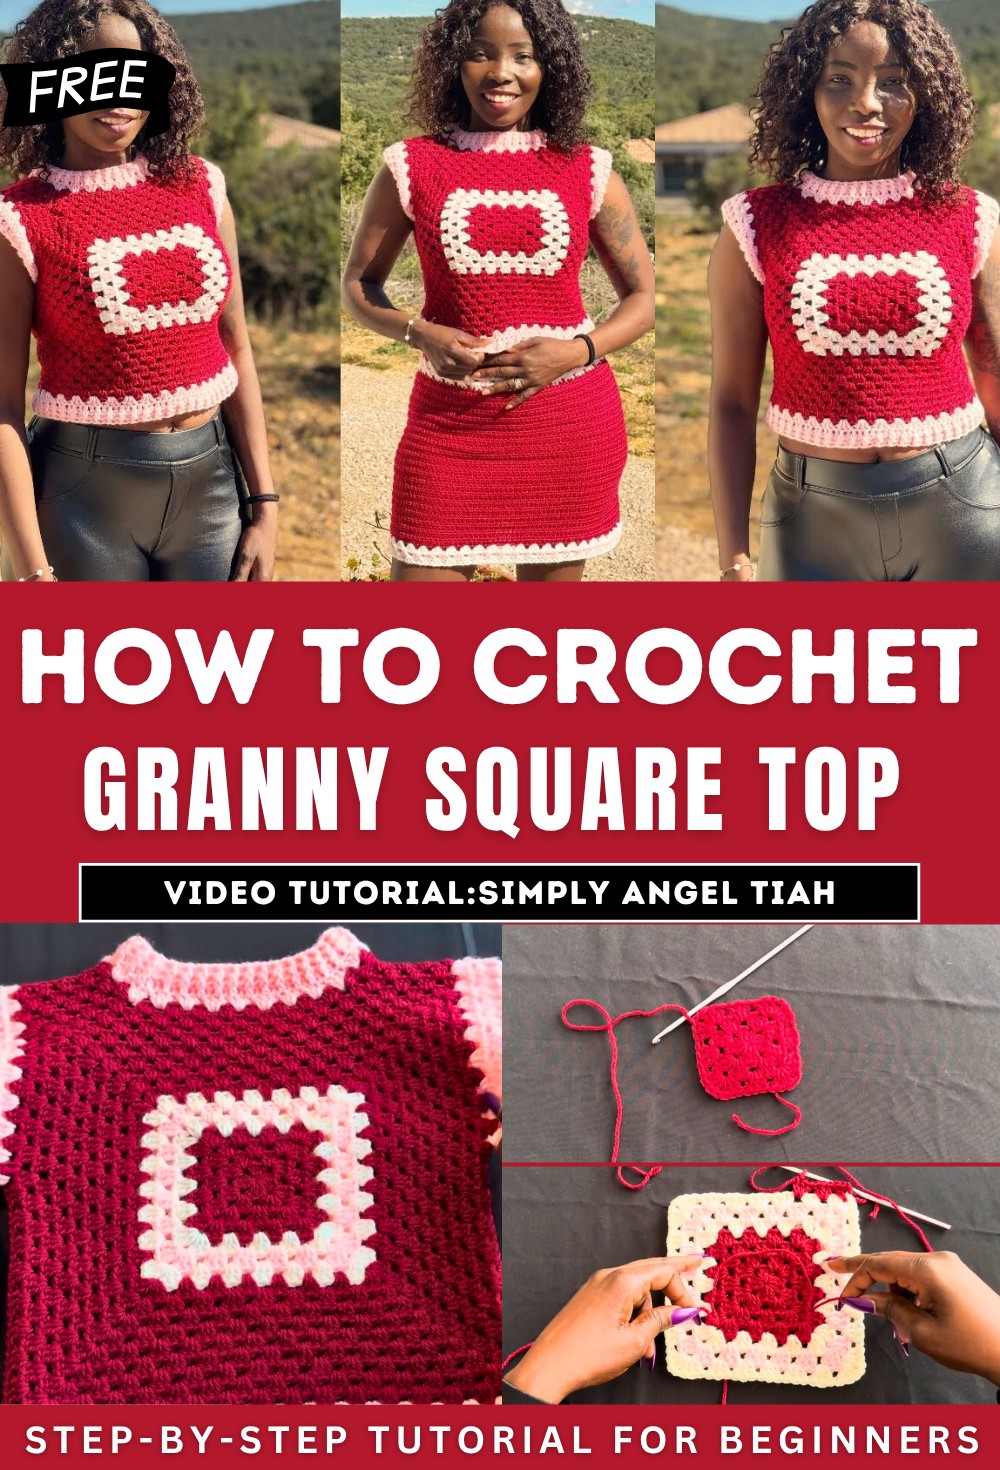
Crochet A Granny Square Top Tutorial
The project focus is a handmade crochet top designed for using red, white, and pink yarns—colors inspired by an earlier skirt project available on her channel.
Materials Used
- Yarn Details:
- Lightweight #3 acrylic yarn, brand name: Aite (by Timid).
- Specific colors include an off-white (#0211), pink (#0325), and red (#3011). Each skein weighs 50g and measures 140m.
- Recommended hook size for the yarn is 3–4 mm, but Angel suggests using a 4.25 mm (US G-6) crochet hook for the top.
- Additional Supplies:
- Crochet hook (size 4.25 mm)
- Scissors
- Darning needle
- Stitch markers
- Tape measure for size adjustments (recommended but omitted in the video).
Project Breakdown
The crochet top is completed in multiple steps, with attention to detail provided for beginners.
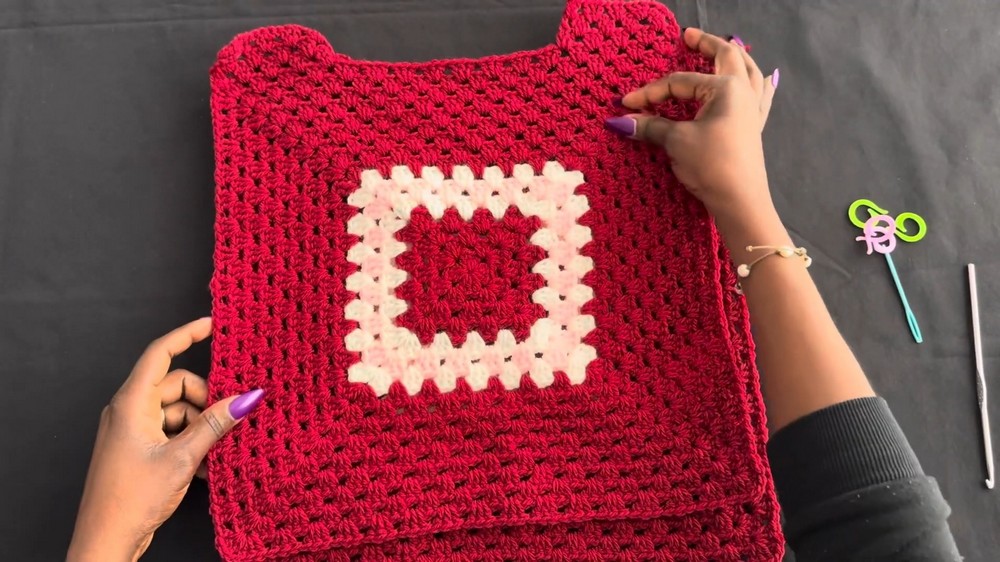
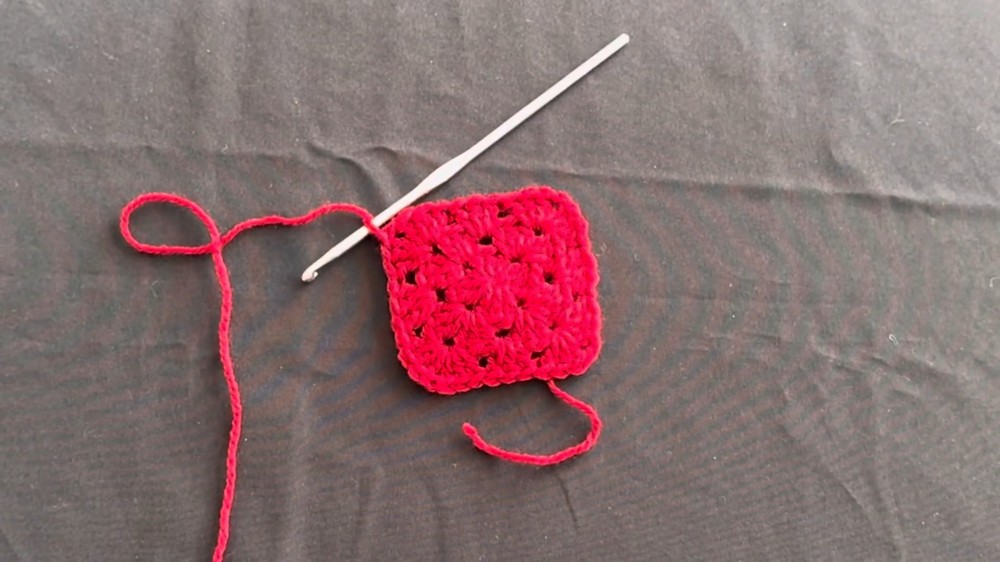
Step 1: Constructing the Granny Square Panel
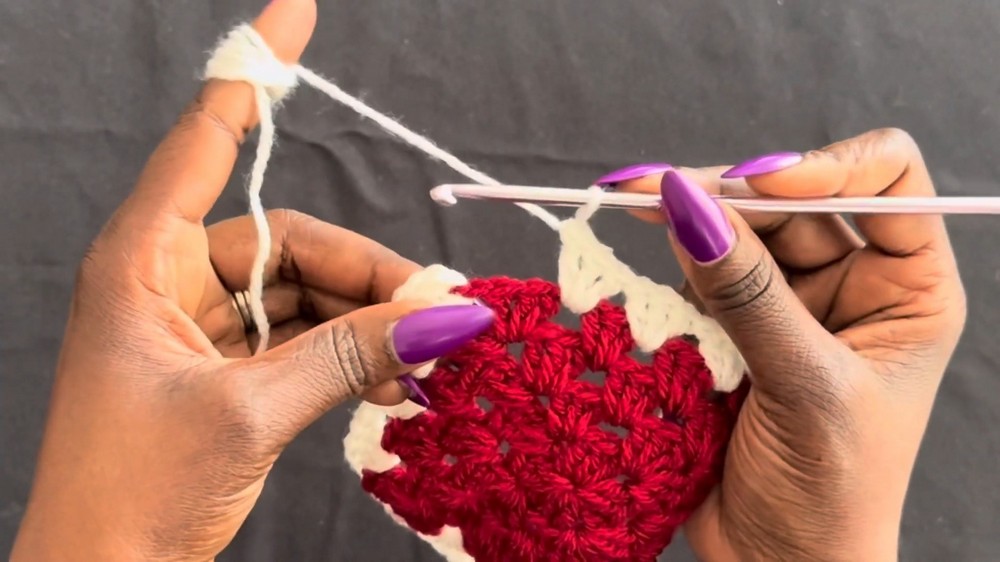
- Angel starts by showing how to crochet a center granny square using a magic circle technique with the red yarn.
- The granny square is created in multiple rounds, alternating between clusters of double crochets and chain spaces. This creates a neat, symmetrical pattern.
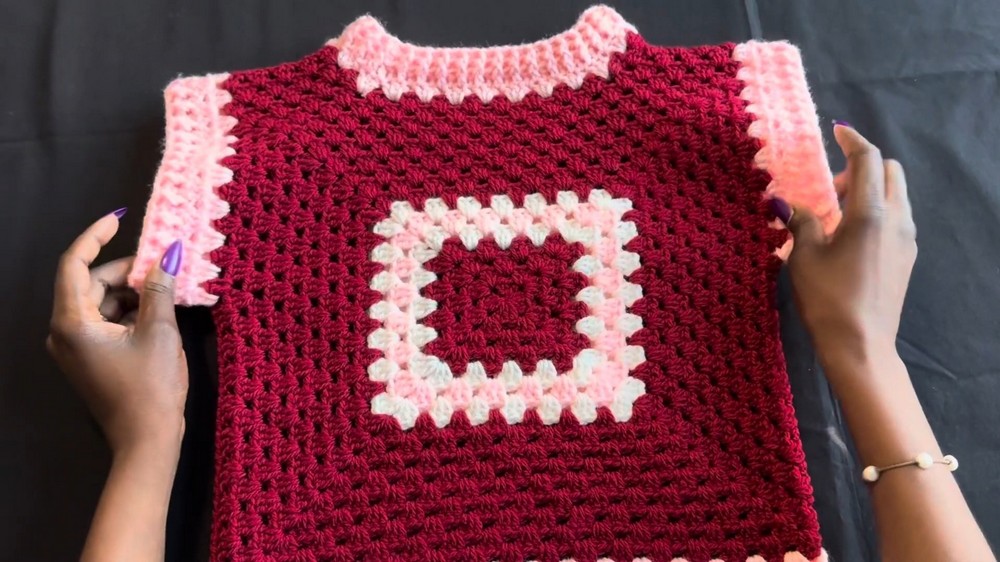
- After completing four rows in the red yarn, Angel introduces color changes to the granny square, shifting to white and pink rows. Proper color-changing techniques are shown to ensure seamless transitions without visible gaps.
- The final component includes extending the top-most rows in red yarn to reach the desired panel size. The granny square panel size is determined based on personal measurements for a snug or loose fit.
Step 2: Creating the Second Panel
- The top’s design requires two identical granny square panels—one for the front and the other for the back.
- Angel explains the importance of symmetry throughout this step to ensure that both pieces align perfectly during assembly.
Step 3: Assembly
- Using a darning needle, the two panels are joined at the shoulders and sides, transforming them into a vest-like shape.
- Armholes are measured and marked with stitch markers to ensure uniformity and allow flexibility for sleeve adjustments.
- The host emphasizes the importance of aligning the stitches for clean and professional seams.
Step 4: Adding Borders
- Sleeves:
- Sleeves are crocheted directly onto the armholes using pink yarn.

-
- Rows of granny stitches followed by double crochets are worked around the armholes for structure.
- A final touch of front post and back post stitches is added to create ribbing along the edges for a polished finish.
- Neckline and Bottom Hem:
- Angel plans to crochet borders on the neckline and bottom hem to enhance the final look of the top using pink yarn for continuity.