How to Crochet Ribbon Bow for Beginners
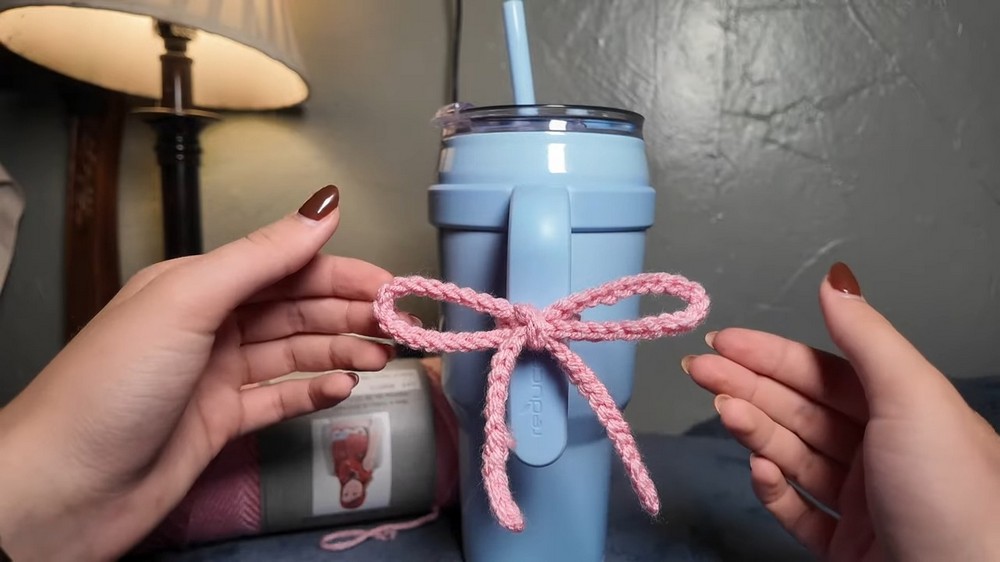
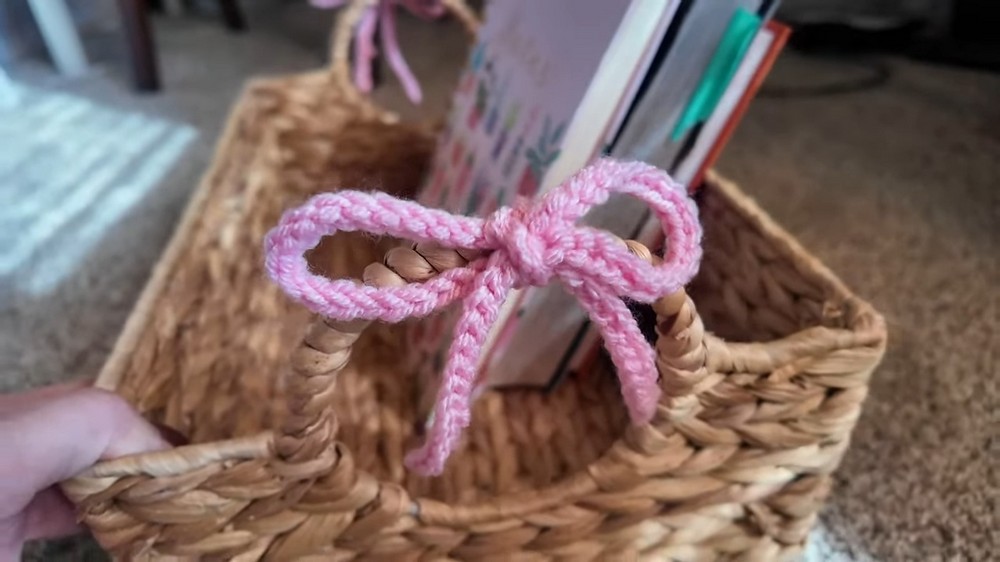
In the post, you’ll learn how to crochet a tiny ribbon bow in a beginner-friendly tutorial. This quick and easy project is perfect for those new to crocheting. The bow can be tied onto various items, such as bags, baskets, or cups, adding charm to everyday objects. The project takes about 15 minutes and is customizable in size and texture.

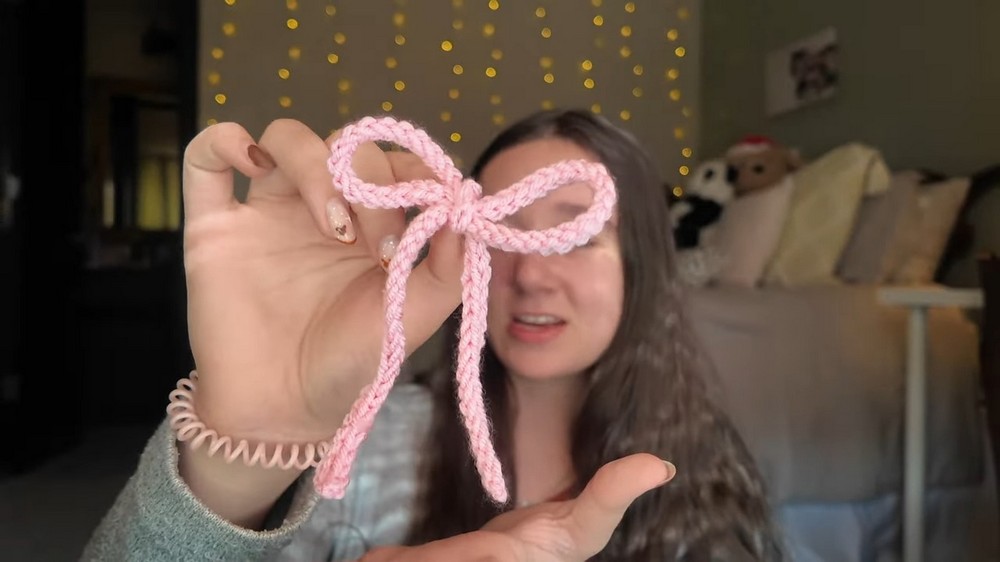
Tiny Free Crochet Ribbon Bow Pattern
Materials
- Yarn: Any yarn (from fingering to bulky; cotton, acrylic, or specialty), small amount
- Hook: Appropriate size for yarn (e.g., US E/3.5 mm for thin to US H/5 mm for worsted weight)
- Scissors
- Yarn Needle (for weaving in ends)
Key Abbreviations (US Terms)
| Abbreviation | Meaning |
|---|---|
| ch | Chain |
| st(s) | Stitch(es) |
| sl st | Slip Stitch |
| yo | Yarn Over |
Special Notes
- This bow is made as a cord using a unique beginner technique (not a traditional chain stitch).
- Adjust cord length for different ribbon or bow sizes.
- The construction uses both the working yarn and a long starting tail.
- This project is ideal for absolute beginners.
Pattern Instructions
1. Prepare the Yarn
- Pull out a long starting tail (the amount depends on your desired ribbon length; about 18–24 inches for a small ribbon, or longer as desired).
- Make a loose pile of the tail; this will be incorporated into the stitches for extra thickness and structure.
2. Create a Slip Knot
- At the spot where your pile of tail yarn meets the main skein, make a slip knot.
- Put the slip knot on your hook.
- The main skein should be on your left; the tail (extra length) on your right.
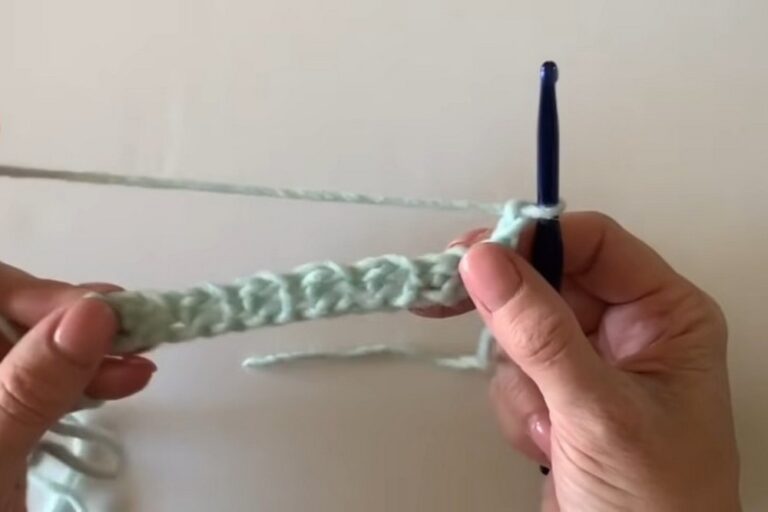
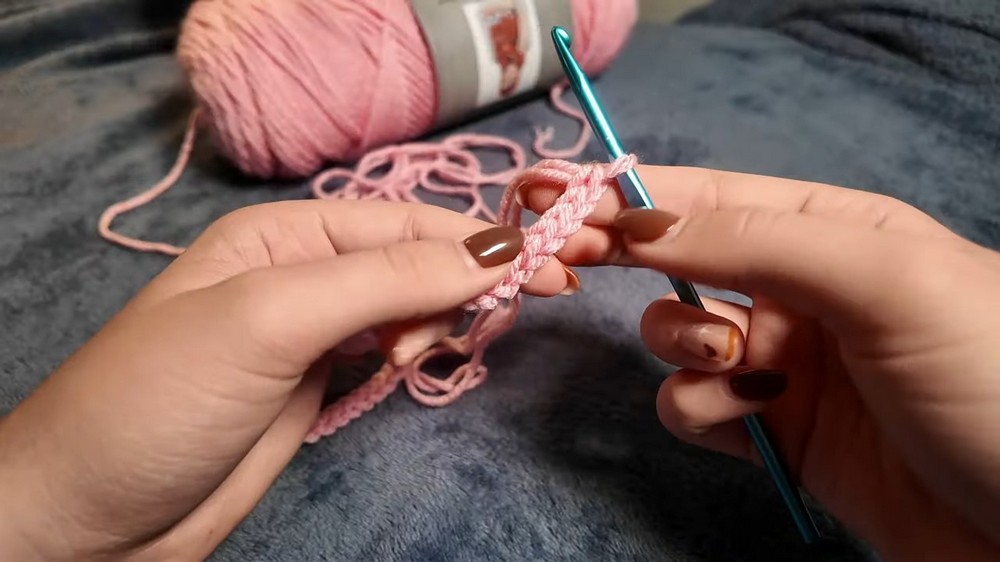
3. Crochet the Cord
Note: This technique works both the main working yarn and the tail strand.
- Wrap the tail (coming from the right side) up and around the hook towards the back.
- Hold both the tail and base of stitch between thumb and middle finger to keep them steady.
- Yarn over (yo) with the working yarn (from skein), then pull through both loops on the hook (the tail loop and the working yarn loop).
- This completes 1 stitch.
- Repeat:
- Again, bring the tail up and wrap it around the hook towards the back.
- Hold in place, yo with the working yarn, and pull through both loops.
- Continue this process to achieve the desired length (typically for a small bow, ~80–100 stitches, but you can adjust as needed).
4. Finish and Fasten Off
- Once your cord is long enough, cut the working yarn, leaving a 4–5 inch tail for weaving in.
- Remove hook, pull the tail through the last loop to secure.
- Weave in both ends with a yarn needle, blending them neatly into the cord.
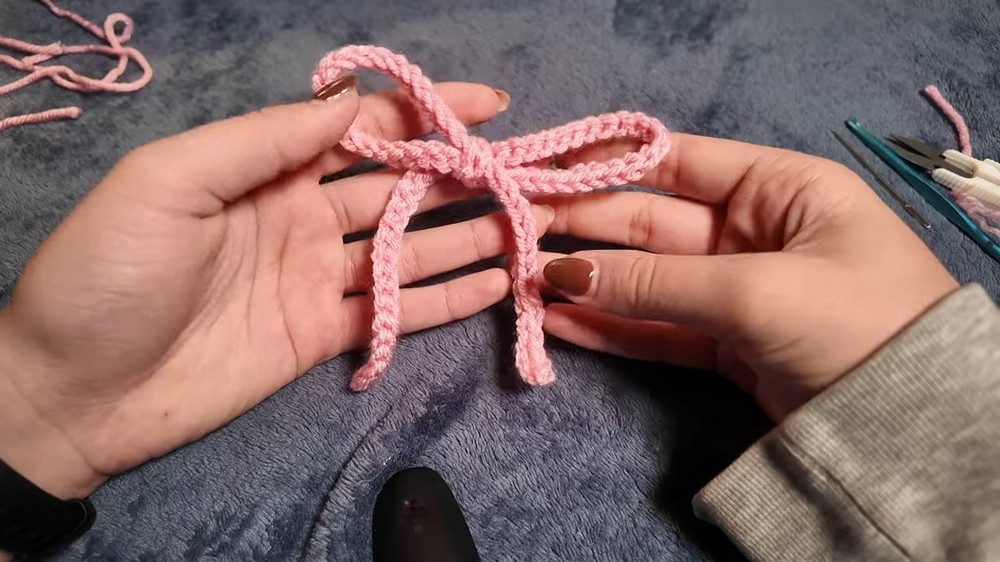
5. Tie The Bow
Method 1 (Basic Bow):
- Tie your finished cord into a bow, as you would with shoelaces or ribbon.
Method 2 (Bow Around an Object):
- Wrap the cord around the object.
- Tie a knot at the center, keeping ends even.
- Use your preferred bow tying method (bunny ears, double loop, etc.).
Conclusion
You have crocheted a quick and easy tiny ribbon bow! Use as a charming embellishment for cups, handles, gifts, hair ties, baskets, and more. Experiment with different yarns and lengths for varied results.
Pattern Correction
- Stitch Consistency: Always wrap the tail “up and towards the back” of the hook; do not wrap from back to front to ensure proper look and texture of the cord.
- Length Note: The cord stretches; measure it gently stretched for an accurate idea of the finished bow size.
Tips
- If you’re new to this stitch, practice the cord technique for even tension.
- Use specialty yarns (e.g., velvet, fluffy, sparkly) for different effects.
- Finished cord can be “blocked” (gently steamed) to set the shape if desired.
- To hide bulk at the bow center, tie a small separate piece of yarn around the middle after bow is made.