How To Crochet a Super Scarf For Beginners

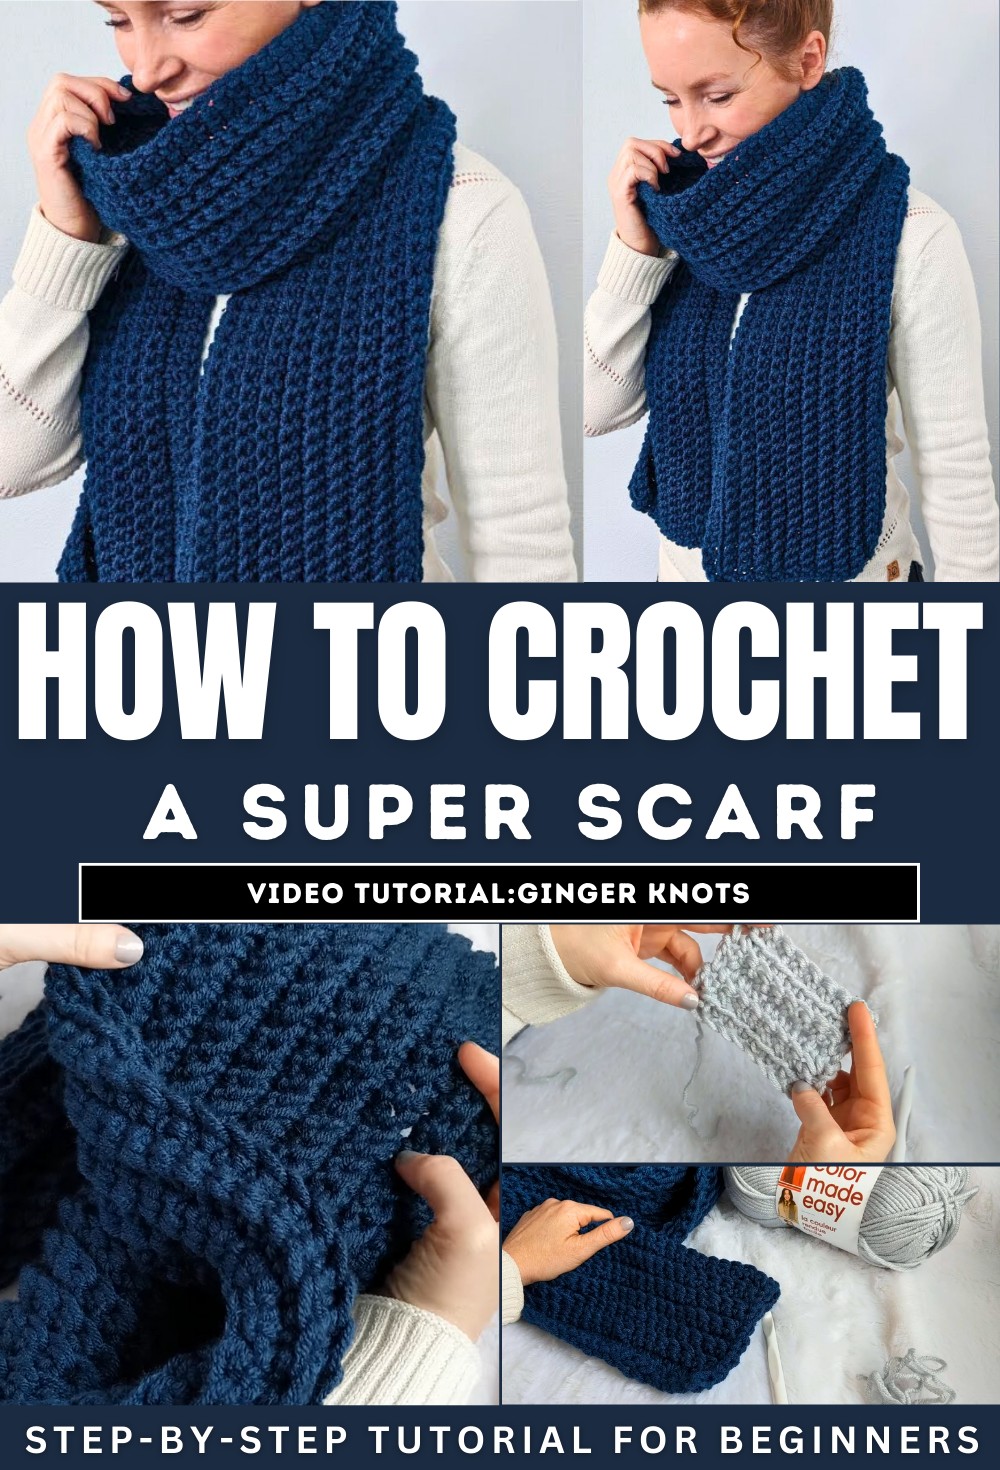
Learn how to crochet a “super scarf” — a large, cozy, beginner-friendly crochet project with a tutorial for beginners and experts. Using “Color Made Easy” bulky yarn and a slightly larger hook for a soft, squishy texture, you will learn everything step by step. The scarf features chains and single crochets, alternating between front and back loops to create a ridged texture.
With 22 rows of simple stitches, Courtney provides detailed tips on tension, technique, and finishing touches. Perfect for beginners, this project promises a stylish and warm accessory for winter! So, follow through with us for the complete tutorial.
How to Crochet a Fluffy Super Scarf: Beginner Tutorial
This tutorial, presented by Courtney from Ginger-Knots, demonstrates how to crochet a large, fluffy “Super Scarf” designed to keep you warm during the winter. The tutorial is beginner-friendly, featuring simple stitches—chains and single crochets—and step-by-step guidance.
Supplies Needed
- Yarn: Lion Brand’s “Color Made Easy” (size 5 bulky yarn). This gives the scarf a fluffy and cozy texture.
- Crochet Hook: A larger hook than recommended for the yarn, to create a soft and drapey finish.
- Additional Tools: Scissors for cutting the yarn.
Starting the Scarf
Creating a Slip Knot
- Make a simple slip knot as the starting point for your chains.
- Courtney provides a detailed explanation of how to create one, noting that beginners may also look up additional references if needed.
Foundation Chain
- Crochet a long foundation chain measuring approximately 80 inches (exact stitch count is unimportant for the outcome).
- Tips for consistency in tension:
- Keep your stitches relaxed.
- Maintain the same level of tension throughout the chain.

Row 1: Single Crochets
- Work into the second chain from the hook.
- Use single crochet stitches across the entire foundation chain.
- Tips for stitching:
- Make sure each stitch is consistent.
- Always move to the next stitch to avoid confusion about which ones have already been worked.
Subsequent Rows: Adding Texture
The scarf’s textured design is created by alternating the loops you work into.
Row 2: Front Loop Only
- Begin the row with a chain 1 and turn the work.
- For the first and last stitch of the row, work through both loops for edge stability.
- For all other stitches, work into the front loop only.
- This creates one “shelf-like” ridge on the scarf.

Row 3 Onward: Back Loop Only
- Repeat the same process as Row 2, but work into the back loop only (except for the first and last stitch, where both loops are used).
- This alternation between front and back loops creates a striped, raised texture.

Final Steps
- Work a total of 22 rows for the full scarf, alternating front and back loops as outlined:
- Even Rows: Front loop.
- Odd Rows: Back loop.
- The alternating texture gives the scarf a “shelf-like” appearance, with visible ridges on both sides.

Finishing the Scarf
- For the last row, return to working in the front loop only.
- Complete the final stitch, cut the yarn, pull it through, and tighten.
- Optional: Weave in yarn ends for a finished look.

Tips for Beginners
- Relax while making the foundation chain to ensure a flat and even scarf.
- Consistency in tension is key to achieving a smooth and professional look.
- Pause the video and take your time during each step.

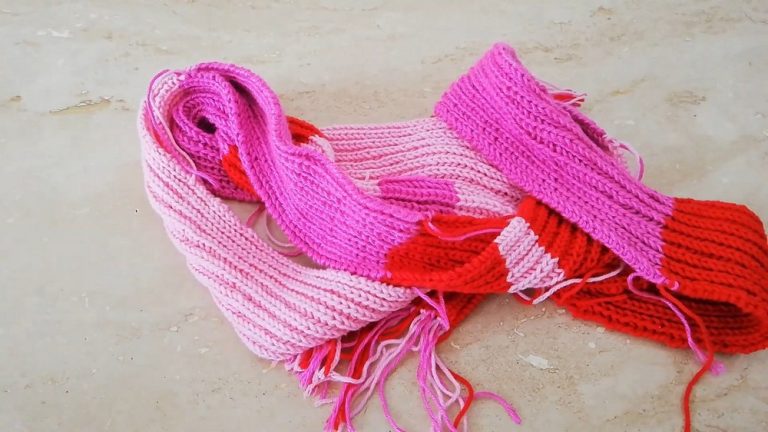
Final Product
The completed scarf is a large, soft, and unisex accessory with a textured striped design. Courtney emphasizes its versatility and assures that even beginners will find the pattern approachable.