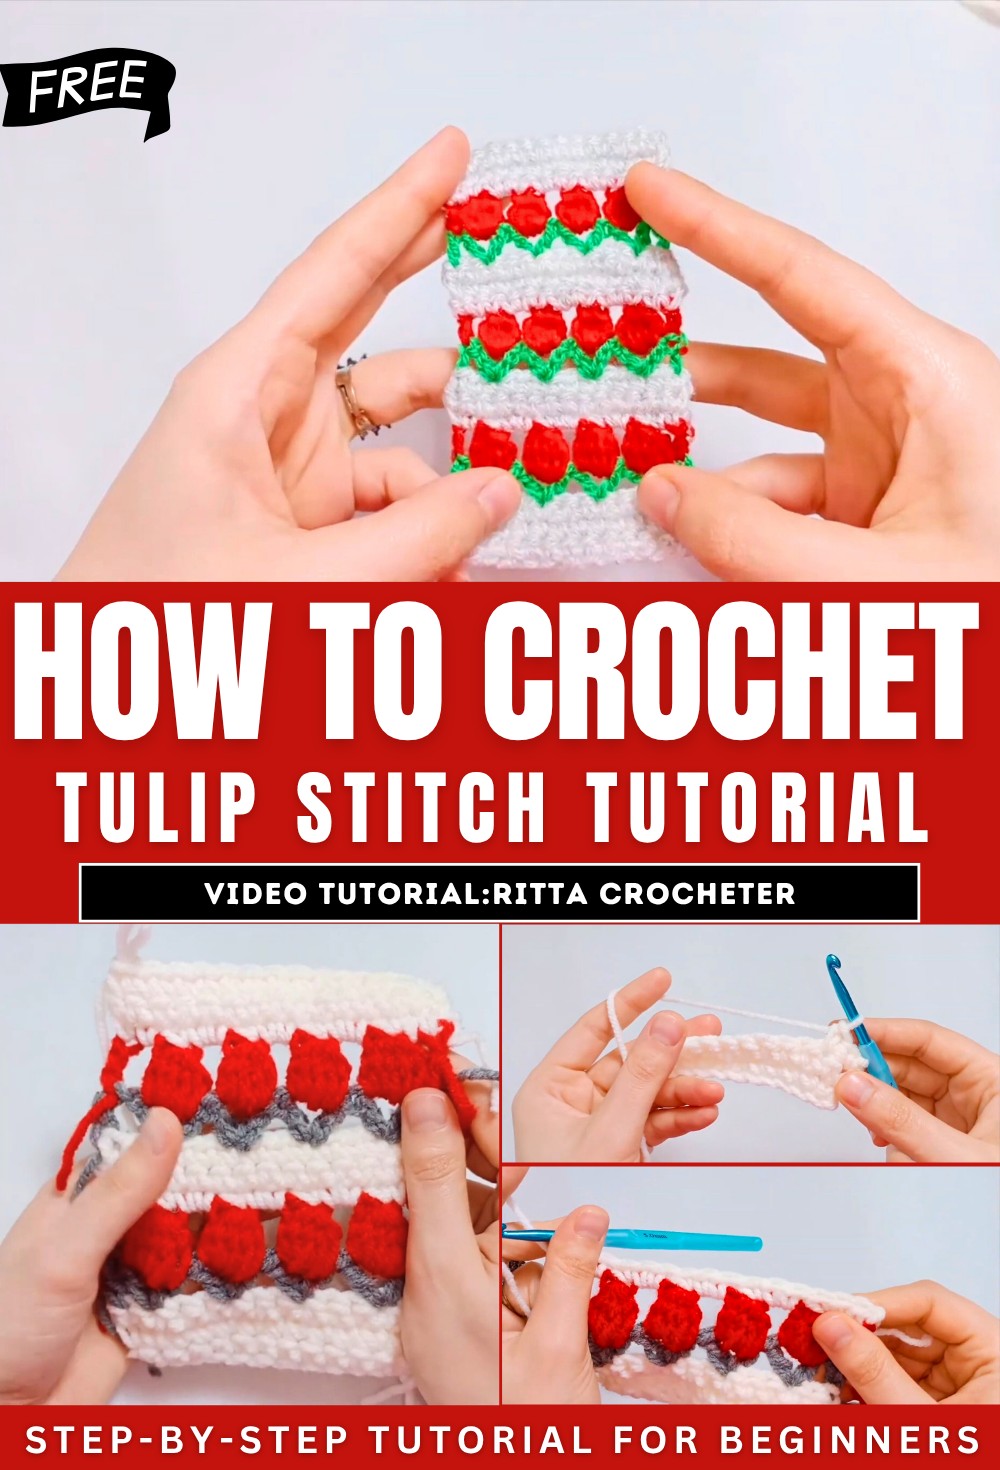
How To Crochet A Tulip Stitch Tutorial for Beginners

The tutorial introduces the beautiful and easy-to-learn tulip stitch, perfect for borders or various crochet projects. Using rows of single crochets, V-stitches, and puff stitches, the creator demonstrates how to create tulips that align perfectly for a neat design. Tips for color changes, maintaining even ends, and customizing the length are also provided.
With clear step-by-step guidance, the tutorial makes this stitch accessible and fun for all skill levels. Viewers are encouraged to subscribe to more crochet tutorials. So, follow through with us for the complete tutorial.
Tulip Stitch Crochet Tutorial
This tutorial focuses on the tulip stitch, a beautiful and easy crochet design that can be used for borders or other creative projects. The creator introduces the stitch as part of a series highlighting various crochet techniques, explaining the steps in detail to ensure beginners and advanced crocheters can follow along.
Materials and Preparation
- The creator uses a 5mm crochet hook and multiple yarn colors to achieve the tulip design.
- A slip knot is created, and an initial chain is made to set up the foundation for the project.
Steps to Create the Tulip Stitch
1. Base Rows with Single Crochets
- The tutorial begins with creating rows of single crochets to form the foundation for the tulip stitch.
- The importance of counting stitches at the end of each row is emphasized to ensure even and neat edges.
- A few rows of single crochets are made to establish a strong base before introducing color changes and patterns.

2. Adding V-Stitches
- Once the base rows are complete, a new color is introduced using simple techniques for changing yarn.
- V-stitches are created in specific spaces along the row to establish the framework for the tulip design.
- Clear instructions are provided for spacing the stitches properly while maintaining consistency throughout the row.

3. Creating Tulip Designs with Puff Stitches
- The puff stitches are added in a contrasting color to form the tulips within the V-stitches.
- Each puff stitch is carefully crafted, with two chains separating each tulip to maintain a balanced design.
- Additional tips are shared for achieving even loops and transitioning between stitches seamlessly.

4. Maintaining Alignment of the Tulip Rows
- A clever technique is introduced to ensure rows of tulips face the same direction for a polished look.
- This involves cutting the yarn at the end of the row and restarting from the opposite side to align the tulip stitches consistently.

Pattern Overview
- The overall tulip stitch pattern consists of alternating rows of single crochets, V-stitches, and puff stitches.
- Between each row of tulips, multiple rows of single crochets are added to create visual separation and stability.
- Tips for extending the chain length to incorporate additional tulips are also provided, making the pattern customizable for larger projects.

Tips and Tricks
- Consistency: Counting stitches at the end of each row is essential for maintaining even edges.
- Color Choices: Experimenting with color combinations adds vibrancy and uniqueness to the design.
- Alignment: Ensuring tulip rows face the same direction enhances the aesthetic appeal of the stitch.