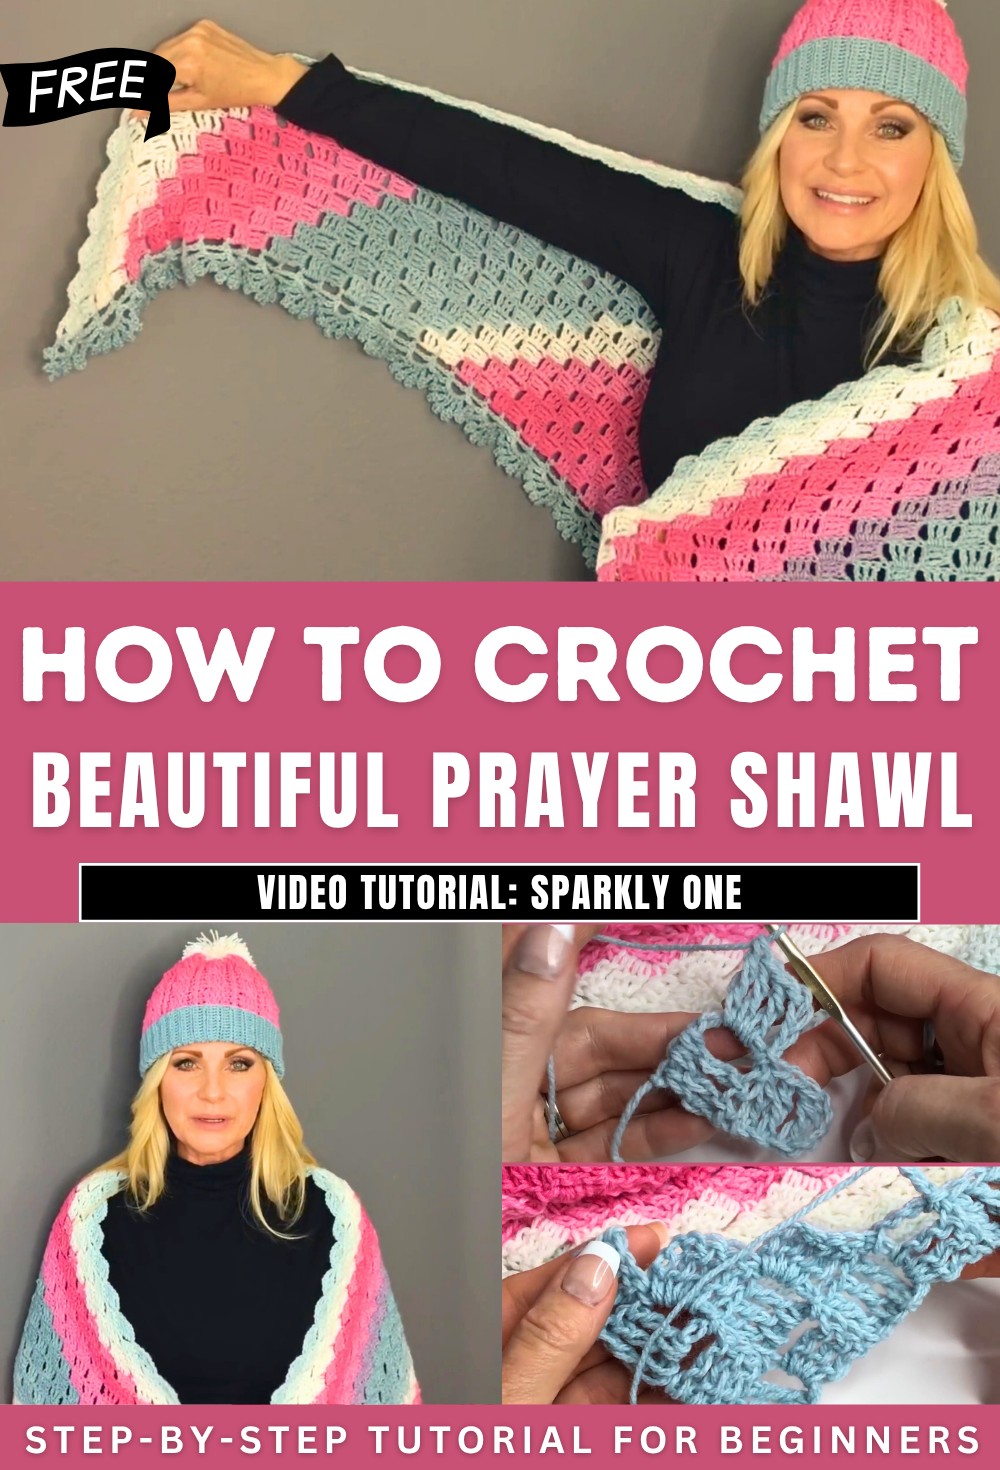
How to Crochet Beautiful Prayer Shawl for Spring

Learn how to crochet a beautiful prayer shawl using Mandala self-striping yarn in the Unicorn colorway, finished with a graceful lace border. You can dedicate this shawl to your dear one, praying love and warmth into every stitch. With clear steps and personal touches, this project embodies creativity, compassion, and the joy of handmade gifts. Let’s get started!
Lacy Prayer Shawl Crochet Pattern
Materials
- Yarn: Lion Brand Mandala (1 skein for shawl only; add a 2nd skein for lace border)
- Self-striping, category 3/light worsted/DK recommended
- Sample color: Unicorn (201)
- Hook: 5.5 mm (I-9) crochet hook, or size needed for preferred drape
- Scissors
- Yarn Needle for weaving in ends
Abbreviations
- ch: chain
- sl st: slip stitch
- tr: treble crochet
- dc: double crochet
- sc: single crochet
- sp: space
- st(s): stitch(es)
Special Notes
- Pattern is written in US terminology.
- The shawl is worked in interconnected blocks with treble crochet; border is added at the end, around the straight sides (not the scalloped edge).
- For a longer or shorter shawl, adjust the number of rows.
- Check your stitch count as you go for a neat shape.
Instructions
MAIN SHAWL
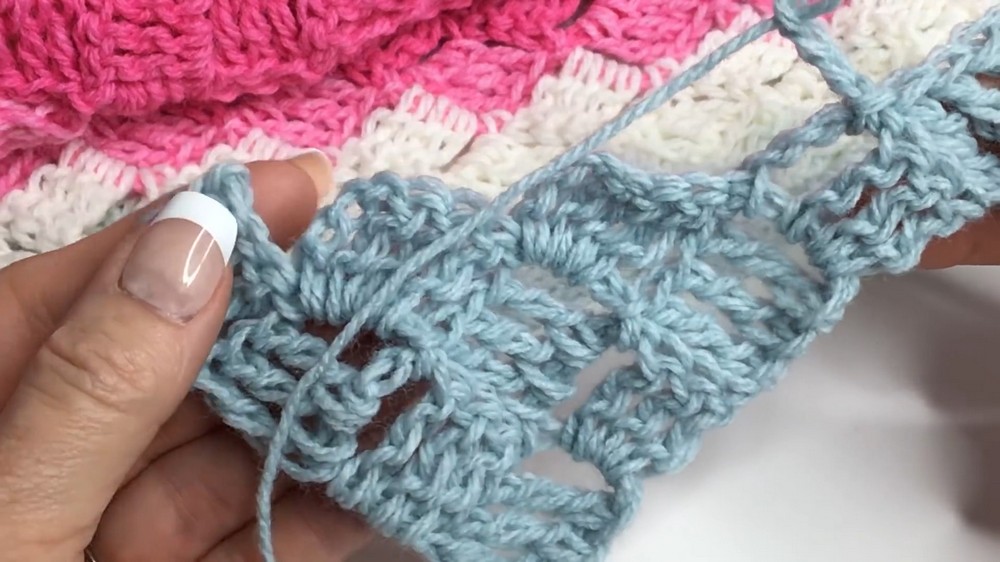
Foundation Motif
- Ch 7.
- In 3rd ch from hook, work 1 tr (counts as first block).
- Work 1 tr in each of next 2 chs (4 tr total for first motif).
Second Motif
- Ch 7.
- In the 3rd ch from base (or 5th from hook), work 1 tr.
- 1 tr in next 2 chs (3 tr).
- Slip stitch into last tr of previous motif to join.
- Ch 4, 3 tr into joining space (i.e., the join between previous motifs). This creates your first “side” of the V.
- Every chain-4 counts as a tr throughout.
Repeat Motif Building
- Ch 7 to start a new motif at the end of each row.
- In 3rd ch from base, tr; repeat in next 2 chs.
- Slip stitch into top of last tr of previous motif.
- Ch 4, 3 tr into joining space.
- At the end of every row, continue to chain 7, work 4 tr back along your starting chs to build the next “block.”
- Continue this back-and-forth building for ~37–51 rows, or to desired shawl length.
- Tip: Each completed row adds a “block” to each side of the triangle.
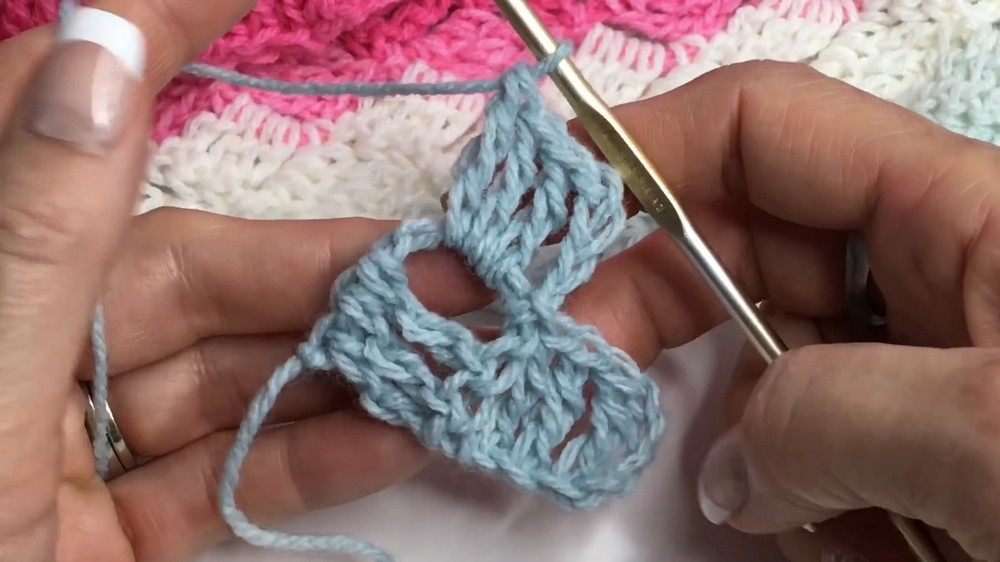
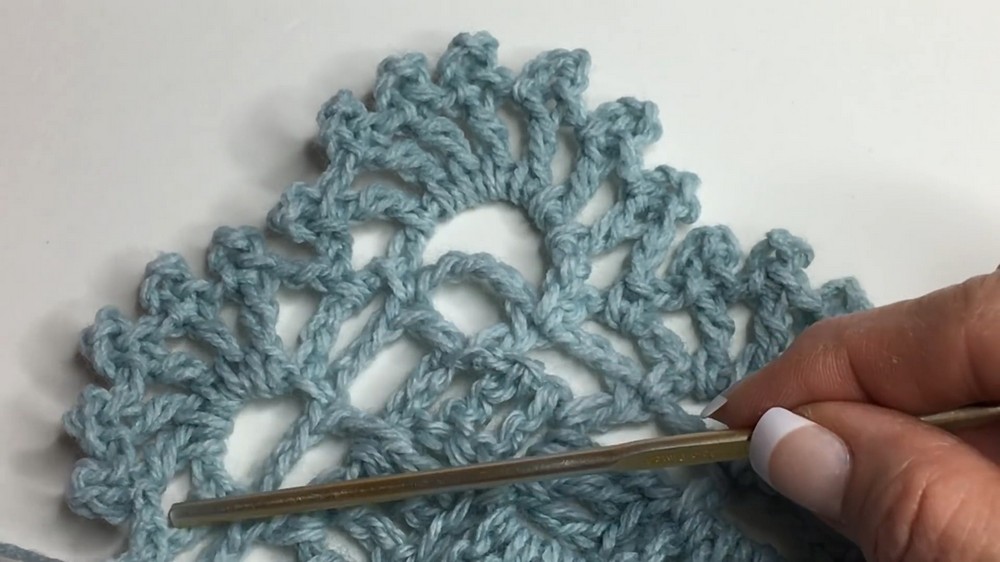
LACE BORDER
Work the following along the two long straight edges of the shawl, NOT the scalloped triangle top edge.
Lace Row 1
- Attach yarn at side edge. Ch 6.
- Dc into open space (next space formed between motifs).
- Ch 3, dc into next space.
- Repeat ch 3, dc in next space all the way down to the point of the shawl.
- At the point: ch 6, dc into same space to form the corner.
- Continue ch 3, dc up the second straight side.
- At the end, ch 1, turn your work.

Lace Row 2 (Scallop Row)
- Sc into same space as last dc, ch 5, sc in next dc (i.e., in the top of each dc).
- Continue, ch 5, sc in next dc across.
- At the point (the “corner” ch-6 from previous row), ch 9, sc back into point.
- Continue ch 5, sc in each dc up second side.
- At end: ch 4, dc into end st to match edge length.
Lace Row 3 (Picot Scallop)
- Ch 2, sc in next ch-5 sp, ch 2.
- In the next ch-5 sp, begin:
- Tr, ch 4, sl st into top of tr (picot made), ch 1.
- Repeat prev step for total of 5 picots in the same ch-5 sp (5 tr, each with picot, ch 1 between).
- Ch 2, sc in next ch-5 sp, ch 2.
- Repeat pattern along side: skip a sp, make 5 picot tr in next sp, skip a sp.
- At the point:
- In the ch-9 sp, work 7 picot treble crochets, ch 1 between each.
- Continue pattern up opposite side.
- At end, chain 2, slip stitch to starting point. Fasten off.
FINISHING
- Weave in all ends.
- Check all edges for skipped stitches or mistakes; fix as needed.
- Block gently to open up lace work if desired.

Conclusion
This lacy prayer shawl is a relaxing and thoughtful project that showcases beautiful self-striping yarn and lovely border details. Perfect as a gift to comfort or encourage a loved one, or to enjoy yourself.
Pattern Corrections & Tips
- Yarn: If making the lace border, have a second skein ready; use similar color sections for a matching look.
- Counting: Always count your stitches, especially on the lace borders for symmetry.
- Picots: For a sturdy picot, slip stitch into the top of the tr, not a chain loop.
- Border Flexibility: If row-end spacing doesn’t match instructions exactly, adapt; the scarf will still look lovely.
- Finishing: Weave in all tails securely before gifting.