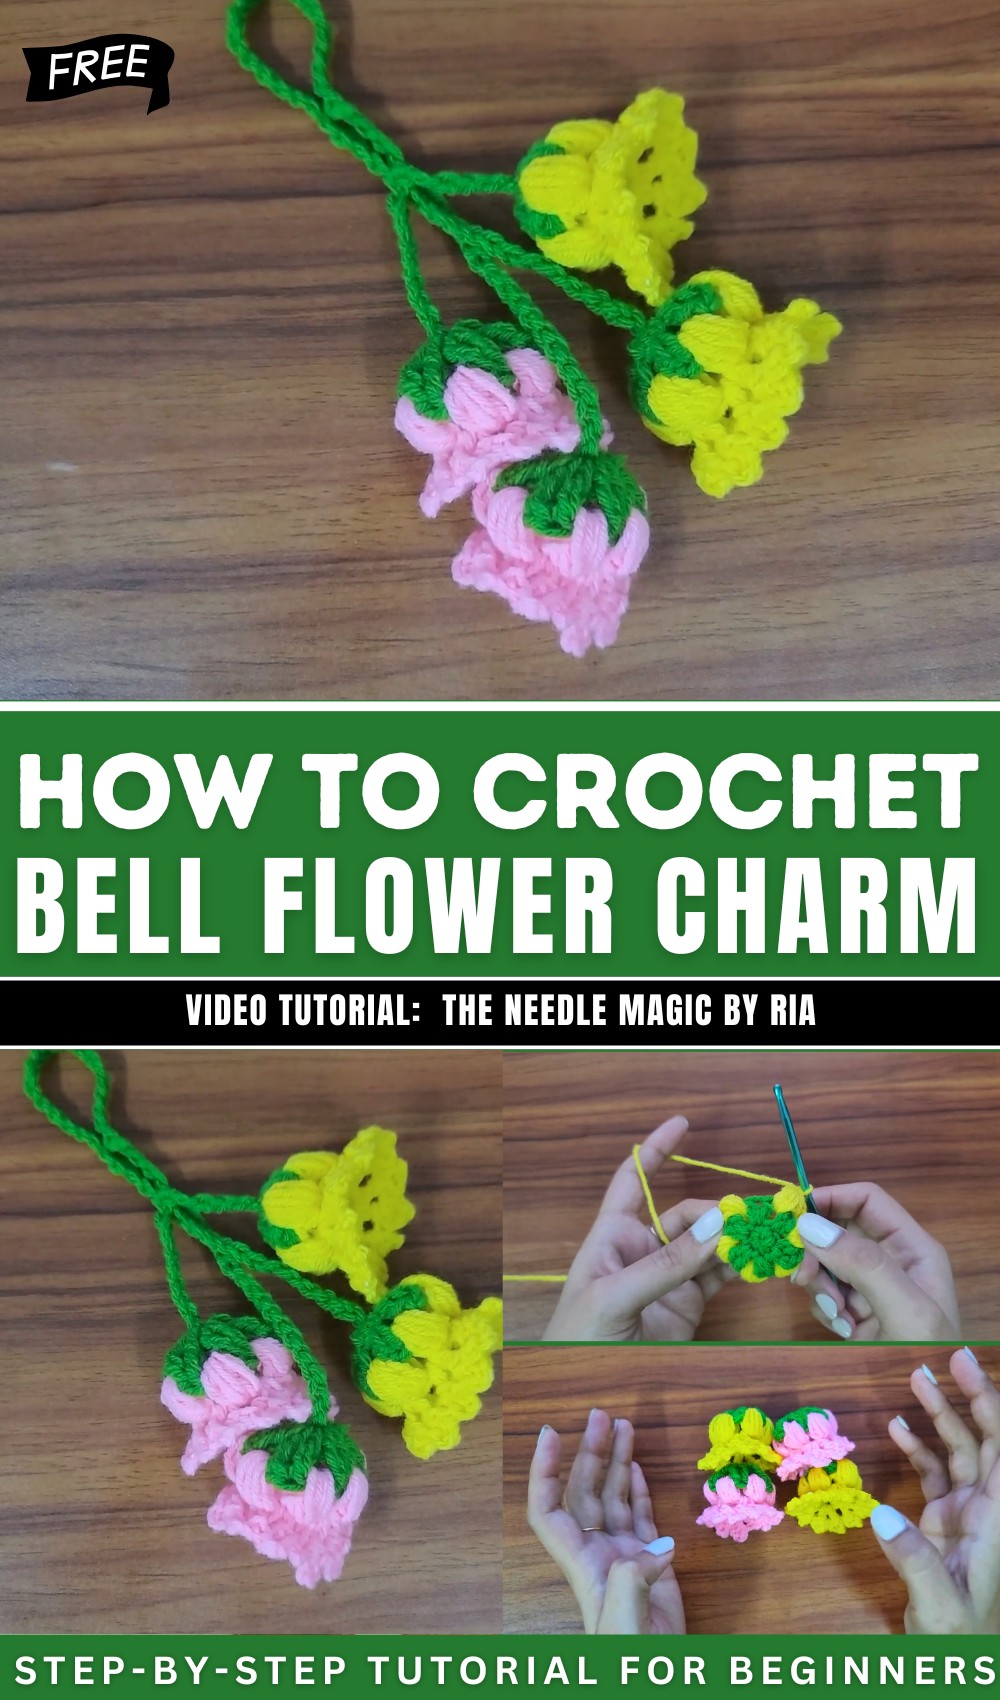
How to Crochet Bell Flower Charms for Spring
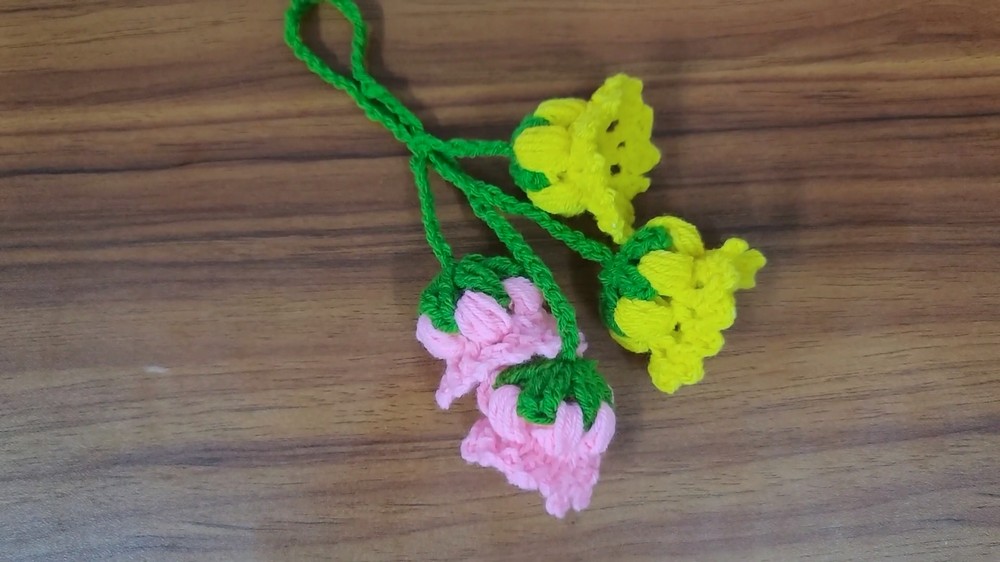
In this post, you’ll learn how to create beautiful crochet bell flower charms that can double as keychains or decorative hangings. The instructor shares clear instructions on assembling and attaching the flowers to create the charm. With just a few materials and some creativity, you can design personalized, elegant pieces perfect for accessorizing or gifting. Follow through us for the complete tutorial!
Crochet Bell Flower Charm Tutorial
Introduction
- The tutorial begins with a warm welcome and a short introduction to the project.
- The goal is to create crochet bell flower charms that can be used as decorative hangings or keychains.
- The instructor emphasizes their beauty and versatility while encouraging the viewers to follow along.
Steps to Create the Crochet Bell Flowers
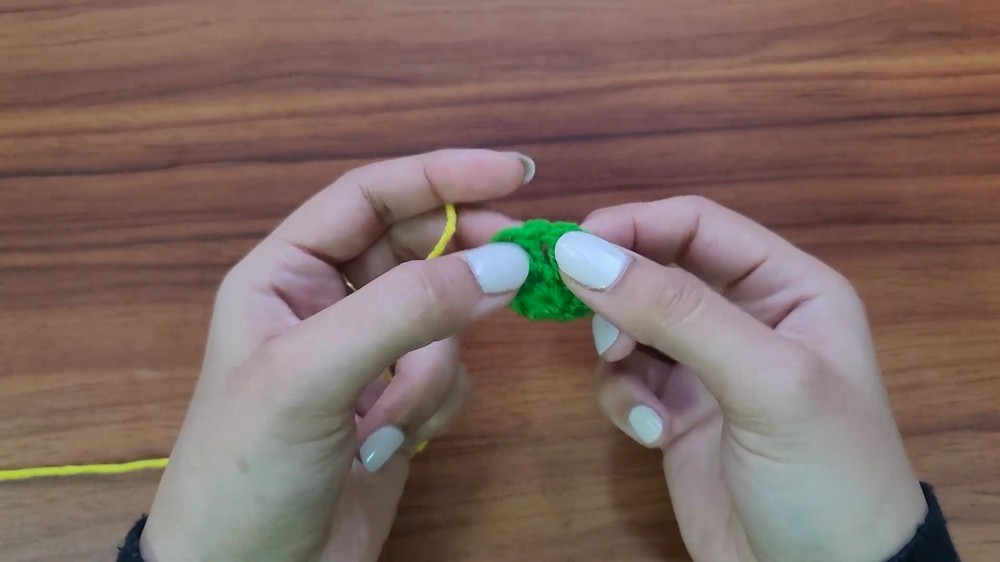
Creating the Magic Circle
- Start by forming a magic circle using yarn wrapped around two fingers.
- Secure the magic circle with a chain stitch to initiate the base structure.
- Follow this by working single crochet stitches into the magic circle.
Double Crochet Round
- The next step involves working double crochet stitches in consecutive spaces to increase the size of the flower base.
- The instructor carefully explains spacing and joining techniques to complete a round with neat, evenly spaced stitches.
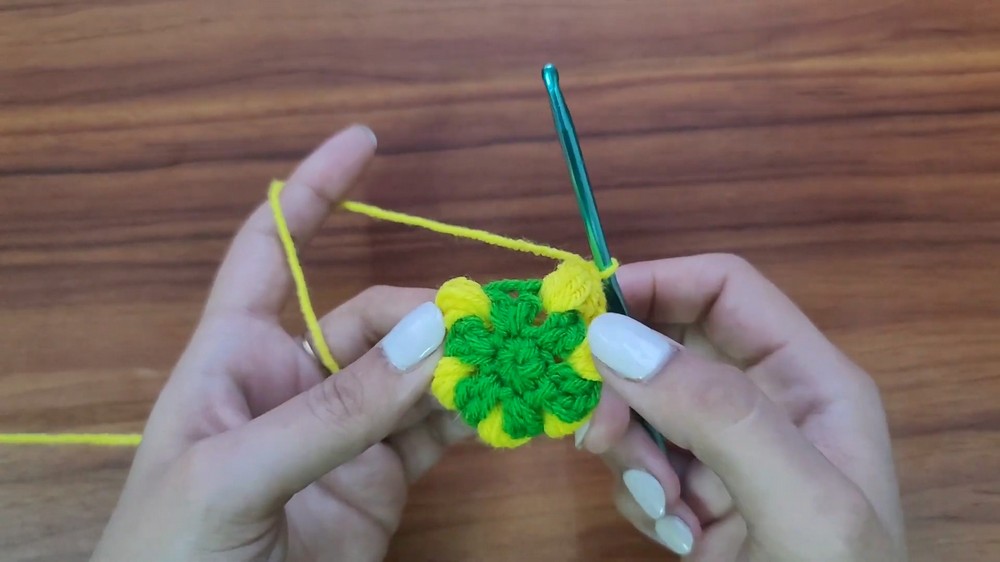
Adding Puff Stitches
- Puff stitches are introduced to create texture and decorative petals for the bell flower.
- Each puff stitch is placed strategically in spaces between stitches from the previous round.
- The spacing ensures that puff stitches form evenly for a consistent design across the flower.
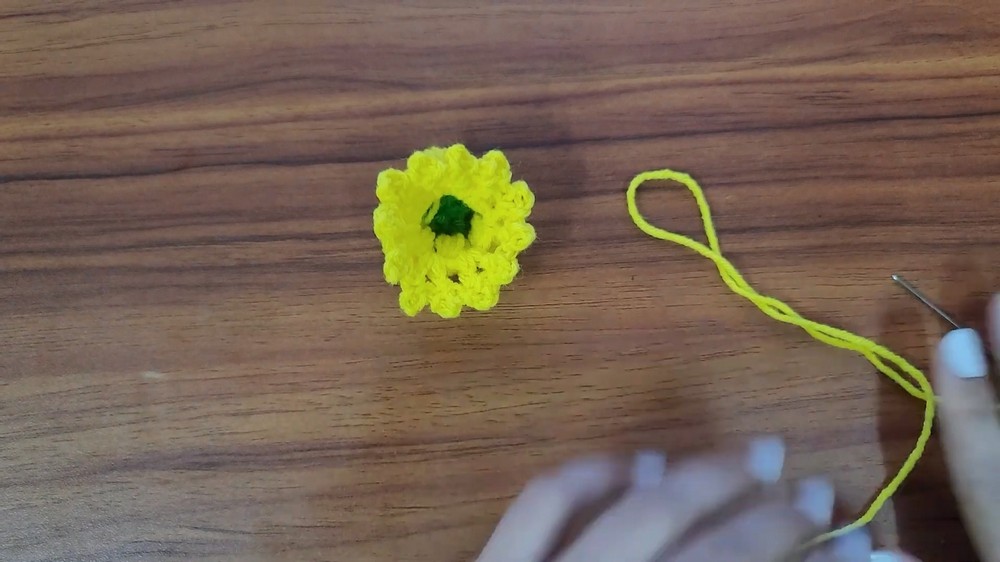
Creating Picots
- The picot stitches are crafted to add delicate detailing to the edges of the puff stitches.
- The instructor demonstrates how to alternate between double crochet stitches and picots in each space.
- This combination results in a finished flower that looks intricate and elegant.
Assembly and Final Touches
Weaving Ends
- Once the crochet flower is complete, the yarn ends are woven using a tapestry needle.
- Any excess yarn is trimmed to give a clean and polished look to the finished flower.
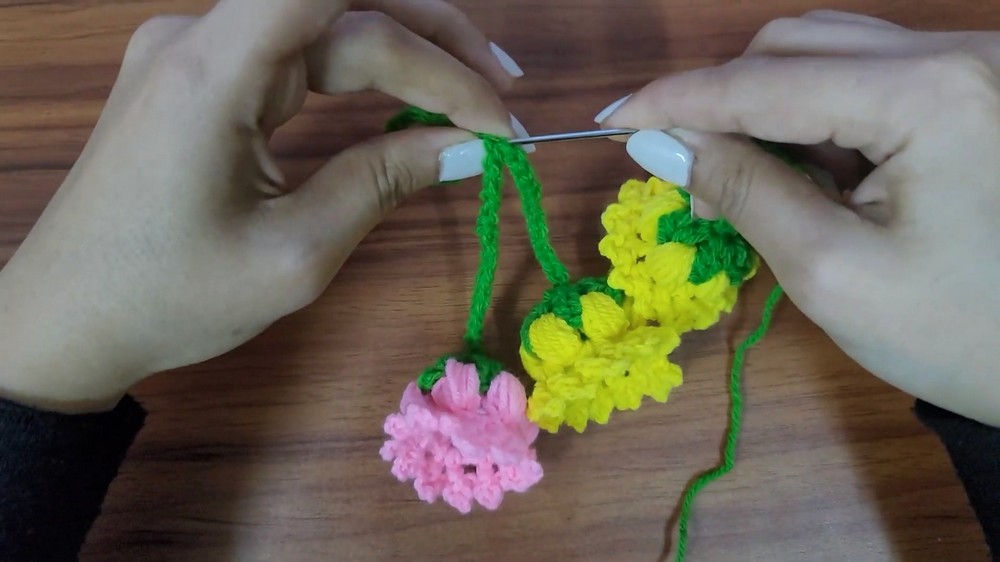
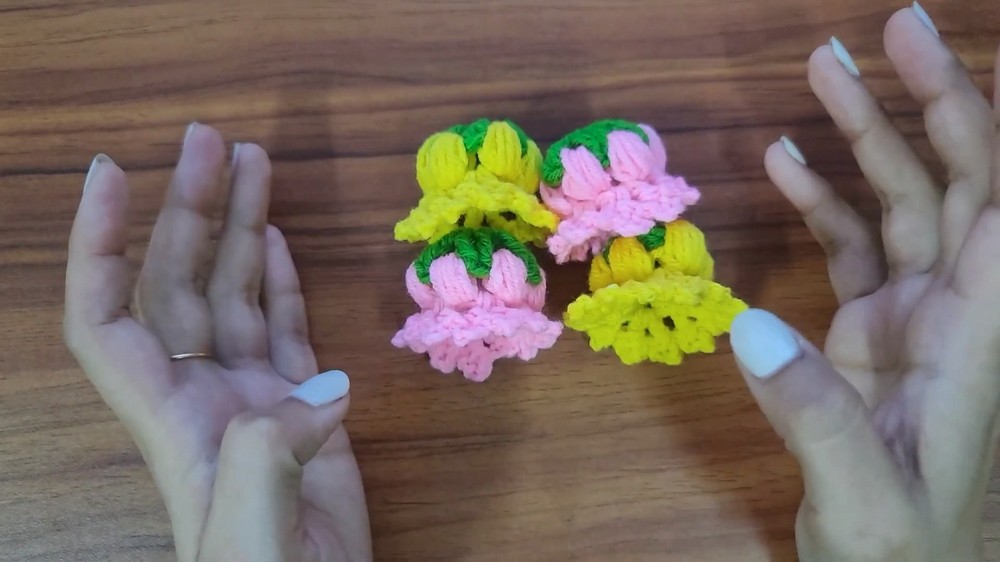
Making Additional Flowers
- The tutorial emphasizes making multiple flowers for the charm. The example demonstrates four flowers, but viewers are encouraged to adjust the number based on their preferences.
Attaching Flowers
- Each flower is attached to a slip-knotted chain created earlier.
- The instructor explains how to tie and secure each flower to the chain by threading yarn through the flower’s center.
Combining Chains
- Two separate chains are created – one longer and one shorter – depending on the desired length of the charm.
- Flowers are attached to each chain, and the two chains are joined together securely.
Finishing the Charm
- The charm is completed by tying the chains at the top to ensure it hangs evenly.
- Optional: A key ring or other attachment can be added to the top for additional versatility.
Final Remarks
- The tutorial concludes with the instructor showcasing the final charm, emphasizing its beauty and uses.
- Viewers are encouraged to experiment with different colors and sizes.
- The instructor gratitude is expressed to the audience, along with final motivational remarks to keep crocheting.