How to Crochet Blanket Rose Bag for Beginners
With a step-by-step tutorial, learn how to crochet an everyday Blanket Rose bag with white and red roses, perfect for spring for ladies. It includes detailed instructions for slip knots, chains, and double crochets, along with tips for creating decorative flowers and assembling the bag securely. With a well-finished and durable bag design, follow this tutorial.
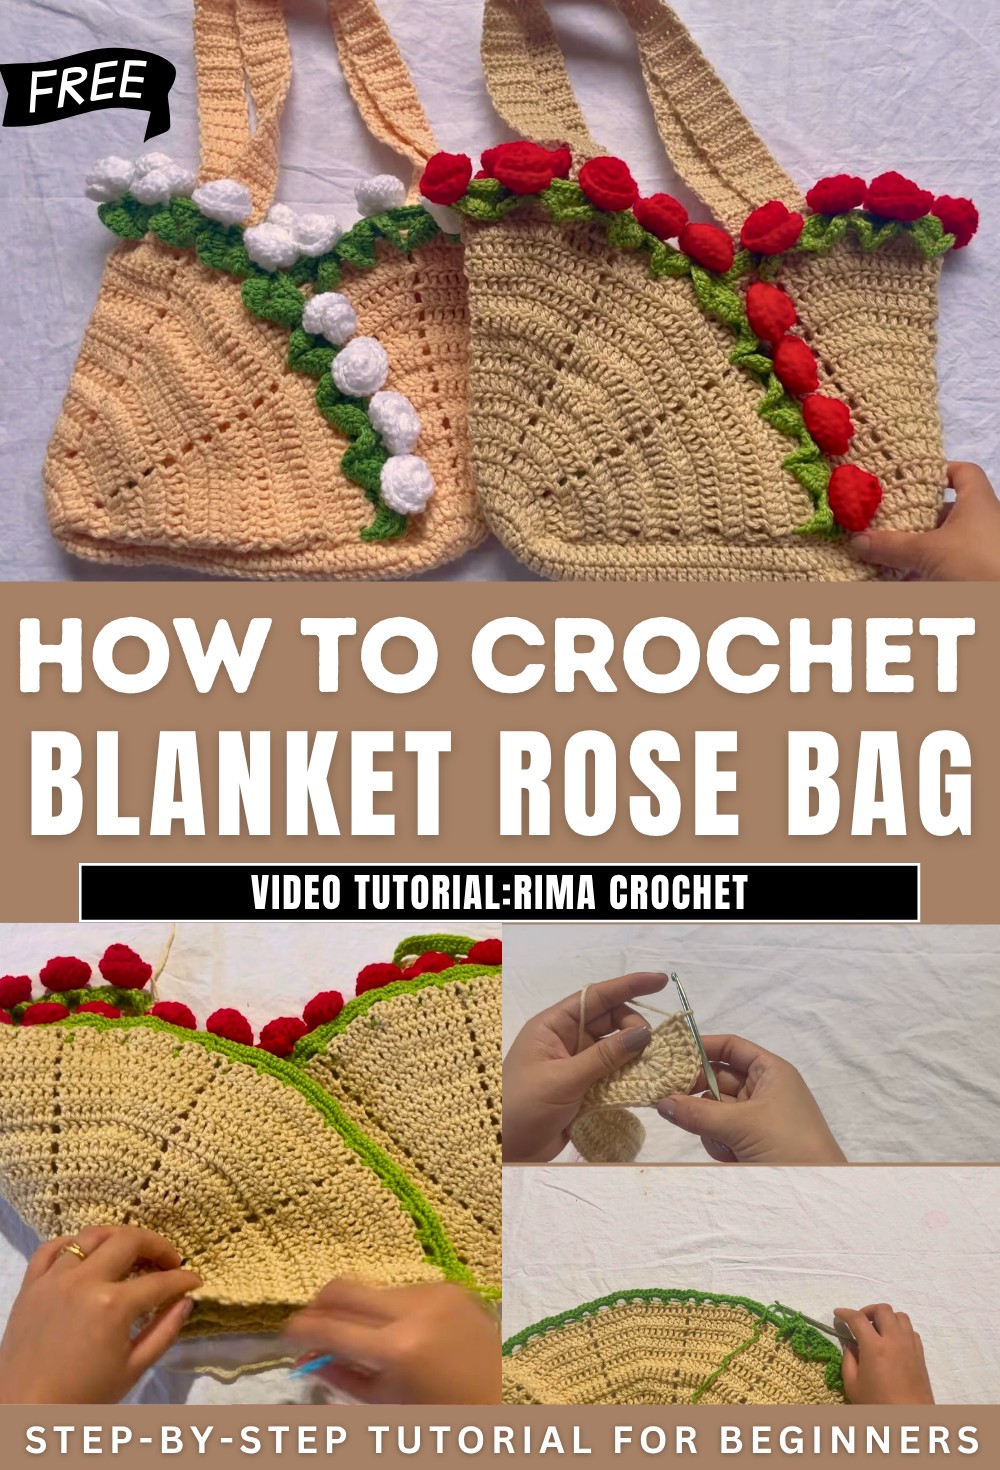
Crochet Blanket Rose Bag
The video opens with an introduction to creating an everyday crochet bag. The presenter emphasizes that the process is simple and suitable for daily use. Three colors of yarn are selected as part of the design: red for the main body, green for the leaf motif, and another color for the base.
Materials Needed
- A 4mm crochet hook.
- A pair of scissors.

- A needle.
- Desired yarn colors.
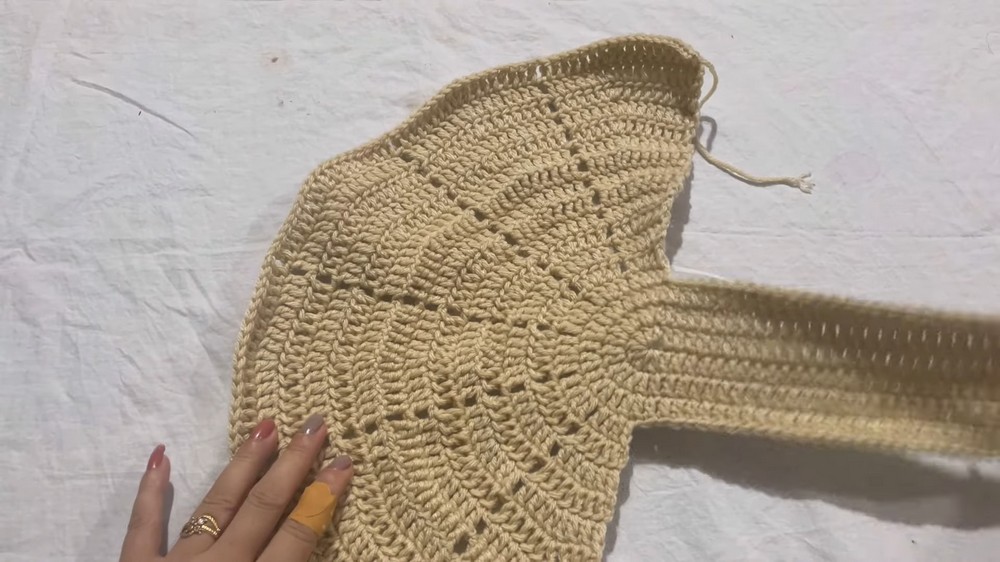
Creating the Base of the Bag
- Begin by making a slip knot using the main color yarn.
- Create a foundation row of 39 chains.
- After completing the chains, work into the third chain space from the hook and begin double crocheting across.
- The edges of the base involve increasing stitches in specific areas to create rounded shapes.
- The process involves creating double crochet stitches for the main base and repeating slip stitches for joining at specific intervals.
- The presenter demonstrates the importance of maintaining increments in designated sections to ensure an even round construction.
Working Through the Rounds
- The presenter explains how to create a smooth transition between rounds using slip stitches and chain-up techniques.
- For certain rows, additional increases are made to expand the structure of the bag.
- The body continues to take form by alternating between rounds with increases and rounds of double crochets.
- This repetitive process is continued over the course of several rows (17 rows total) which create the size and depth of the main bag structure.

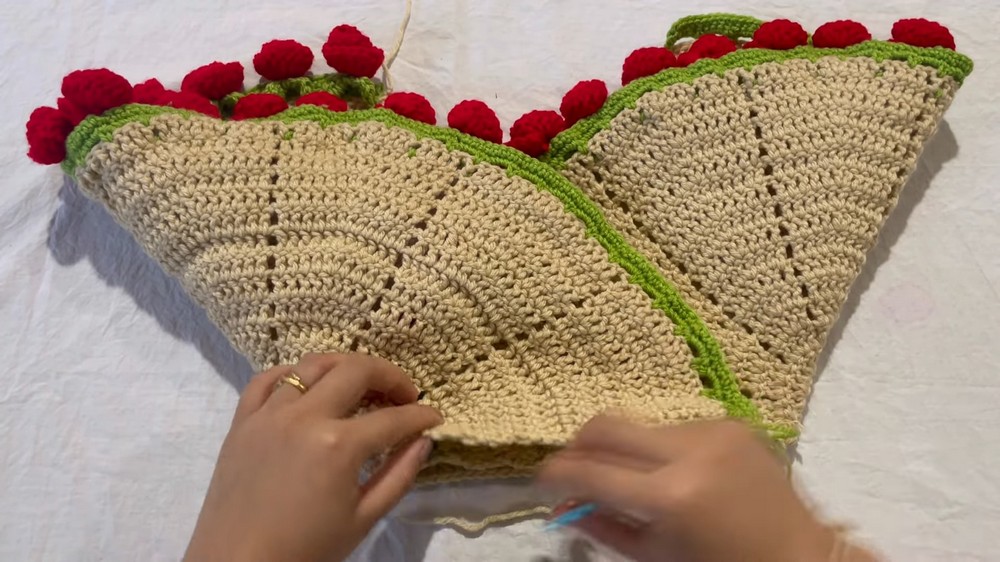
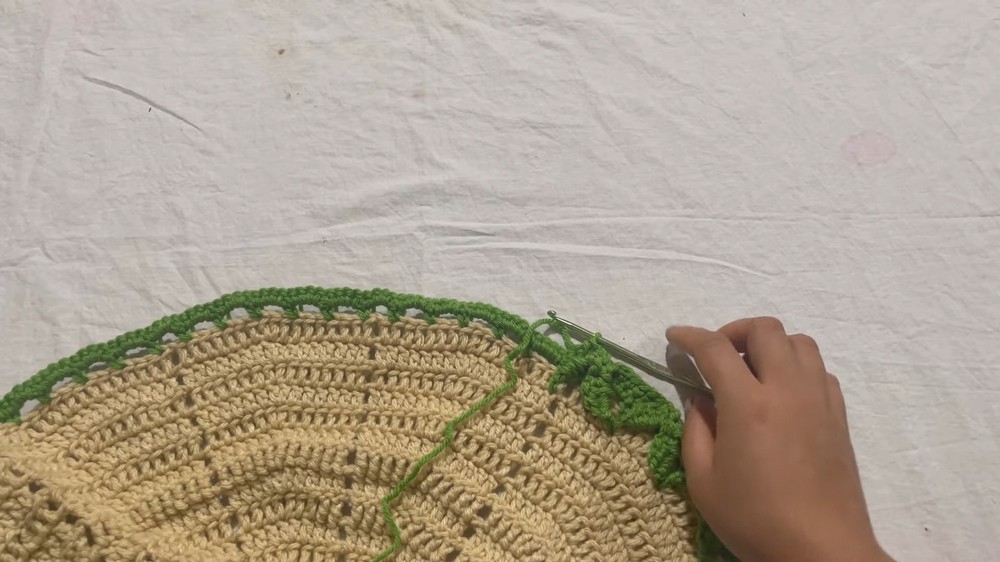
Adding Decorative Details: Leaf Motif
- A green yarn is introduced to create leaf-like patterns as decoration for the bag.
- Begin with a slip knot and chain three.
- Skip two stitches and work single crochets and chains intermittently to form the shape of leaves.
- The leaf motifs are spread across the surface of the bag in sets of 12.
Creating Flower Decorations
- Using a different yarn color (red), flowers are added to enhance the aesthetic of the bag.
- Flowers are constructed using chains and clusters of double crochets in alternating spaces.
- After individual flowers are made, they are joined and sewn onto the surface of the bag.
- The flowers are spaced evenly for symmetry.
Assembling and Finishing the Bag
- Once the body of the bag is completed, the sides are stitched to close the edges neatly.
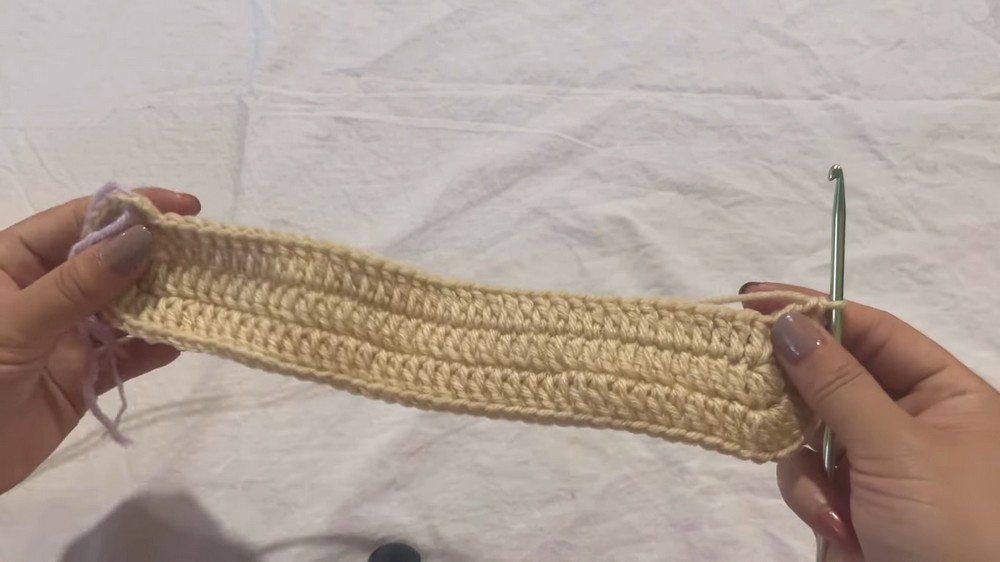
- A separate strip is created for the handles. These strips are made with half double crochet stitches across rows, with 75 rows per handle.
- The handles are sewn onto the bag carefully, ensuring alignment and durability.

- The presenter emphasizes keeping the rope straight while stitching to prevent twists.
Final Look and Conclusion
- After finishing all components, the presenter assembles the bag completely.
- The bag is displayed in its final form, showcasing its decorative flowers, leaf motifs, and sturdy handles.