How to Crochet Bow Clutch for Beginners

Learn how to crochet a bow-shaped clutch bag, suitable for beginners and intermediates, with a step-by-step tutorial for all skill levels. Tutor guides viewers through making the base, the bow, and the bow’s centerpiece, using a 5mm hook and Nautical yarn. The tutorial covers detailed steps for each component and their assembly, concluding with the finished bag featuring a magnetic snap and charm. Follow through with us for the complete tutorial!
Crochet Bow Clutch Tutorial

Project Overview: The video presents a detailed tutorial on crocheting a “clutch de laço,” which translates to a “bow clutch” bag. Creator: The tutorial is led by Jordana from Labelle Bags Crochet.
-
Materials:
-
Crochet Hook: A 5mm crochet hook is used for the main parts of the bag.
-
Yarn: Nautical yarn is specified, with the “Quilombo” brand mentioned.
-
Finishing Hook: A 4mm hook is used for the slip-stitch border on the base.
-
II. Base Construction
-
Starting Chains: The base of the clutch begins by making a specific number of chains, which results in a particular length.
-
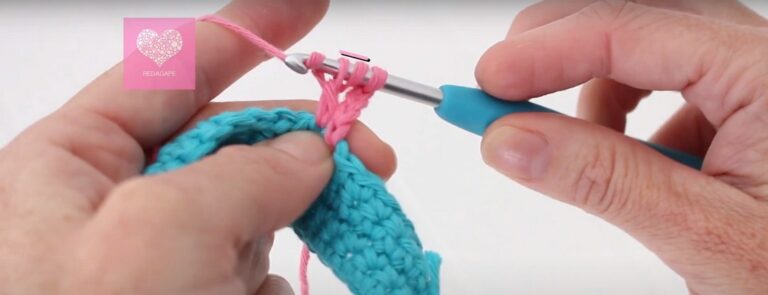
First Row: The first row consists of single crochet stitches, worked into the back loops of the initial chains.
-
Subsequent Rows: Following the first row, subsequent rows involve single crochet stitches worked into only one loop (likely the back loop), creating a simple and consistent fabric for the base.
-
Base Completion: The base is completed with a specific number of rows of single crochet, achieving particular dimensions in length and width.
-
Border: An important finishing touch for the base is a slip stitch border applied around the entire edge, using a smaller hook size.

III. Bow (Laço) Construction
-
Bow Foundation: The bow part of the clutch is made similarly to the main base, starting with a specific number of chains.
-
Stitch Pattern: It also uses single crochet stitches worked into one loop (likely the back loop).
-
Bow Border: Like the base, the bow piece is also finished with a slip-stitch border for a clean edge.

IV. Bow Centerpiece (Miolo) Construction
-
Centerpiece Foundation: This part, which forms the center wrap of the bow, is made with a specific number of chains.
-
Stitch Pattern: It consists of rows of slip stitches, specifically working into the back loop only.
-
Row Count: Jordana mentions making a specific number of rows for this piece.

V. Assembly
-
Attaching Bow Centerpiece: The bow centerpiece is wrapped around the folded bow piece. It is then sewn in place at the back to secure the bow’s shape.
-
Attaching Bow to Bag: The completed bow is then carefully sewn onto the main bag base, positioning it as a decorative and functional element.
-
Sewing Bag Sides: Finally, the sides of the bag are sewn together. This is done using a tapestry needle, picking up one loop from each side to create a neat seam.

VI. Creator’s Notes and Final Touches
-
Learning Process: Jordana notes that this is her first time making this specific bag model, emphasizing that it’s a learning process for both her and the viewers. This adds a relatable aspect to the tutorial.

-
Finished Bag: The video concludes by showing the finished bag.
-
Additional Features: The completed bag includes a magnetic snap closure for practicality and a charm as an embellishment.