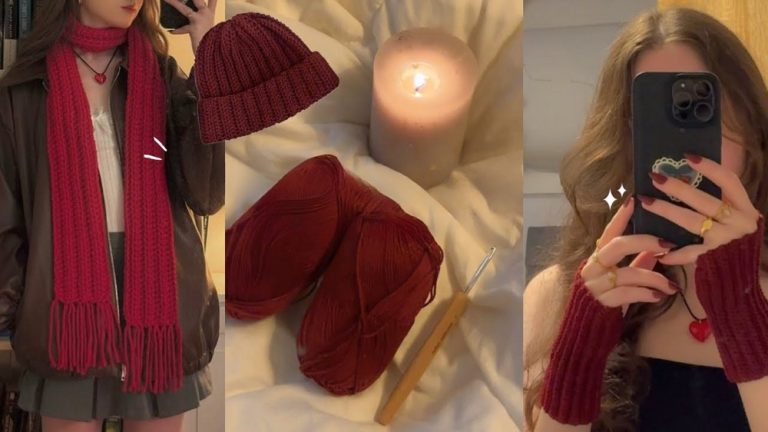
How to Crochet Cozy Plush Bucket Hat for Beginners

In this post, you’ll learn how to crochet a cozy and stylish bucket hat for beginners and experts. Perfect for colder months, the hat uses super bulky yarn, a 9 mm crochet hook, and simple techniques like the magic circle, half double crochets, and front/back loop stitching. Karen provides step-by-step instructions for creating the crown, body, and wide brim, ensuring the perfect fit.
The project is beginner-friendly, customizable with different yarns, and quick to complete within an hour. With clear explanations and helpful tips, this hat is a great addition to any winter wardrobe or gift collection. So, follow through with us for the complete tutorial.

Cozy Bucket Hat Tutorial
This tutorial by Daisy Knits by K shows how to crochet a cozy and stylish bucket hat that is perfect for the colder months. The pattern involves simple techniques, making it beginner-friendly while still customizable for advanced crocheters. Below is a detailed summary of the tutorial.

Introduction
The tutorial begins with Karen introducing the bucket hat design, describing it as simple, quick, and cozy. The project takes roughly an hour to complete, making it suitable for crocheters of all levels.
Materials Needed:
- Super bulky weight yarn (Bernat Blanket is used in the tutorial).
- 9 mm crochet hook.
- Stitch marker, scissors, measuring tape, and tapestry needle.
Karen also notes that alternate types of yarn, such as faux fur or scrap yarn, can be used for variety.

Starting the Magic Circle (Crown Section)
The pattern begins by creating a magic circle to form the crown of the hat.
- Karen demonstrates an easy method of creating the magic circle and weaving in the starting tail as you crochet.
- She describes specific steps to build the crown by alternating single stitches and increases to maintain a circular shape.

Avoiding Hexagon Shapes
The tutorial includes a helpful tip about varying the placement of increases in each round. This prevents the crown from taking on a hexagonal shape and keeps the hat’s circle perfectly smooth.
Shaping the Hat Body
Once the crown section is complete and the appropriate diameter is reached, the tutorial moves on to shaping the body of the hat.
- Karen emphasizes the importance of switching to single crochet stitches in the back loops only to create a curvature in the design. This helps transition the crown into the body of the hat.
- The body is completed by crocheting in standard half-double stitches without increases. Karen offers the option to adjust the number of rows to fit personal measurements, ensuring the body of the hat reaches the top of the ears.

Creating the Brim
The brim is where the bucket hat takes its signature look, adding width and flow.
- The brim begins with half-double crochets worked into the front loops. This technique adds flexibility and creates a neat, defined edge.
- Karen explains how to incorporate increases into the brim and stagger their placement to avoid uneven shaping.
- The brim is customizable in terms of width, allowing for the crocheter’s preference of a wide or subtle brim.

Finishing Touches
The video concludes with detailed instructions on how to finish the hat seamlessly:
- Karen shows how to secure the final row and weave in the loose ends using a tapestry needle. This ensures the project has a polished look.
- Crocheters are encouraged to stretch the hat slightly, as the yarn provides natural ease over time.

Customizations and Final Notes
Karen suggests trying different yarn types like faux fur or combining multiple strands of scrap yarn for more texture. She also mentions that this pattern is highly versatile, easy to follow, and makes for a cozy and stylish winter accessory.
She wraps up the tutorial by inviting viewers to share their creations and tag her on social media for inspiration. With its clear instructions and flexible design, the cozy bucket hat is a fantastic DIY project for all crochet lovers.