How to Crochet Cute Bunny Mobile Pouch For Beginners

With a step-by-step tutorial, learn how to crochet a cute bunny mobile pouch using simple stitches and techniques. Starting with a foundation chain, you’ll work rounds of single crochet to create the pouch’s body, forming 26 and a half rows. The design incorporates decorative elements such as treble crochets, double crochets, and picots to add flair to the edges.
The tutorial also includes creating facial features using a French knot for the eyes and contrasting yarn for the nose. Perfect for beginners, this project results in a functional and adorable handcrafted pouch for your phone. So, follow through with us for the complete tutorial.

Cute Mobile Pouch Crochet Tutorial
This tutorial guides you through creating a charming mobile pouch using simple crochet techniques. It is designed to be beginner-friendly, utilizing a 4.5 mm crochet hook and baby pink yarn. The following steps cover the entire process:
Materials Needed
- 4.5 mm crochet hook
- Yarn in baby pink
- Scissors
- Tapestry needle
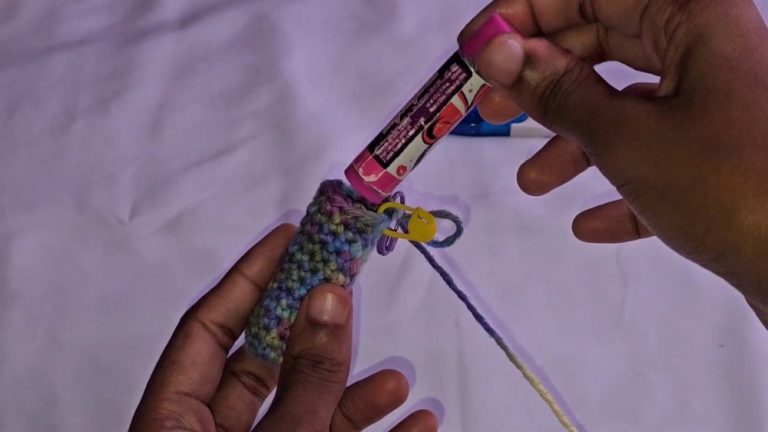
Starting the Pouch
- Slip Knot and Foundation Chain:
- Begin with a slip knot and create a chain long enough to match the width of your mobile device.
- The chain should be proportional to your phone for an ideal fit.
- Single Crochet Foundation:
- Work a single crochet stitch in each stitch across the foundation chain.
- At the end of the row, continue single crocheting back through the opposite side of the chain, forming a continuous round.

- Joining and Continuing Rounds:
- Complete the first round by joining with a slip stitch to the starting stitch.
- For subsequent rounds, start with a chain and continue single crocheting around.
- Repeat this process to build the pouch’s body, ensuring an even and consistent texture.

Body Construction
- Building Height:
- You will crochet until you’ve created 26 and a half rows, achieving the needed height to cover your phone.
- Each row should follow the pattern of single crochet throughout.
Edging and Detailing
- Decorative Edging:
- Near the top of the pouch, incorporate more decorative stitches.
- Begin with single crochet, transitioning to a half double crochet, double crochet, and treble crochet in specific stitches to add texture.
- Picot Edge:
- Use a chain and picot technique to form a decorative edge at the top, adding a visual accent to the pouch.

- Repeating Pattern:
- Repeat the pattern for the remaining rows at the top, incorporating the treble and double crochets as needed for a uniform finish.
Finishing Touches
- Securing the Yarn:
- Once the final round is complete, join with a slip stitch and cut the yarn.
- Secure the yarn ends by weaving them into the pouch using a tapestry needle.

- Creating Facial Features:
- Design the eyes using a French knot technique with black yarn, adding personality to the pouch.
- The nose is crafted with purple yarn, enhancing the cute aesthetic.
Final Look and Recommendations
- The completed mobile pouch is not only functional but also a stylish accessory to protect your device.

In summary, this tutorial offers a straightforward approach to crafting a mobile pouch while providing ample opportunity for creativity. Through detailed instructions and engaging techniques, crocheters can create a vibrant and personalized pouch to suit their style and needs.
https://youtu.be/3JfvNP5Ao60