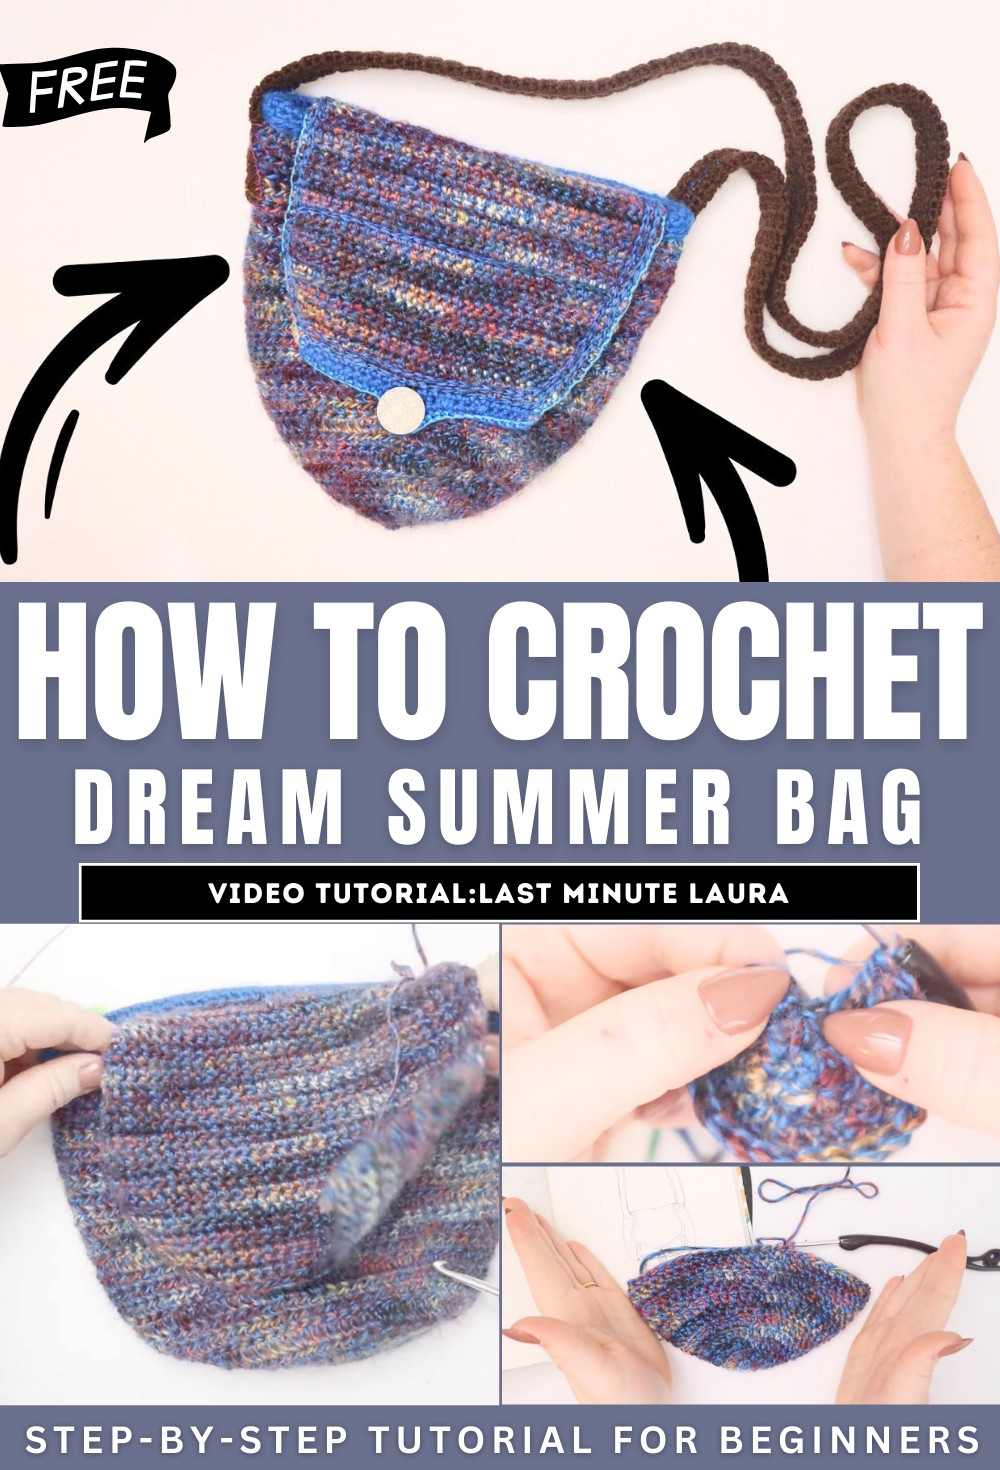
How to Crochet Dream Summer Bag – Full Tutorial!
Learn how to crochet a customizable crossbody bag from scratch with a tutorial for beginners and experts. Starting with the circular base, the creator guides viewers through shaping the bag, adding pockets, constructing a sturdy strap, and finishing touches like decorative embroidery and lining. Using yarn in varying weights and colors, as well as basic stitches like single, double, and half-double crochet, the project is a blend of functionality and aesthetics.
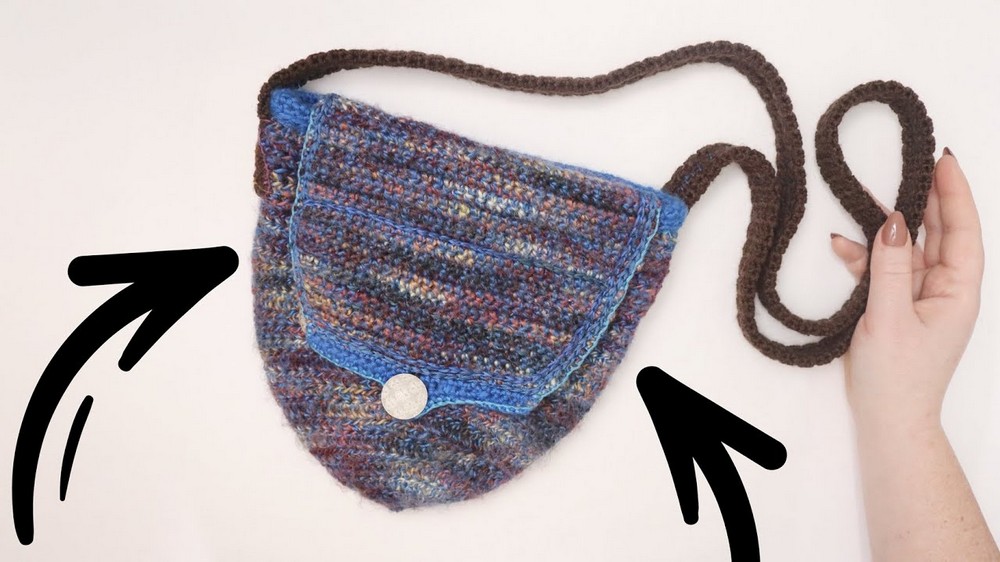
The final result is a unique handmade bag with thoughtful features like a button closure, internal lining, and a compact outside pocket. Perfect for crochet enthusiasts seeking a practical yet creative project!
Overview of the Project
- The tutorial demonstrates how to crochet a functional crossbody bag.
- The project includes features such as a flap, an inner and outer pocket, a sturdy strap, and a lining for durability.
- The design starts with a round base and evolves into a rounded bag with a decorative trim and unique finishing techniques.
Materials Needed
- Yarn: Number 4 weight and number 3 weight yarn in three colors (variegated, brown, and blue for trim).
- Crochet Hooks: Two sizes—5.5 mm and 4 mm.
- Tools: Scissors, yarn needle, sewing needle, thread, stitch markers, and a button.
- The chosen button should complement the overall design aesthetic.
Step-by-Step Instructions
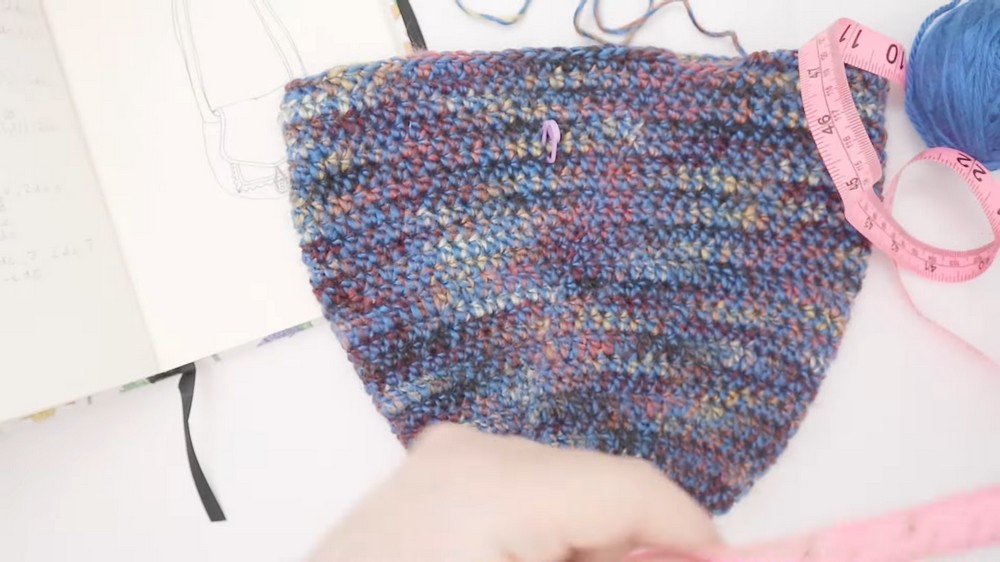
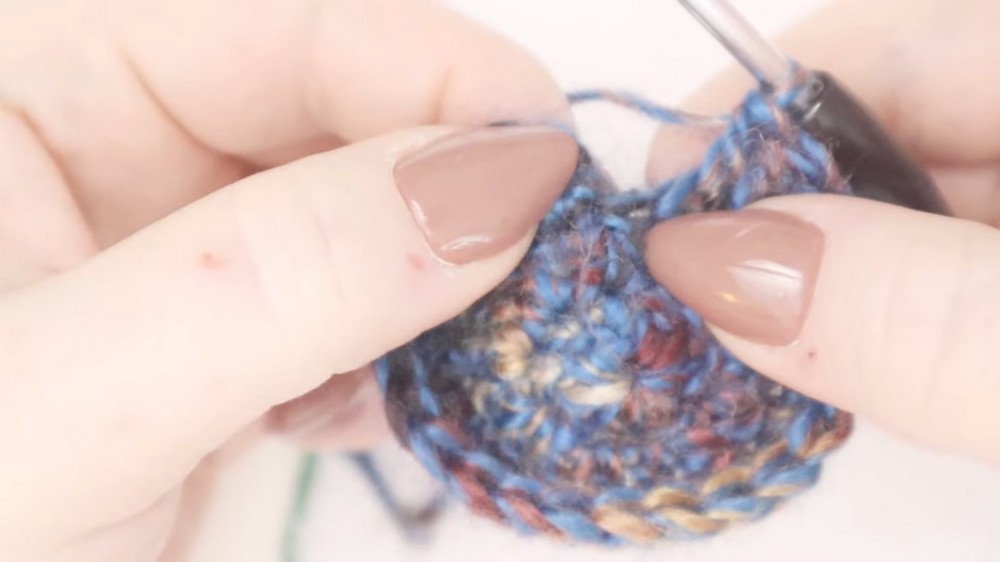
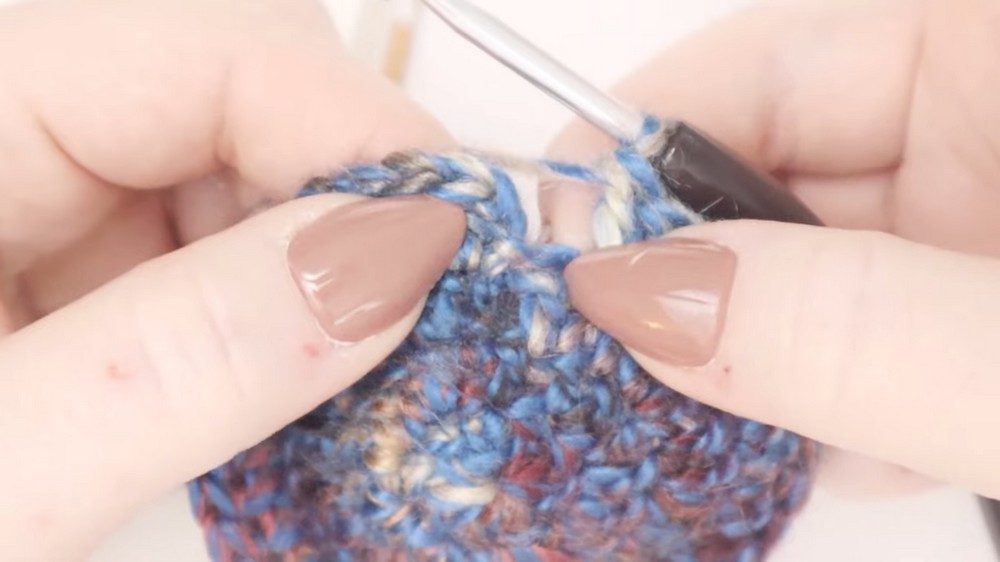
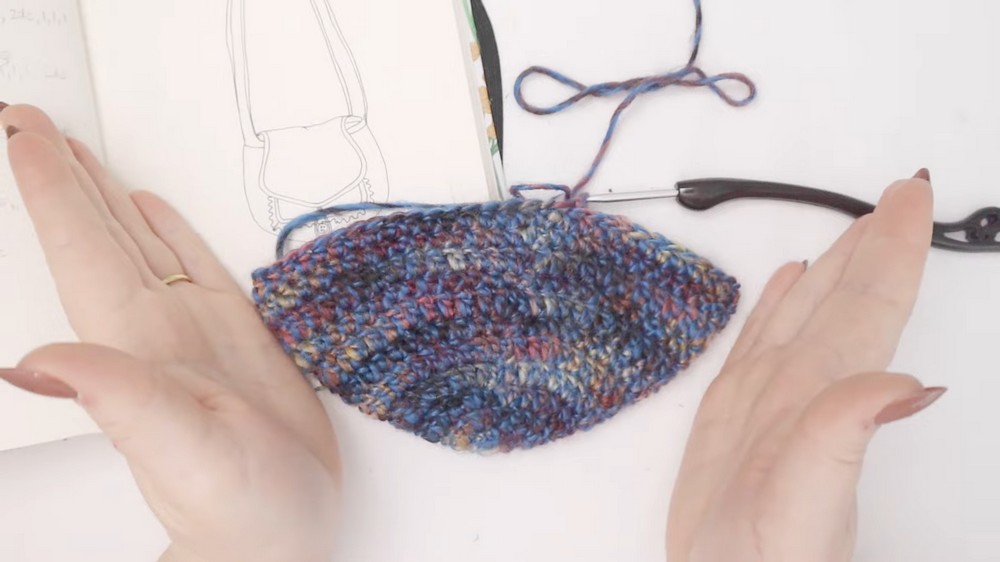
Starting with the Base
- Begin by crocheting a circular base using double crochet stitches.
- Gradually expand the circle by adding increase rows to achieve the desired width.
- Once the base is complete, shift to half double crochet stitches to start curving the shape for the sides of the bag.
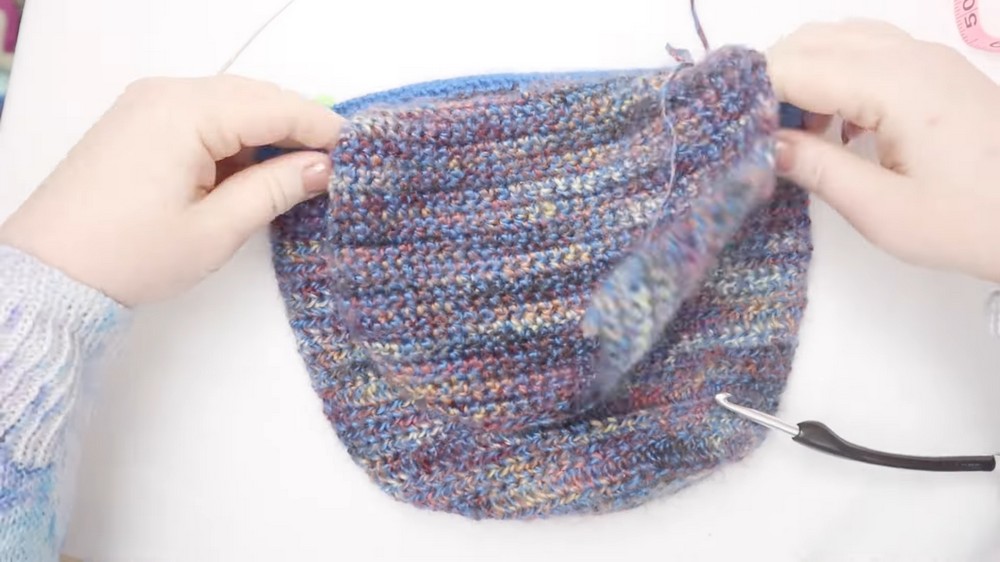
Building the Bag’s Body
- Continue working in rounds using half double and double crochet stitches without adding further increases.
- Alternate between rows of double crochet and rows of half double crochet to create a textured and sturdy design.
- Stop once the bag reaches the desired height.
Adding the Top Rim
- Switch to a contrasting yarn color to crochet five rounds of single crochet stitches.
- Fold over the single crochet rim and stitch it down using a blanket stitch to create a thick, sturdy edge.
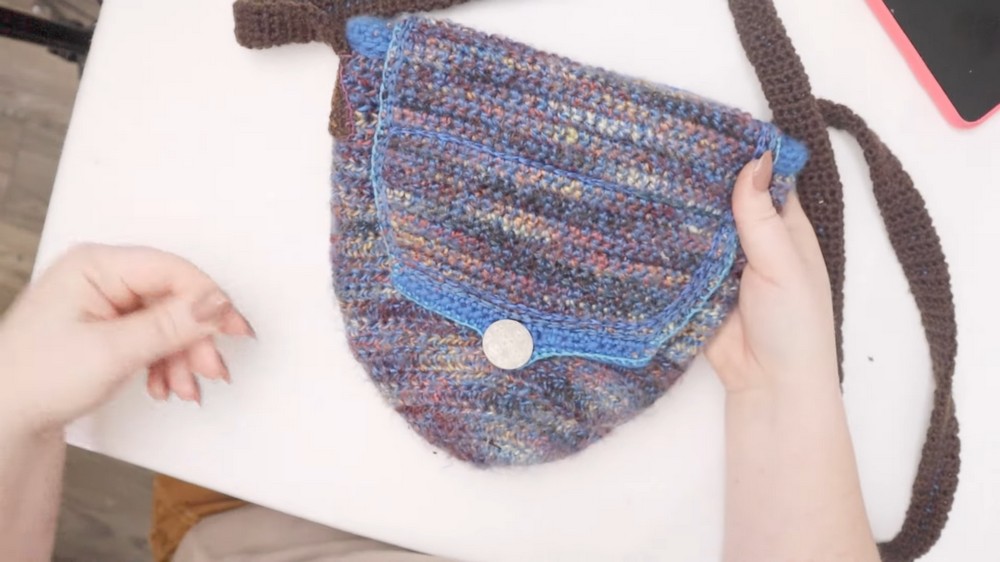
Creating and Attaching the Flap
-
Flap Construction:
- Locate the back of the bag and connect the variegated yarn using surface crochet near the rim.
- Crochet a rectangle flap using single crochet rows, working back and forth.
- Add decreases to shape the flap into a rounded edge.
-
Buttonhole:
- Switch to blue yarn and create a chain-based buttonhole near the center of the flap.
- Reinforce the buttonhole with single crochet stitches over the chain.
Making the Pocket
- Crochet a rectangle in a woven or moss stitch pattern and fold over about an inch for a thicker top edge.
- Attach the pocket to the inside of the bag using blanket stitches.
Crocheting the Strap
- Use brown yarn to crochet a long, narrow strap with single crochet stitches.
- Iron and fold the edges inward, then stitch them down using embroidery floss to create a sturdy, finished strap.
- Attach each end of the strap securely to both sides of the bag.
Final Touches
-
Button Attachment:
- Position the button on the bag near the base of the flap, ensuring it aligns perfectly with the buttonhole.
- Stitch securely using thread and a needle.
-
Adding a Lining:
- Create a fabric lining that matches the size of the bag, rounding off the bottom edges to fit snugly.
- Sew the lining into the inside using blanket stitches.
-
Decorative Details:
- Add optional embroidery on the outside for a personalized and decorative touch.
Finished Result
- The completed bag is functional, stylish, and versatile for daily use.
- Features include a secure flap and button, practical pocket, and a comfortable strap.
- The addition of a fabric lining ensures a polished, professional finish suitable for carrying various items.