How to Crochet EASIEST Blouse with Stripes
Learn how to knit a simple and elegant striped blouse for ladies with as step-by-step tutorial for beginners and experts. Using “copito” yarn in three complementary colors, the blouse is crocheted by creating two identical rectangles, joined to form the garment. The V-stitch technique is explained step-by-step, along with tips for customization, sewing, and adding finishing touches like crab stitch borders. Perfect for beginners it ensures a beautiful and functional handmade blouse.

Introduction to the Project
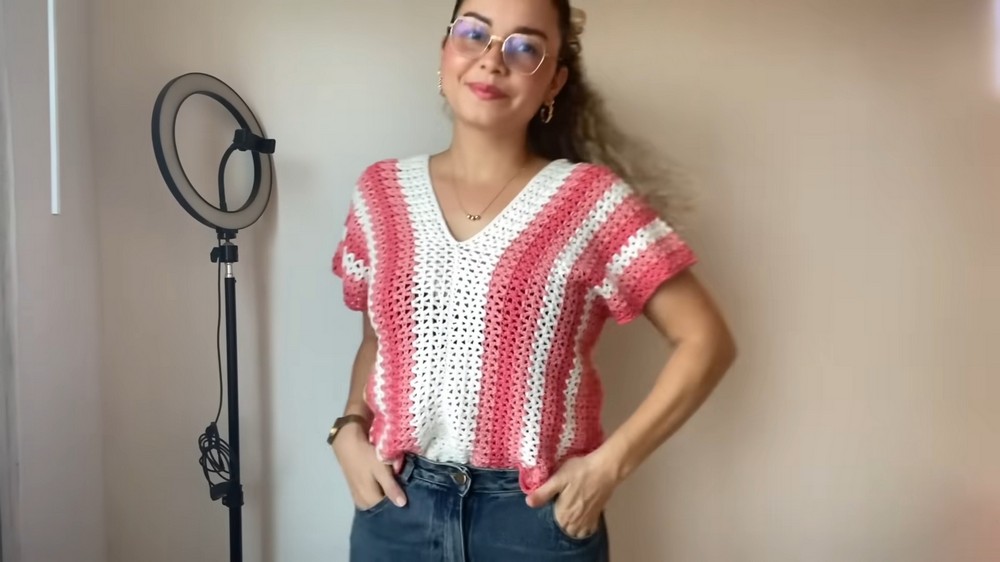
- Estefani starts by presenting the final blouse, emphasizing its simplicity and ease of creation, making it suitable for beginners.
- The project uses “Copito yarn” in a combination of three colors (off-white, white, and a similar hue), which she mentions creates a beautiful mix.
- The blouse is made in two parts: two identical rectangular panels joined together to form the shape of the garment.
Design Overview
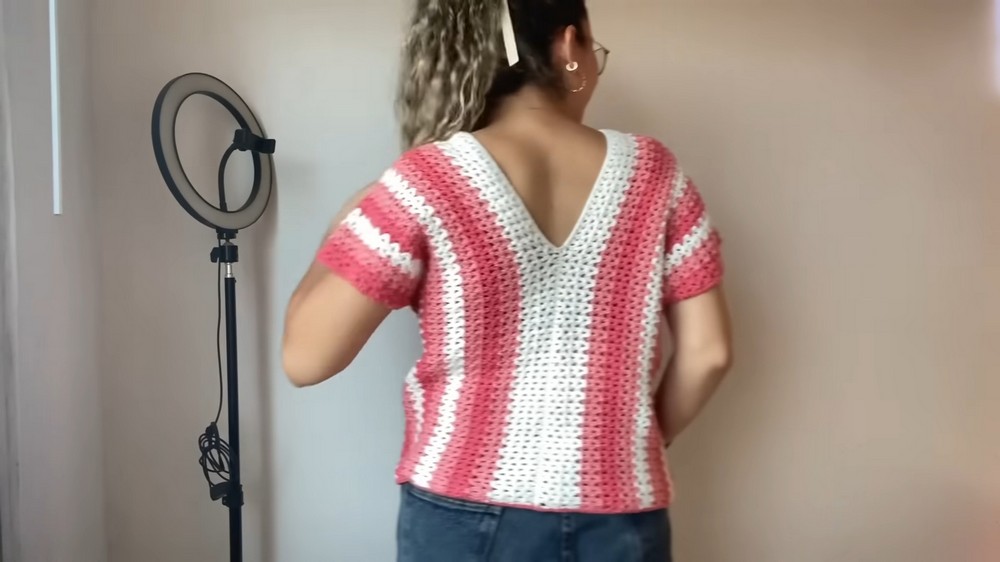
- The blouse is crafted in rectangles and sewn together to form the top.
- A sketch is provided to help visualize the assembly of the two rectangles, marking:
- The neckline area (where stitches won’t be sewn).
- Sewn edges at the top and sides.
- Advice is given to adjust measurements based on size and personal preference:
- Estefani worked with a size M/L, but suggests ways to reduce or increase dimensions for smaller or larger sizes.
Starting the Panels
-
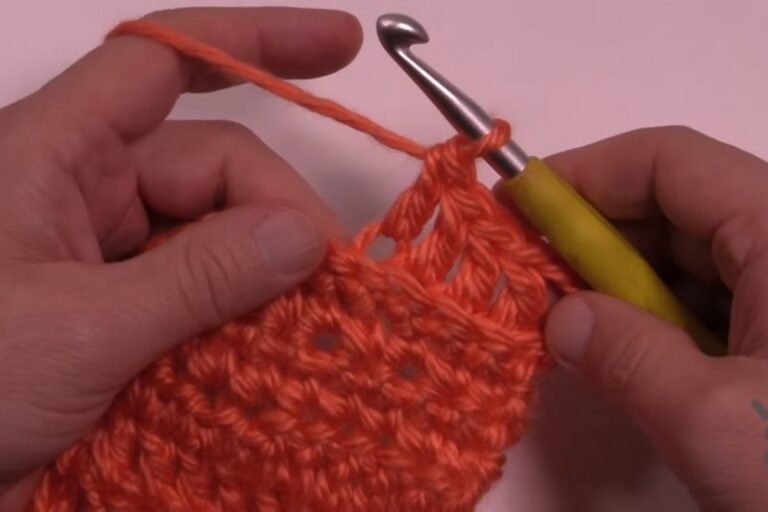
Choice of Crochet Hook and Yarn:
- Estefani chooses a 4 mm crochet hook and begins the project with a darker shade of yarn.
-
Foundation Chain:
- She demonstrates how to work a foundation chain with the chosen yarn and how to prepare for the first row.
-
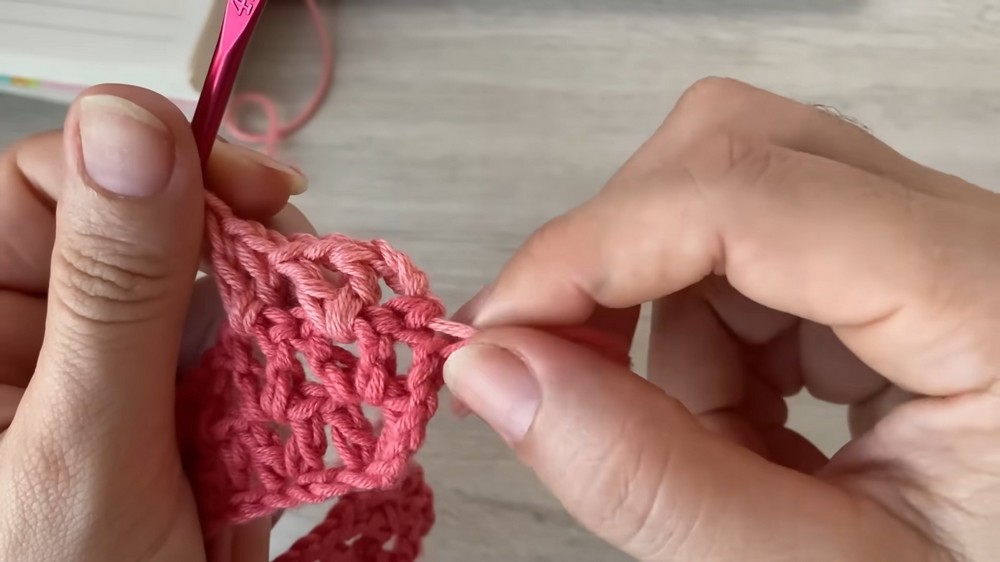
Creating “V Stitch” Pattern:
- The “V stitch” technique is used throughout the panels:
- Double crochet stitches paired with chain spaces to form a “V” shape.
- She carefully explains the repetitive pattern used for the entire rectangle, ensuring new learners can follow.
- The “V stitch” technique is used throughout the panels:
-
Color Changes:
- Estefani introduces color-changing techniques, alternating between rounds of darker and lighter colors to create visually appealing stripes.
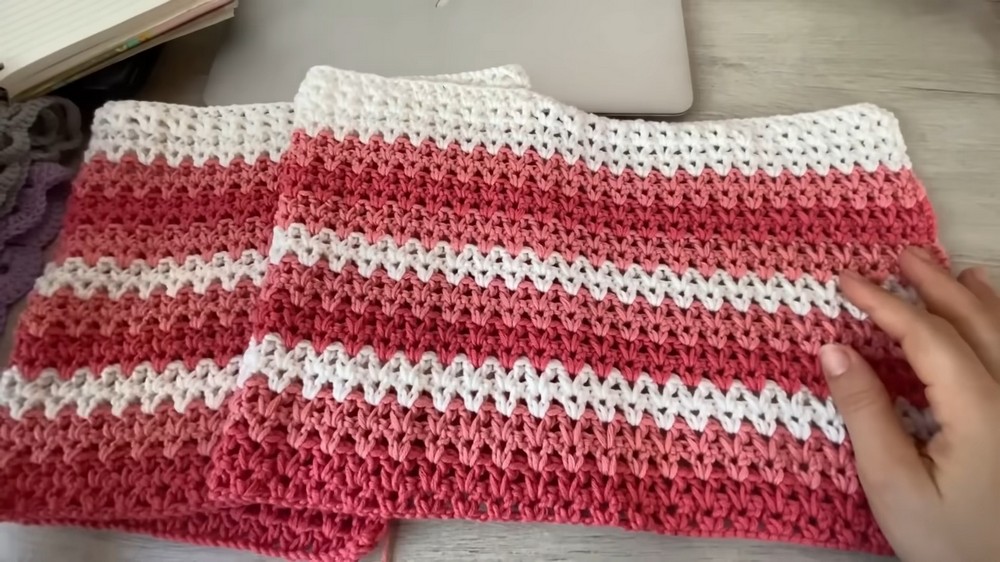
Finishing the Panels
- She completes two identical rectangles, ensuring they have matching measurements.
- Estefani explains the importance of symmetrical panels to ensure proper alignment during assembly.
Joining the Panels
-
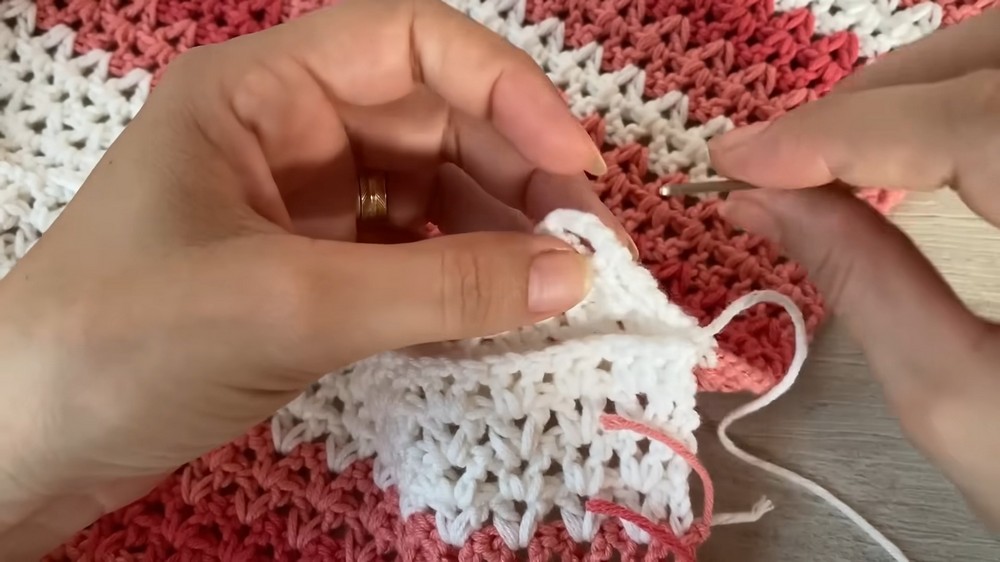
Sewing Edges:
- She uses a wool needle to sew the top and sides of the rectangles.
- Sewing steps involve taking matching points from each rectangle to ensure a neat finish.
- The neckline area is left open, and measurements for sewing are guided by personal preference (e.g., higher back neckline for extra comfort).
-
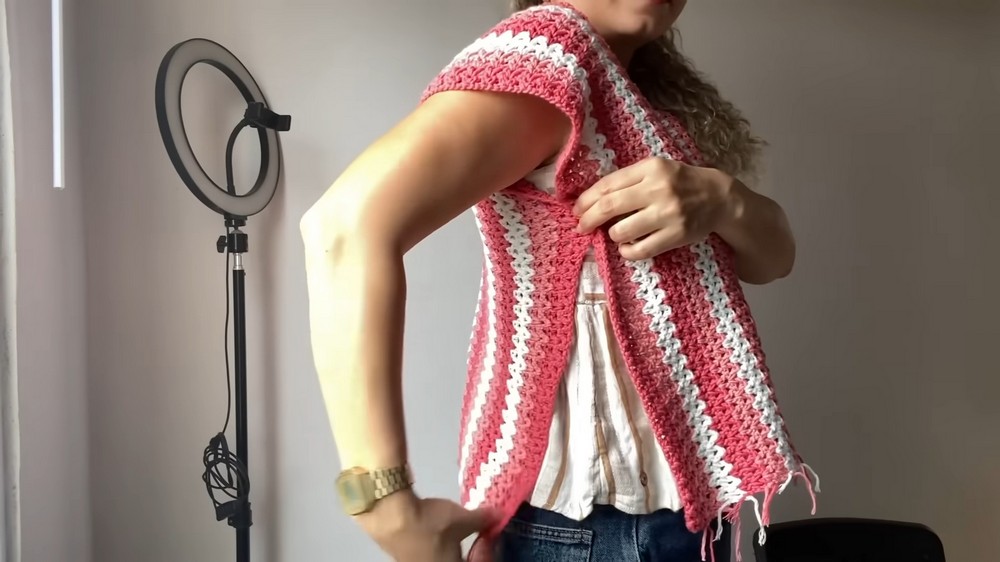
Side Closures:
- She advises trying on the blouse while sewing the sides to determine how much of the sleeve area to leave open.
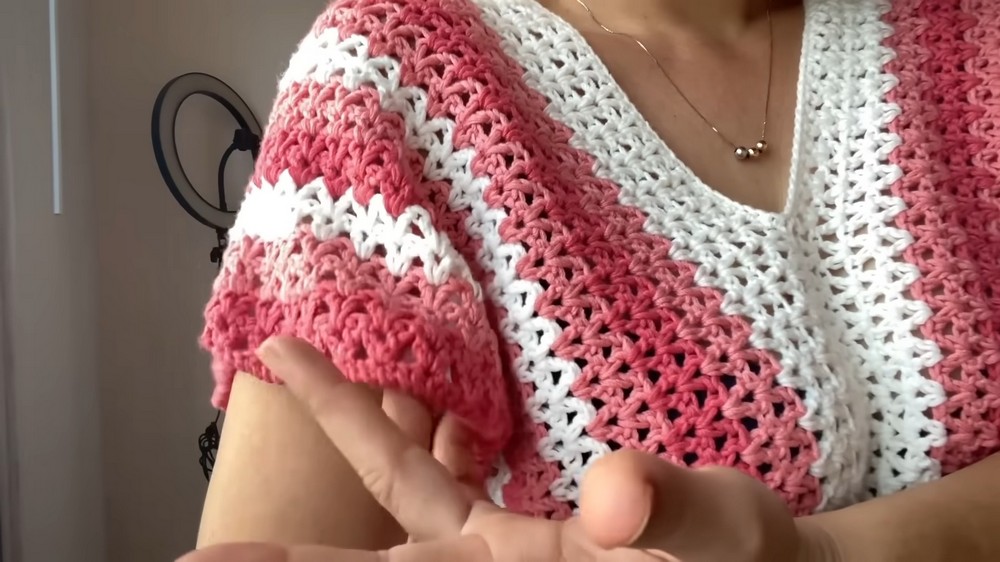
Adding the Borders
-
Edging the Sleeves:
- A crab stitch (single crochet worked backwards) is used to create a clean edge around the sleeves.
- This stitch adds durability and a neat finish to the blouse.
-
Neck and Bottom Edges:
- Single crochet stitches are used to create a polished look, though she mentions using the crab stitch as an optional alternative.
This detailed tutorial makes creating a blouse approachable even for beginners, offering flexibility in sizing, colors, and crochet techniques.