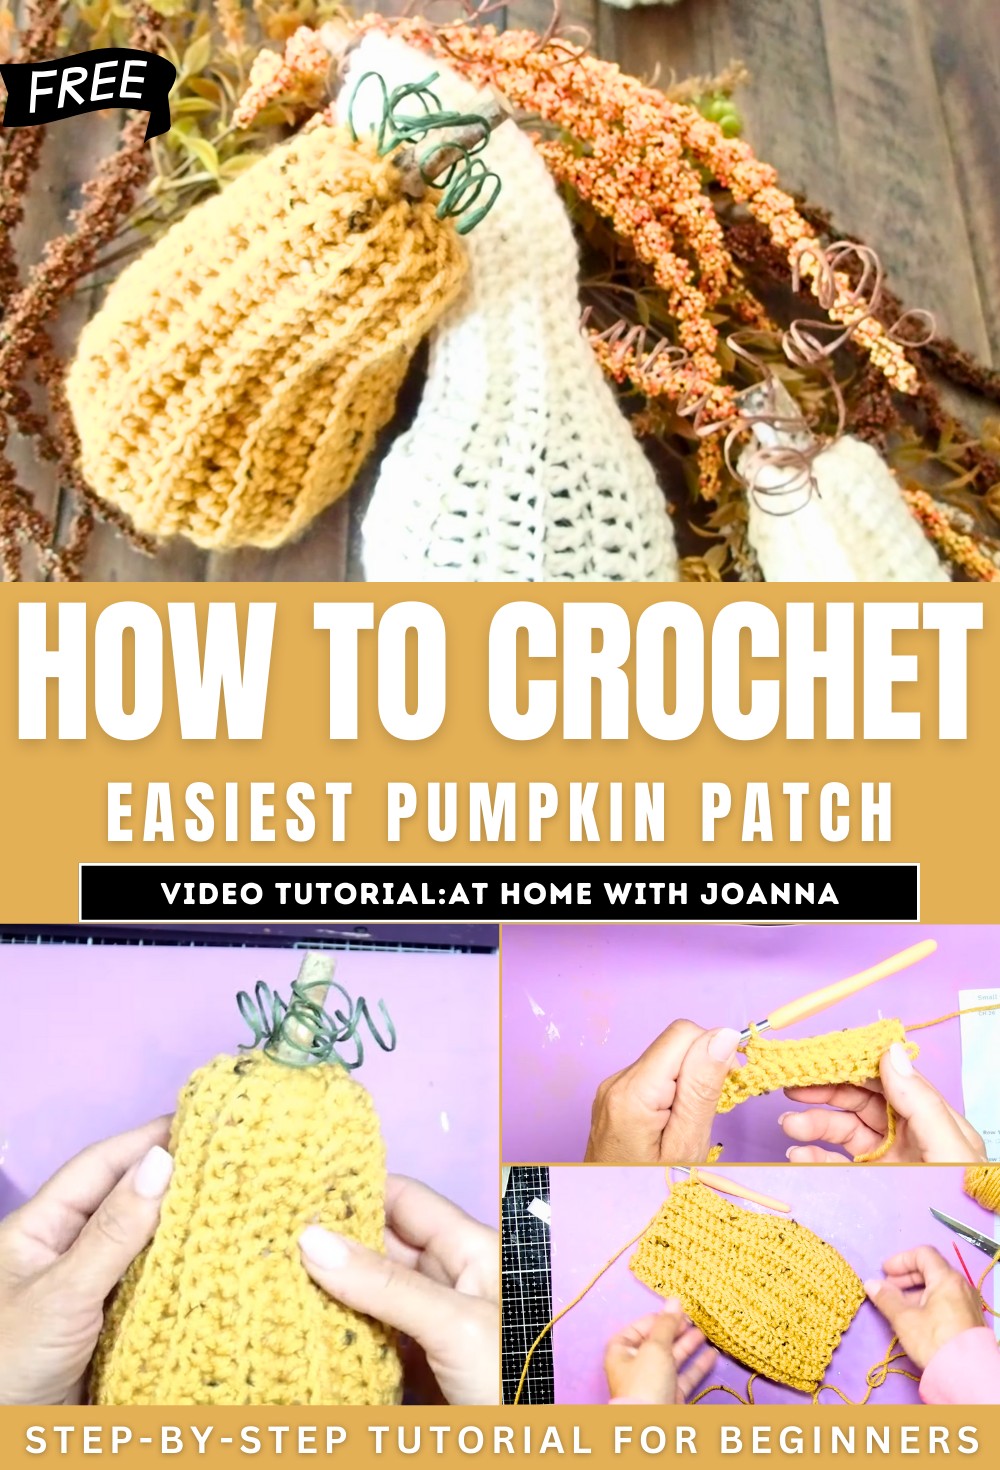
How to Crochet Easiest Pumpkin Patch (Tutorial for Beginners)
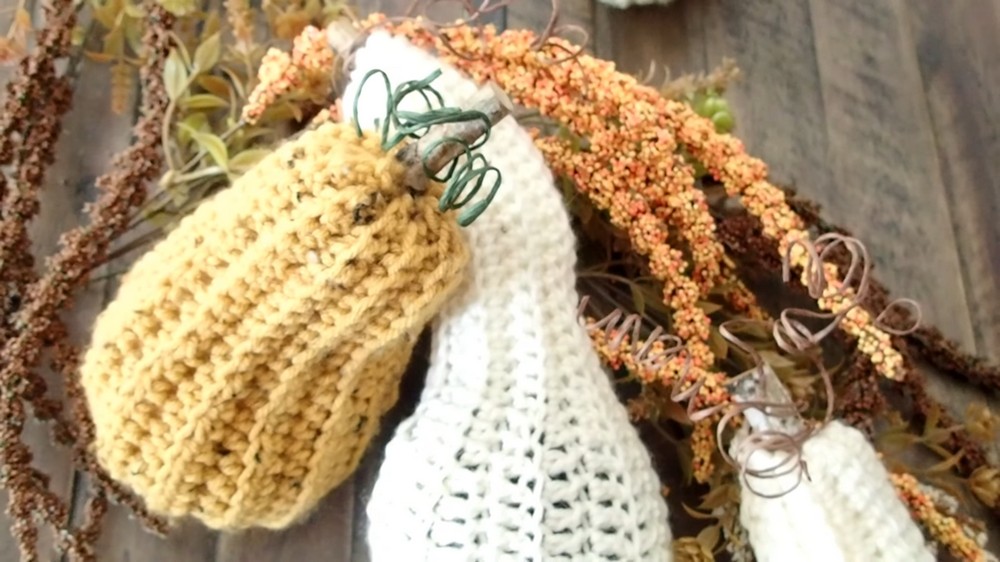
In this post, you’ll learn how to crochet a squash and gourds pumpkin using simple stitches perfect for beginners. Using affordable Dollar Tree yarn, she guides viewers through creating distinctive shapes by alternating single, double, and half-double crochets. Joanna also provides tips on assembling and styling the pieces, adding creative touches like wire curls and wooden stems for extra charm. Whether as decor or gifts, these projects capture the essence of autumn and allow for personalization based on individual preferences.
Check her pumpkin video for more inspiration and detailed written patterns in the description! So, follow through with us for the complete tutorial.
Introduction
Joanna shares a delightful crochet project showcasing how to make a gourd and a squash. These projects are quick, simple, and suitable for beginners due to their basic stitches.
Materials
- Yarn: Joanna uses Dollar Tree yarn in yellowish mustard with brown spots.
- Crochet Hook: Appropriate size for the yarn
- Additional Supplies: Needle for stitching, stuffing (green cloth), wire, and small wood pieces for finishing touches.
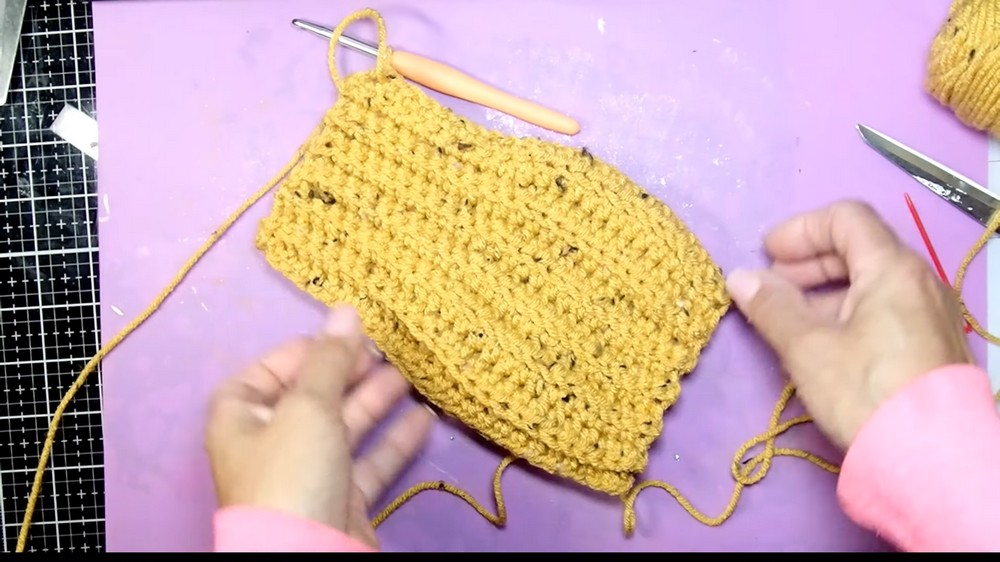
Squash Tutorial
Starting the Project:
- Begin by chaining 26.
- Perform a single crochet in the second chain from the hook and single crochet in the next two chains.
Body of the Squash:
- Transition to double crochet for the next 11 stitches to create the squash’s shape.
- Revert to single crochet for the remainder of the row.
- Chain one and turn for the next row.
Adding Texture:
- Work in the back loop of each stitch to create a textured design.
- Alternate rows between single crochet and double crochet, always working in the back loop.
Gourd Tutorial
Starting the Gourd:
- Chain 39 for a longer gourd.
- Single crochet in the second chain from the hook and continue for the next 19 chains.

Creating the Bulge:
- Use half double crochets to create a larger bulge than the squash.
- Transition to double crocheting for the main body of the gourd.
- Finish with half double crochets and single crochets to complete the row.
Repeating Rows:
- Single crochet in the back loop for texture.
- Continue alternating between half double crochets and double crochets to maintain the shape.
- Repeat these two rows until the desired length is achieved.
Assembly
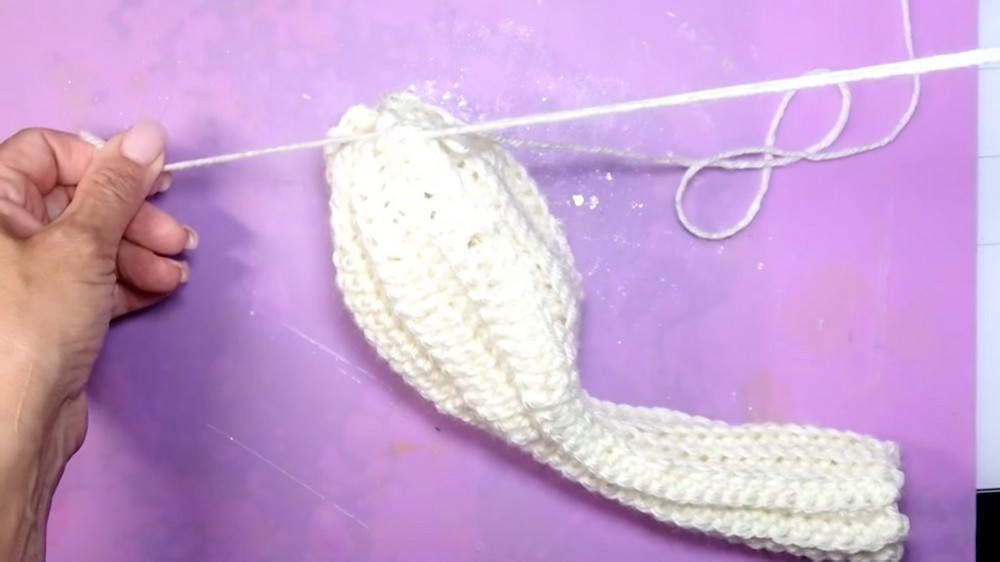
Finishing the Squash and Gourd:
- Fold the piece in half and join the edges with a slip stitch.
- Secure the bottom using a needle and weave it in and out.
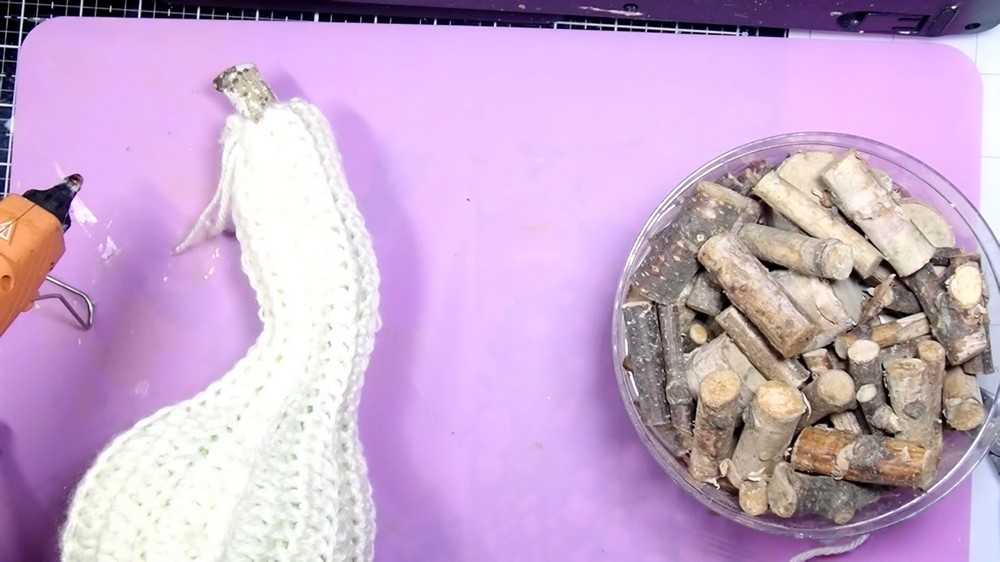
Stuffing:
- Use leftover green cloth or any stuffing to fill the shape.
- Ensure the top and bottom are securely sewn.
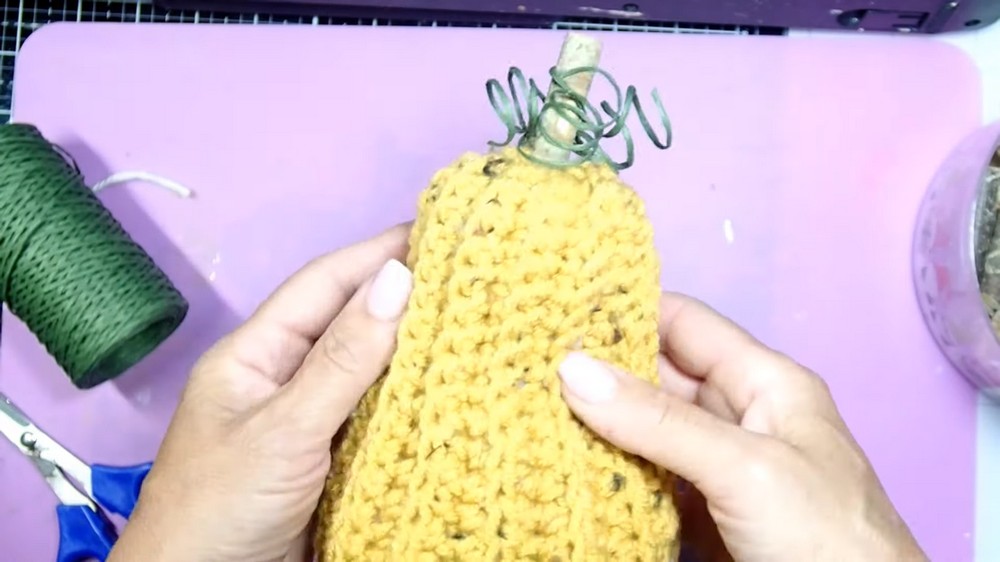
Adding the Stem and Decoration:
- Insert wire into the neck to shape and style.
- Add a small wood piece at the top, securing it with glue and tying it for sturdiness.
- Wrap decorative wire around a marker to create curls and attach them to the top for a finished look.
Conclusion
Joanna’s crochet tutorial offers a fun and customizable fall project, ideal for decor or gifts. She provides tips for personalizing the gourd’s shape and adding creative touches. The accompanying video and written pattern in the description help ensure that even beginners can create these charming autumn pieces successfully.