How to Crochet Easy Granny Stitch Sweater – Beginner Friendly Tutorial
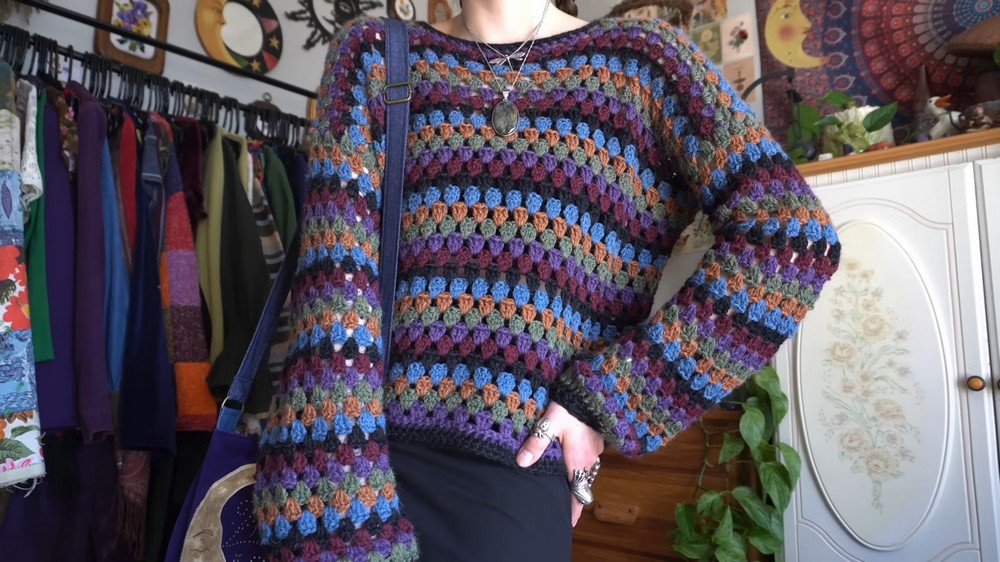
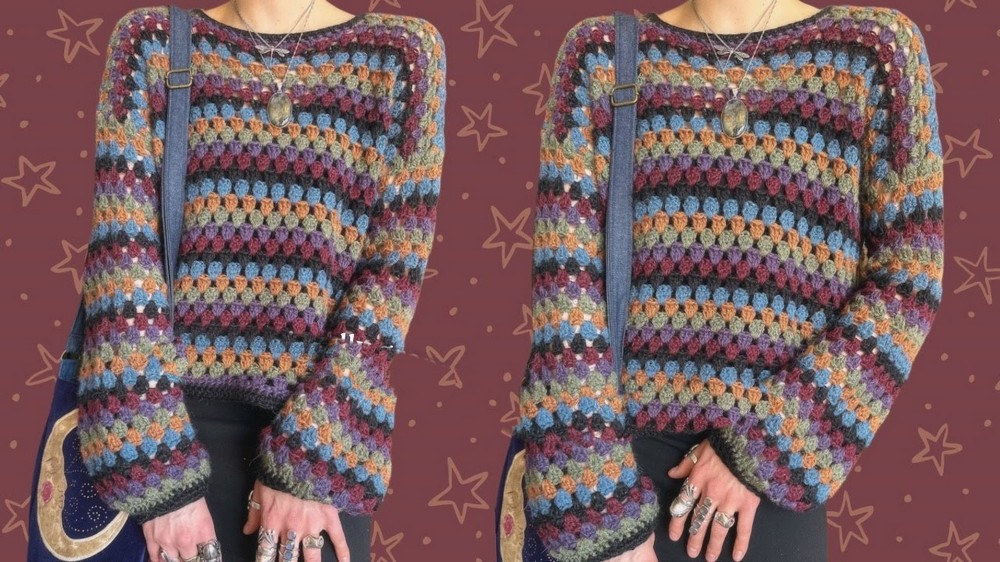
This tutorial will demonstrate how to crochet a beginner-friendly Granny Stitch sweater that is stylish, simple to construct, and requires minimal sewing. The design involves crocheting panels, seaming the sides, and crafting sleeves in the round, eliminating the need to sew them on.
The video provides clear, step-by-step instructions, including tips for achieving the perfect fit, adding borders, and customizing colors. With its straightforward granny stitch clusters, this project is perfect for relaxed crafting and works up quickly, making it ideal for all skill levels. So, follow through with us for the complete tutorial.

- The tutorial walks viewers through creating a beginner-friendly granny stitch sweater.
- Features include simple construction, a beautiful drape after blocking, and no need to sew sleeves.
- The sweater is crocheted in panels joined together, followed by working in the round to crochet sleeves directly onto the garment.

Materials Needed
- Crochet hook used: 6.5mm (slightly larger than the recommended size for the yarn).
- Yarn: Choose based on personal preference, considering the desired fit and drape.
Construction Process
Starting the Body Panels
- Begin by chaining a number of stitches that matches your shoulder-to-shoulder measurement. Customize the fit by adjusting the width of the chains:
- Form-fitting fit: Chain less for shoulder-to-shoulder width.
-
- Boxy fit: Chain extra for width beyond shoulder length.
- Ensure the starting chain is divisible by three for the granny stitch clusters.
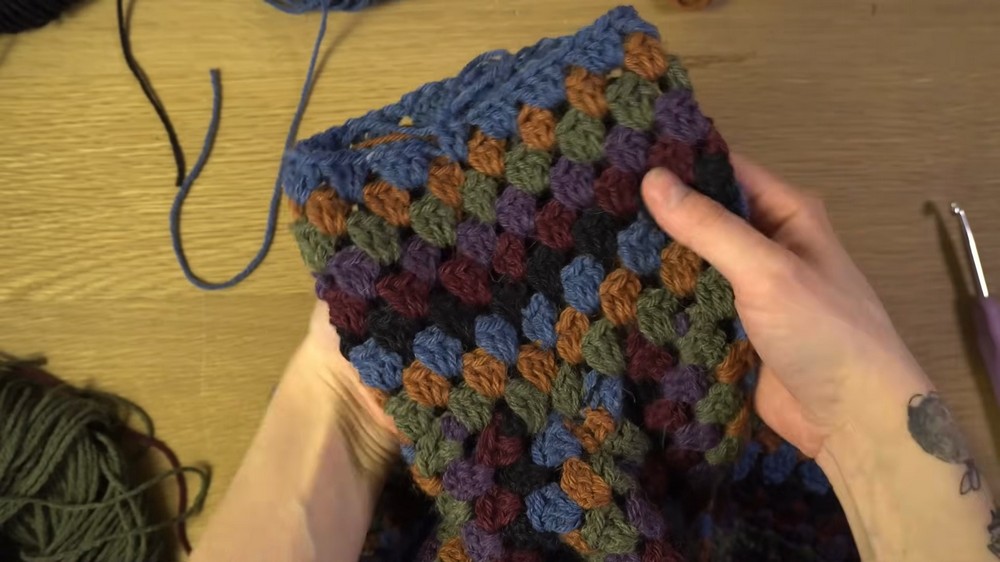
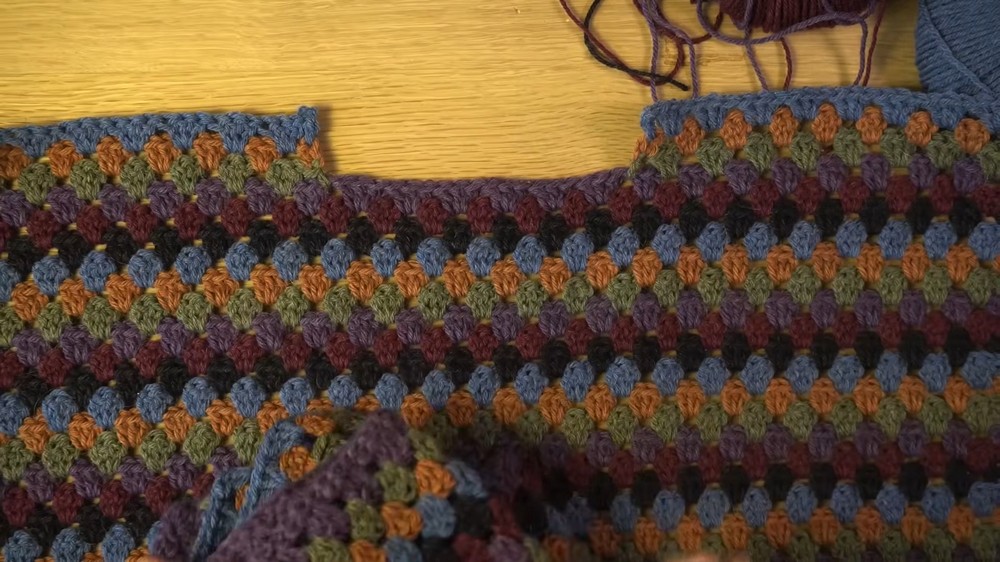
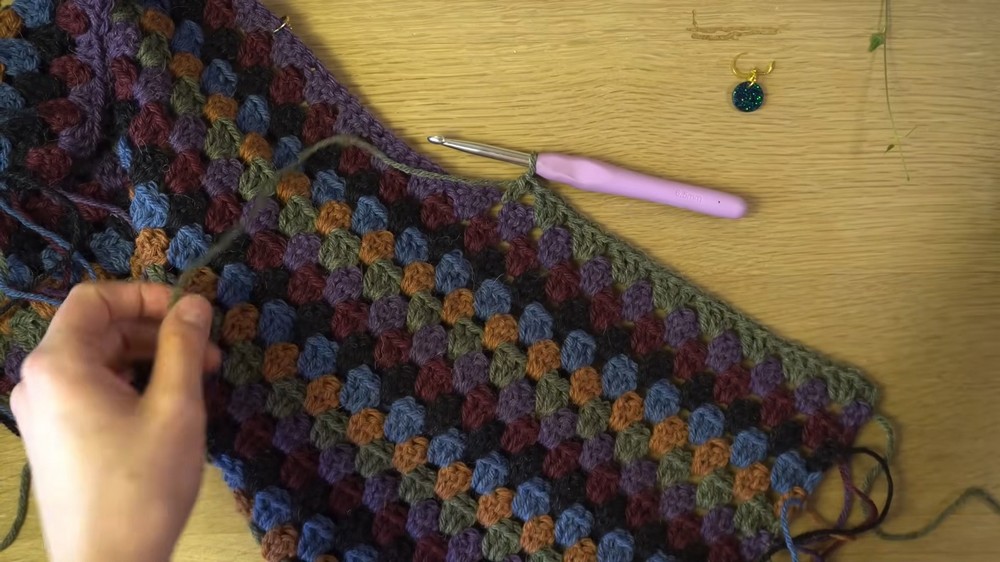
Creating Granny Stitch Rows
- The granny stitch consists of clusters of three double crochets, worked into alternating spaces across each row.
- Alternate between two types of rows:
- Rows featuring three double crochets evenly spaced (Row 3-type).
- Rows with alternating placement clusters (Row 4-type).
- Repeat these rows until achieving the desired panel length.
Assembling the Sweater
Joining Shoulder Panels
- Mark the neck opening using stitch markers to ensure symmetry on both sides.
- Seam the shoulder sections together using a whip stitch or any preferred method, ensuring a clean and cohesive finish.
Seaming the Sides
- Use whip stitching to join the side panels together, leaving a gap near the top for armholes.
- Double-check the placement of stitch markers for symmetry and preferred armhole size.
Adding Borders
Collar Border
- Add a half-double crochet border around the neckline using even placement of stitches, being mindful to decrease at the shoulder panel sections for smooth shaping.
- Complete two rows (or more based on preference) around the neckline.
Bottom Border
- Repeat the same half-double crochet border technique for the bottom hem of the sweater.

Crocheting Sleeves in the Round
- Attach yarn in the armhole and start crocheting granny stitch clusters in the round.
- Alternate between the two row types, as done for the body, to achieve uniform and seamless sleeves.
- Customize sleeve length based on individual preference.
Optional Sleeve Cuff Shaping
- Add decreases while working the sleeve cuff to cinch the sleeve:
- Decrease in specific intervals (e.g., every fourth, third, or second stitch) for a tapered fit.
- Finish the sleeve with a cohesive border to match the neckline and bottom hem.
Final Touch: Blocking
- Wet block the finished sweater for improved drape and alignment.
- The tutorial highlights wet blocking as a preferred method for an even finish, especially when working with alpaca yarn.
Customization Ideas
- Play with colors for creative, multicolor designs or choose a single color for a sleek, solid look.
- Adjust fit (boxy or form-fitted) by tweaking initial chain counts and sleeve widths.